The Cupless Headset
Back to Index
The inventor....Me....
It is gratifying to me that my little headset idea has spread so widely around the internet. You will find your time and effort to build them will be repaid nicely the first time you go flying with these little jewels. Cheap, easy to make and extremely comfortable.
I own a Bose Series 2 and series X (10) aviation headsets and really appreciate the excellent bass and frequency response of the series 2, and the lightness and comfort of the series X. Both of these are excellent headsets but the price for them is outrageous. The Cupless headset I made in a few hours, has better noise attenuation and is much more comfortable than with any of the Bose products I own. The sound quality blows the Bose out of the sky, it is super light weight at 21 grams (less than 1 oz) and most importantly they cost of less than $150 even if you buy everything new. If you have to buy new Shure ear buds, and happen to have a old headset around you can save about $50. A buddy bought two old headset at SNF for $15 just for the mic's and wire plugs
For years, I have been interested in building my own headset for years to get away from head-vice headsets (even as nice as the Bose are). Over time I tried experimenting with a number of different ideas such as using vinyl tubes to foam plugs with a remote speaker. Eventually, I ended up using my Shure headset with a mic attached to my hat with paper clips. I called it my HatSet. Eventually, I just went back to using the Bose Series 10 headset since I could never get the mic to set in the right position.
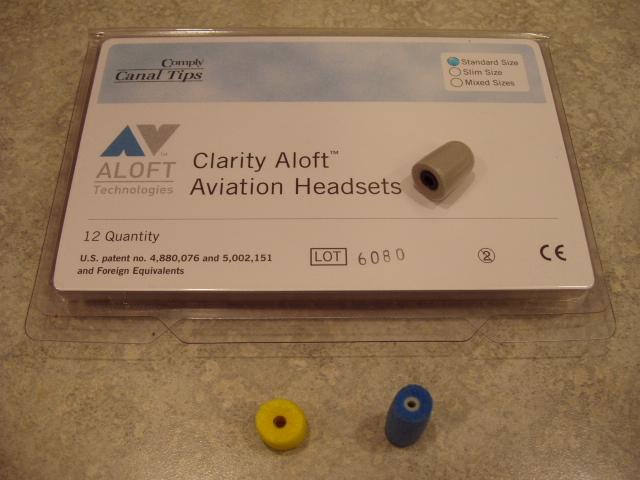
While at Oshkosh, I saw the Clarity Aloft headset and thought overall the product was a good idea, They were light weight and had these unusual audio drivers with threaded posts on to which really soft ear foam plus were attached. Nice product, but I thought the price at $525 was a bit ridiculous for something so simple. After visiting SNF I was able to pick up some Clarity Aloft ear bud foams to test at home since they fit the Shure transducers. I was so impressed by the Clarity tips, I purchased a box of Clarity Aloft foam replacements at 12 ea @ $24. Later I found out the Clarity tips are actually a hearing aid product meant for continuous wearing from the manufacture "Comply Canal Tips" which can be order on line for less money.
Seeing them gave me the inspiration to once again go back to my shop and try again to make my own headset. Since I already owned the Shure E3C ($117) ear buds I use for my iPod, and having an extra old worthless headset I could steal parts from it was worth a try. I like the Shure because it has a yellow foam earplug sleeves which work very well at sealing the ear. The are as effective as using regular solid foam ear plugs, but of coarse I can hear the music and ATC. the Shure's also fit the Comply foam tips.
Here is your shopping list:
NOTE: As a motorcycle rider, I know some audiologists will make custom ear molds of the ear for noise attenuation/music for around $150 or you can also get them made for the Shure (I have a set) and you don't have to bother with the Comply earbud foamies. After using both types (the Shure foamies and the custom molded appliances) I can say with hesitation, the foam type is much more comfortable and a bit quieter. The only reason I can see to order the custom ear pieces is if you have a very large ear cannel in which the foamies will not fit.
The blue foam shown is from Lightspeed and they are uncomfortable and harder to get in. Not recommended! The yellow one is from Shure (ok) the gray one is a Comply tip.... MOST EXCELLENT!!
The Process of Building
I did not modify the Shure headset in any way. I first thought of cutting the wires and incorporating it into the head piece (aka Clarity), but decided I wanted it separate so I can still use it on the motorcycle, on the airlines, at work, etc. Mainly the electronic work will be to adapt the microphone to the application.
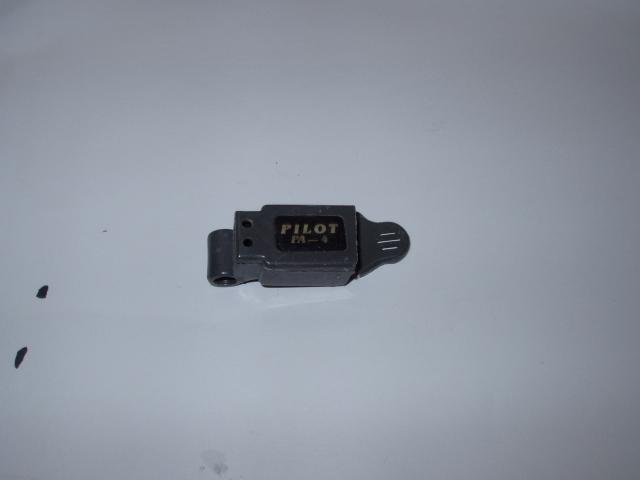
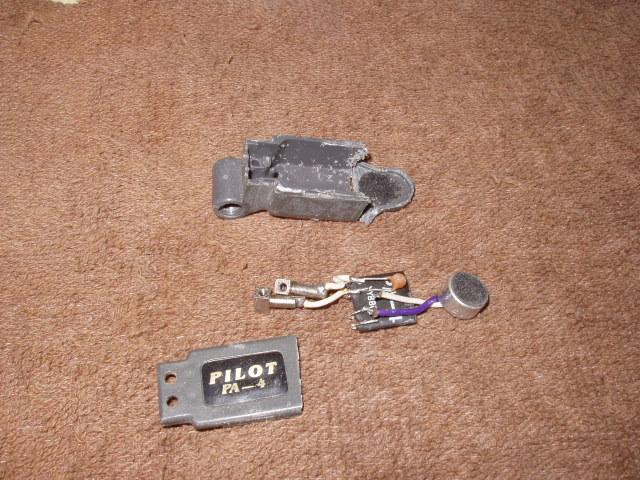
First, cut the plugs off the old headset. You will be reusing the mic plug (and headset plug for mono systems). Remove the mic and crack open the case. In my unit I found a small electronic assembly and the small mic (which I relocated to the interface box). Remove everything from the plastic mic holder. I then cut the tip of the plastic mic off the main holder to be reused. Be sure to mark all the wires. I don't know if they are +/- but I didn't want to mix them up.
The carbon mic requires an electronic circuit to adapt it to the plane system. We are going to separate the mic from the circuit and relocate it to a remote box.
Solder some #26 wires on the mic and then take the piece of piano wire and bend the end to form a hook (to better hold the flox to the plastic) and flox it on plastic mic holder you cut off the mic end, and set the assembly aside so the flox can cure.
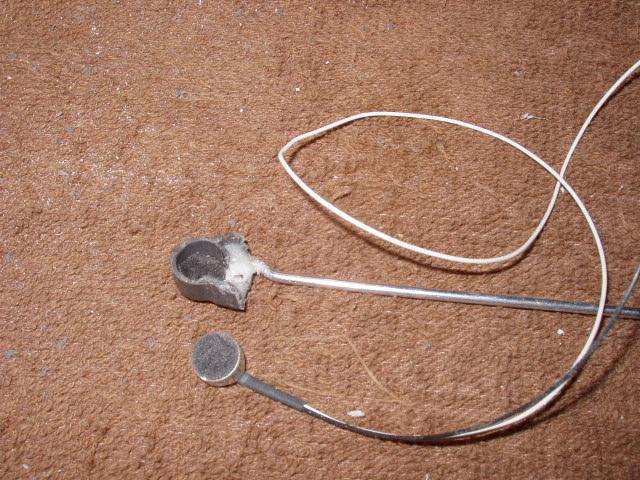
Now flox on the cover of the mic and when cured, shape the mic area to make a nice bud on the end of the piano wire.
I took some aluminum welding wire (soft wire), and just wrapped it around my head until it was comfortable in the shape I wanted. It is easy to bend and it formed the template for the piano wire assembly. Make sure you make a dip in the areas over the ears as they seem to help with keeping the band comfortable and secure.
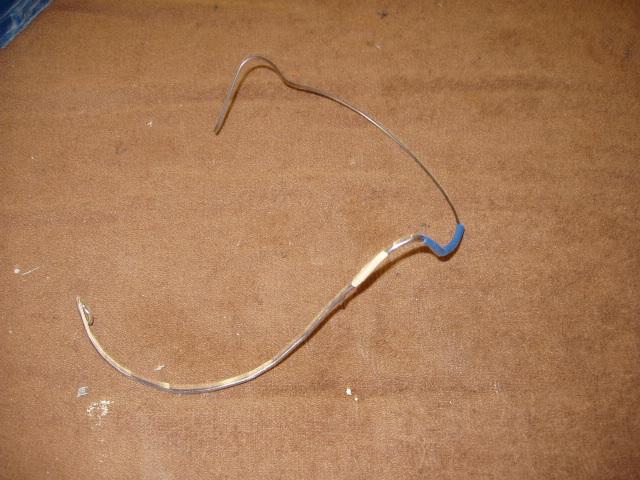
Once you are happy with the template, just bend the piano wire mic assembly to the shape of the template. It helps to bend, starting from the mic end, then tape the two together a little at a time. Bend, tape, look. Bend a little more, tape, look. I also formed a very small loop on the end of the wire where the terminal end (where it wraps around the ear) so to soften the pressure on the skin.
Take some heat shrink tubing and slide it over the piano wire (the mic wires are inside) and shrink it down. I put a couple of extra heat shrinks on the back of the headset where the wire exits the band to keep the stress of the wire movement from ripping the shrink tubing.
Extend your mic wires to your plastic box, place the little electronic circuit in the box, and reattach the mic plug. The mic system is now done.
For the head set there are two ways to go.
Matching transformer system.
1. Direct hookup.
This is the easiest and most universal. Just buy an adapter plug (1/4" phono to 1/8" headset) and an inline volume control for earbuds from radio shack and you are done. Plug the adaptor into the plane, attach the volume control and your headset.
2. Matching transformers
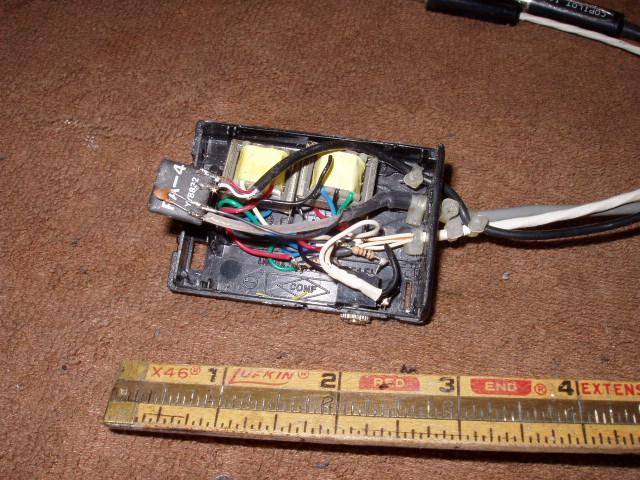
Some radio systems need the proper impedance to work correctly with an audio speaker. They require an impendence matching transformer to match the 8 ohm of the ear buds to the plane system. Just hook up the planes headphone plug to the transformer's green and blue wires, and solder the stereo headphone jack to the red and white wires. You can tie both grounds together if you wish. If your plane is mono, then you'll only need one transformer. Add a 480 ohm resistor in the transformer output line to the Left and Right channels to reduce the volume of the Shure's because they are super efficient. This allows me and the GIB on the Bose to be at the same volume level.
The small circuit looking card is the carbon mike circuitry I took out of the mike. I just relocated it to the box. You can also see the impedance matching transformers. Note, I have stopped using the impedance transformers and have switch to the direct hookup. Seems to work just fine in the plane.
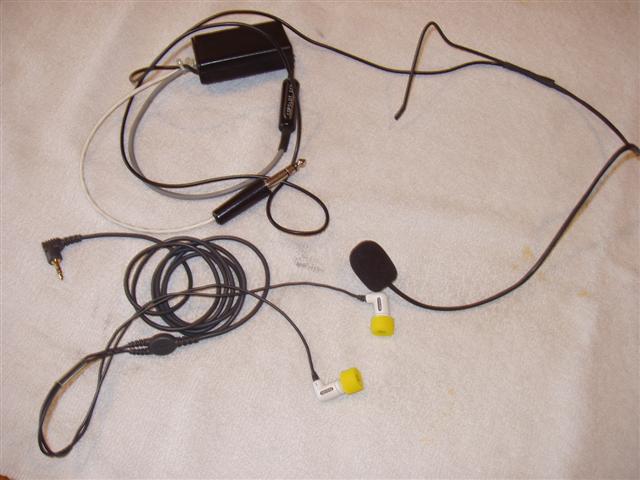
Here is the finished unit: I took the mic foam cover off a car headset I had laying round.
Drew Chaplin also built a set of these headsets with a very good write-up.
Enjoy