Oct
09
2009
I won a free copy of Windows 7 Ultimate for having a Windows 7 Launch Party at guess where….my house!! It is a strange way Microsoft is introducing the new operating system. So next week on the Oct 23, I have invited a bunch of friendsover to see the new operating system and have some burgers and beer. Should be fun! I have already received my party package complete with streamers, napkins, cards, and a bunch of other shit and my free software. Actually, I am so enthusiastic with the software, it wouldn’t have taken much for me to have a party to show off the features anyway.
Because of the party, I decided my computer desk need to be refinished. I was a bit embarrassed with my grungy desk and it needed a new look if I was going to have guests over checking out the new software. The refinishing came out great, but my computer was disassemble and posting wasn’t possible. This will be a quick catch up on this week’s activities.
The instrument panel is now cut out. I hope to start cutting instrument openings next week.

The submerged NACA scoop came out really nice. All work was done from the inside of the plane so no repainting was necessary .

The inside part of the NACA.

I made a duct from the NACA to the eyeball vent which will be installed on the the arm rest cover. It has a little bit of a weird shape to clear the aileron torque tube. I also will install a pilot controlled door in the the vent duct to allow for pressurization of the cabin when flying in rain or when extra ventilation is needed.

This is how the vent will look in the back seat.

I was going to use a piece of Alum to make a control handle for the overboard oil heat door, but after I made it I found it weighted in at 15 grams.

I then remembered I am using the same style knobs for all interior electrics controls and can also use it for the heat door. The knob only weight 8 gms for a savings of 7 gms over the Alum part and it works just as well. It will give me a more consistent look for the interior. I will recycle the alum part for an exterior canopy latch.

The purge valve dump push/pull system is completed. I have started checking out options for the wiring install.

Sep
15
2009
The drain line hole has been back filled. Now it is time to plant some grass seed and add some fill to level the yard out a bit.

Tony Cole stopped by today to bring over his HID light he purchased for an amazing $50 for two. Came direct from China. We had to run a side by side test against the HID light sold in Aircraft Spruce for $450.

First thing you notice is the weight. The China one 498 grams and the ACS one is 383 gm.

When Tony powered them up although they had the same rating (35 watts), the ACS model had a much tighter, brighter beam. Like a spotlight should be. The ACS HID light color was warmer than the cooler, bluer (6000 Kelvin) look of the China model.
The China HID used a reflector meant for a motorcycle which spread out quite a bit and could be used as a taxi light. While cheap, I would deem it not good for a landing light and the only place I would use it would be for a taxi light.

I did some research on the ACS HID light and found it is actually made a re-purposed light from Speaker Model Model 9440LS-12V 35W retrofit light. I found the OSRAM ballast for $75, and the bulb for about $60, I couldn’t find a proper reflector. Finding a supplier for the Speaker model above would be the best solution. One could call the company. Overall, in some ways I fail to see why anyone would want HID lights in a plane that cost half a grand. I have a $20 aviation bulb in my plane, and while not the brightest on the block has worked well for 8 years. It take more power, a little heaver wire, but it works and is cheap.
Today’s efforts was concentrated on finishing up the nose lift cover (which I cut into 3 sections), installing nut plates, glassing heat ducting and manufacturing the mounting brackets for the EFIS AHRS (gyro).

Worked 6.5 hrs.
May
03
2007
I ordered the copper paint today for making the ground plane for the transponder and ADS-B antennas. I also did some research and testing of camlocks sizes to order for the cowl.
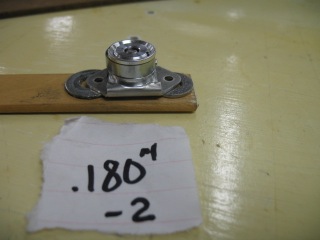
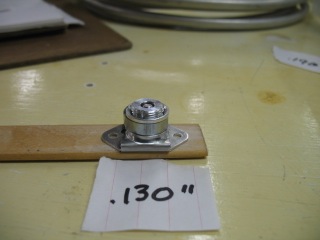
This is a series of tests. The parameters are the camlock is screwed flush shown. Then I put different thicknesses to see which size stud is necessary for Pats cowls and doors.
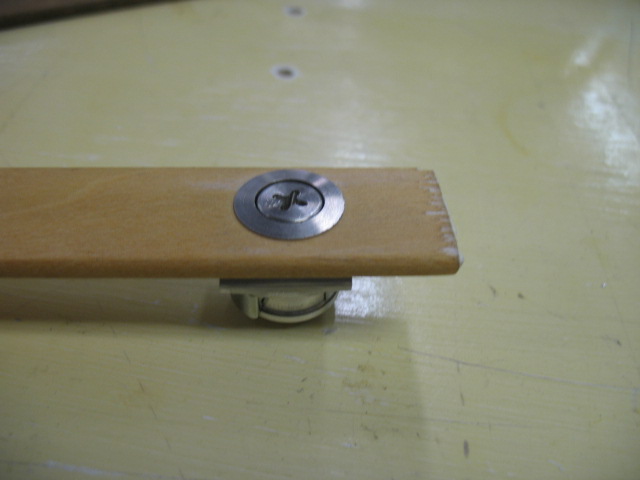
Click on the thumbnails to view
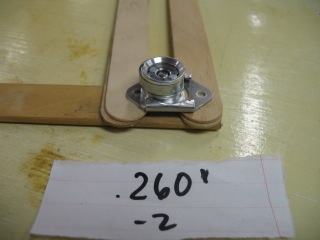
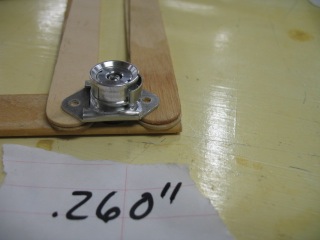
The pictures shows the position of the positioning screw at various thicknesses of flanges. These pictures is shown using a
Dash 2 stud.
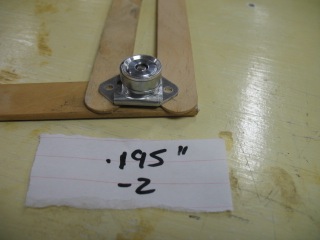
Dash 3 Stud

Dash 4 Stud
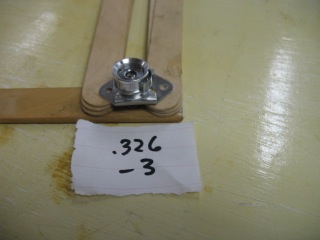
The following is what is needed for putting on the cowl with camlocks. SK245-4 floating adjustable receptacles, Studs (dash 3 or 4), Grommets 4002-NS (were you want to remove the studs such as at the front the cowl) and SK-018S Grommets (with retaining rings) for studs you wish to leave in the cowl (used for about .100″ thick cowl). I have decide to use dash 3 studs for almost all location except for 4 where the cowl is extra thick.
I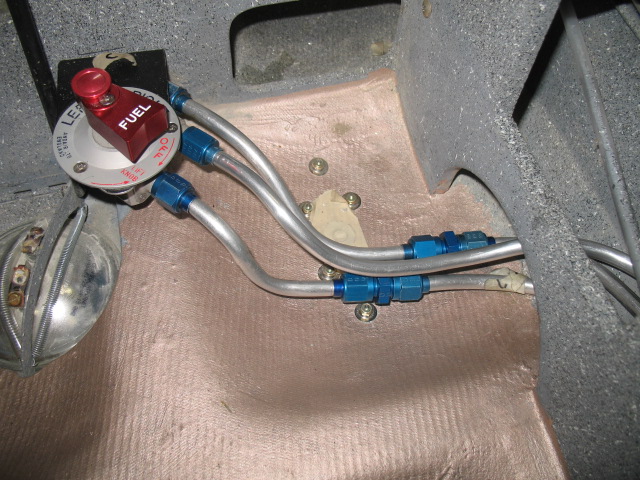
The fuel valve is now installed.
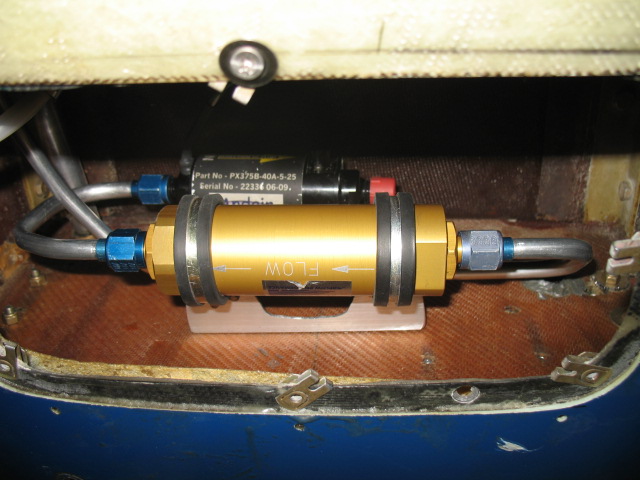
Fuel pump and filter is installed. I wanted to make it easy to clean the filter, so all Pat has to do is loosen the fittings and remove two bolts on the engine firewall side and it will drop out.
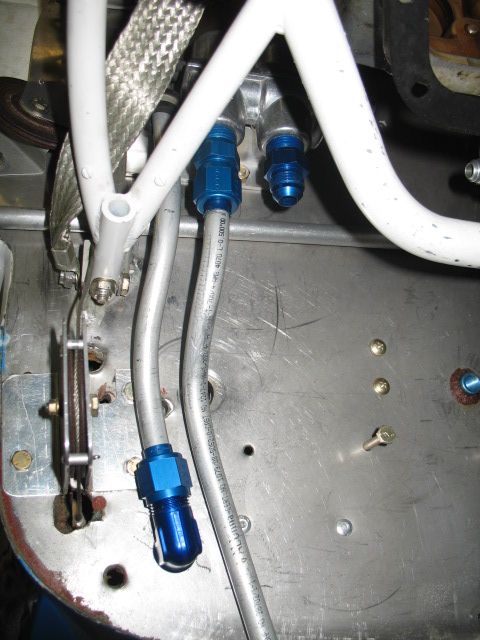
I also started routing the tubing for the oil heat. The heavy walled 1/2″ tubing is a bitch to bend.. I want to use as much tubing as possible to minimize hoses and keep everything clean looking and simple. I should have the remaining fuel and oil lines routed tomorrow. On Tuesday, I’ll get all the hoses made (fuel and oil).