Category: Grease car

Oct 08 2010

Grease Car part 4

Today was spent giving new life to my grease car fueling station.   I just didnt have room in my shop anymore and I wanted to move it to the remote storage building which required disassembling everything and rebuilding it.  Just like I did with an erector set as a kid…  Every boy should have one.    Transformers, video games… who needs them.  It’s much better to build a log cabin out of Lincoln Logs or something out of Lego’s.  

I recycled most of the fitting and parts so the it was a very cost effective project.  This a is a picture of the manifold/pump station. 

I can now pump oil between my two storage tanks and from my transport tank.  Since I picked up most of the stuff for free I am very happy with the results.

The final resting home for the cart.  It wasn’t a total waste of time building it, but a learning experience….

The last and final step will be installing a pipeline from the shed to my driveway so I can just flip a switch and fill Sherman with lots of artery choking recycled grease.

Sep 02 2010

The panel is back

I finished up the work on the WVO car controller.    I built a test stand to simulate all the connections and switches of the car and dang it, the thing worked as I originally designed it.  I dont know why I thought it was a bad design.  After a few hours work on the timer circuit it now works perfectly.  

Basically, in AUTO, the WVO system now waits for the coolant water to get up to 60C, turns on the oil supply valves, turns on an electric oil heater to keep the oil a minimum of 50C (it cycles as necessary). 

If the fuel in the supply tank gets to 1 gal, it shuts everything down. 

When the car is turned off in AUTO the system closes the oil valves and keeps the engine running for 30 sec to purge out the WVO before it turns the car off.   Very cool…  The next step is to install LED’s and the switch in the dash with some nice lettering to make it look good.  It is amazing to me that a commercial unit which does the same thing this does cost $350.  Mine cost about $25.

The engine is now on the plane.  It really looks good now with the newly painted engine mount and engine.

The is a close up of the firewall penetrations.  After all the wires are run, I will clamp the firestop tubing around the wires.

The insturment panel came back to me unletter but with some nice glass work done around the leg openings and radios.  I spent all day fitting the radios to the panel so they would have exactly 1/4″ exposure from the panel.

 Tommorow, I’ll finish screwing the radio boxes to the panel and some other detail work which needs to be done prior to sending it off to be lettered.

Aug 29 2010

Grease Car Part 3, WVO Computer…..??

Work on the plane stopped for a few days while I worked on the car and a few other projects.  I plan to start back on the bird tomorrow… 

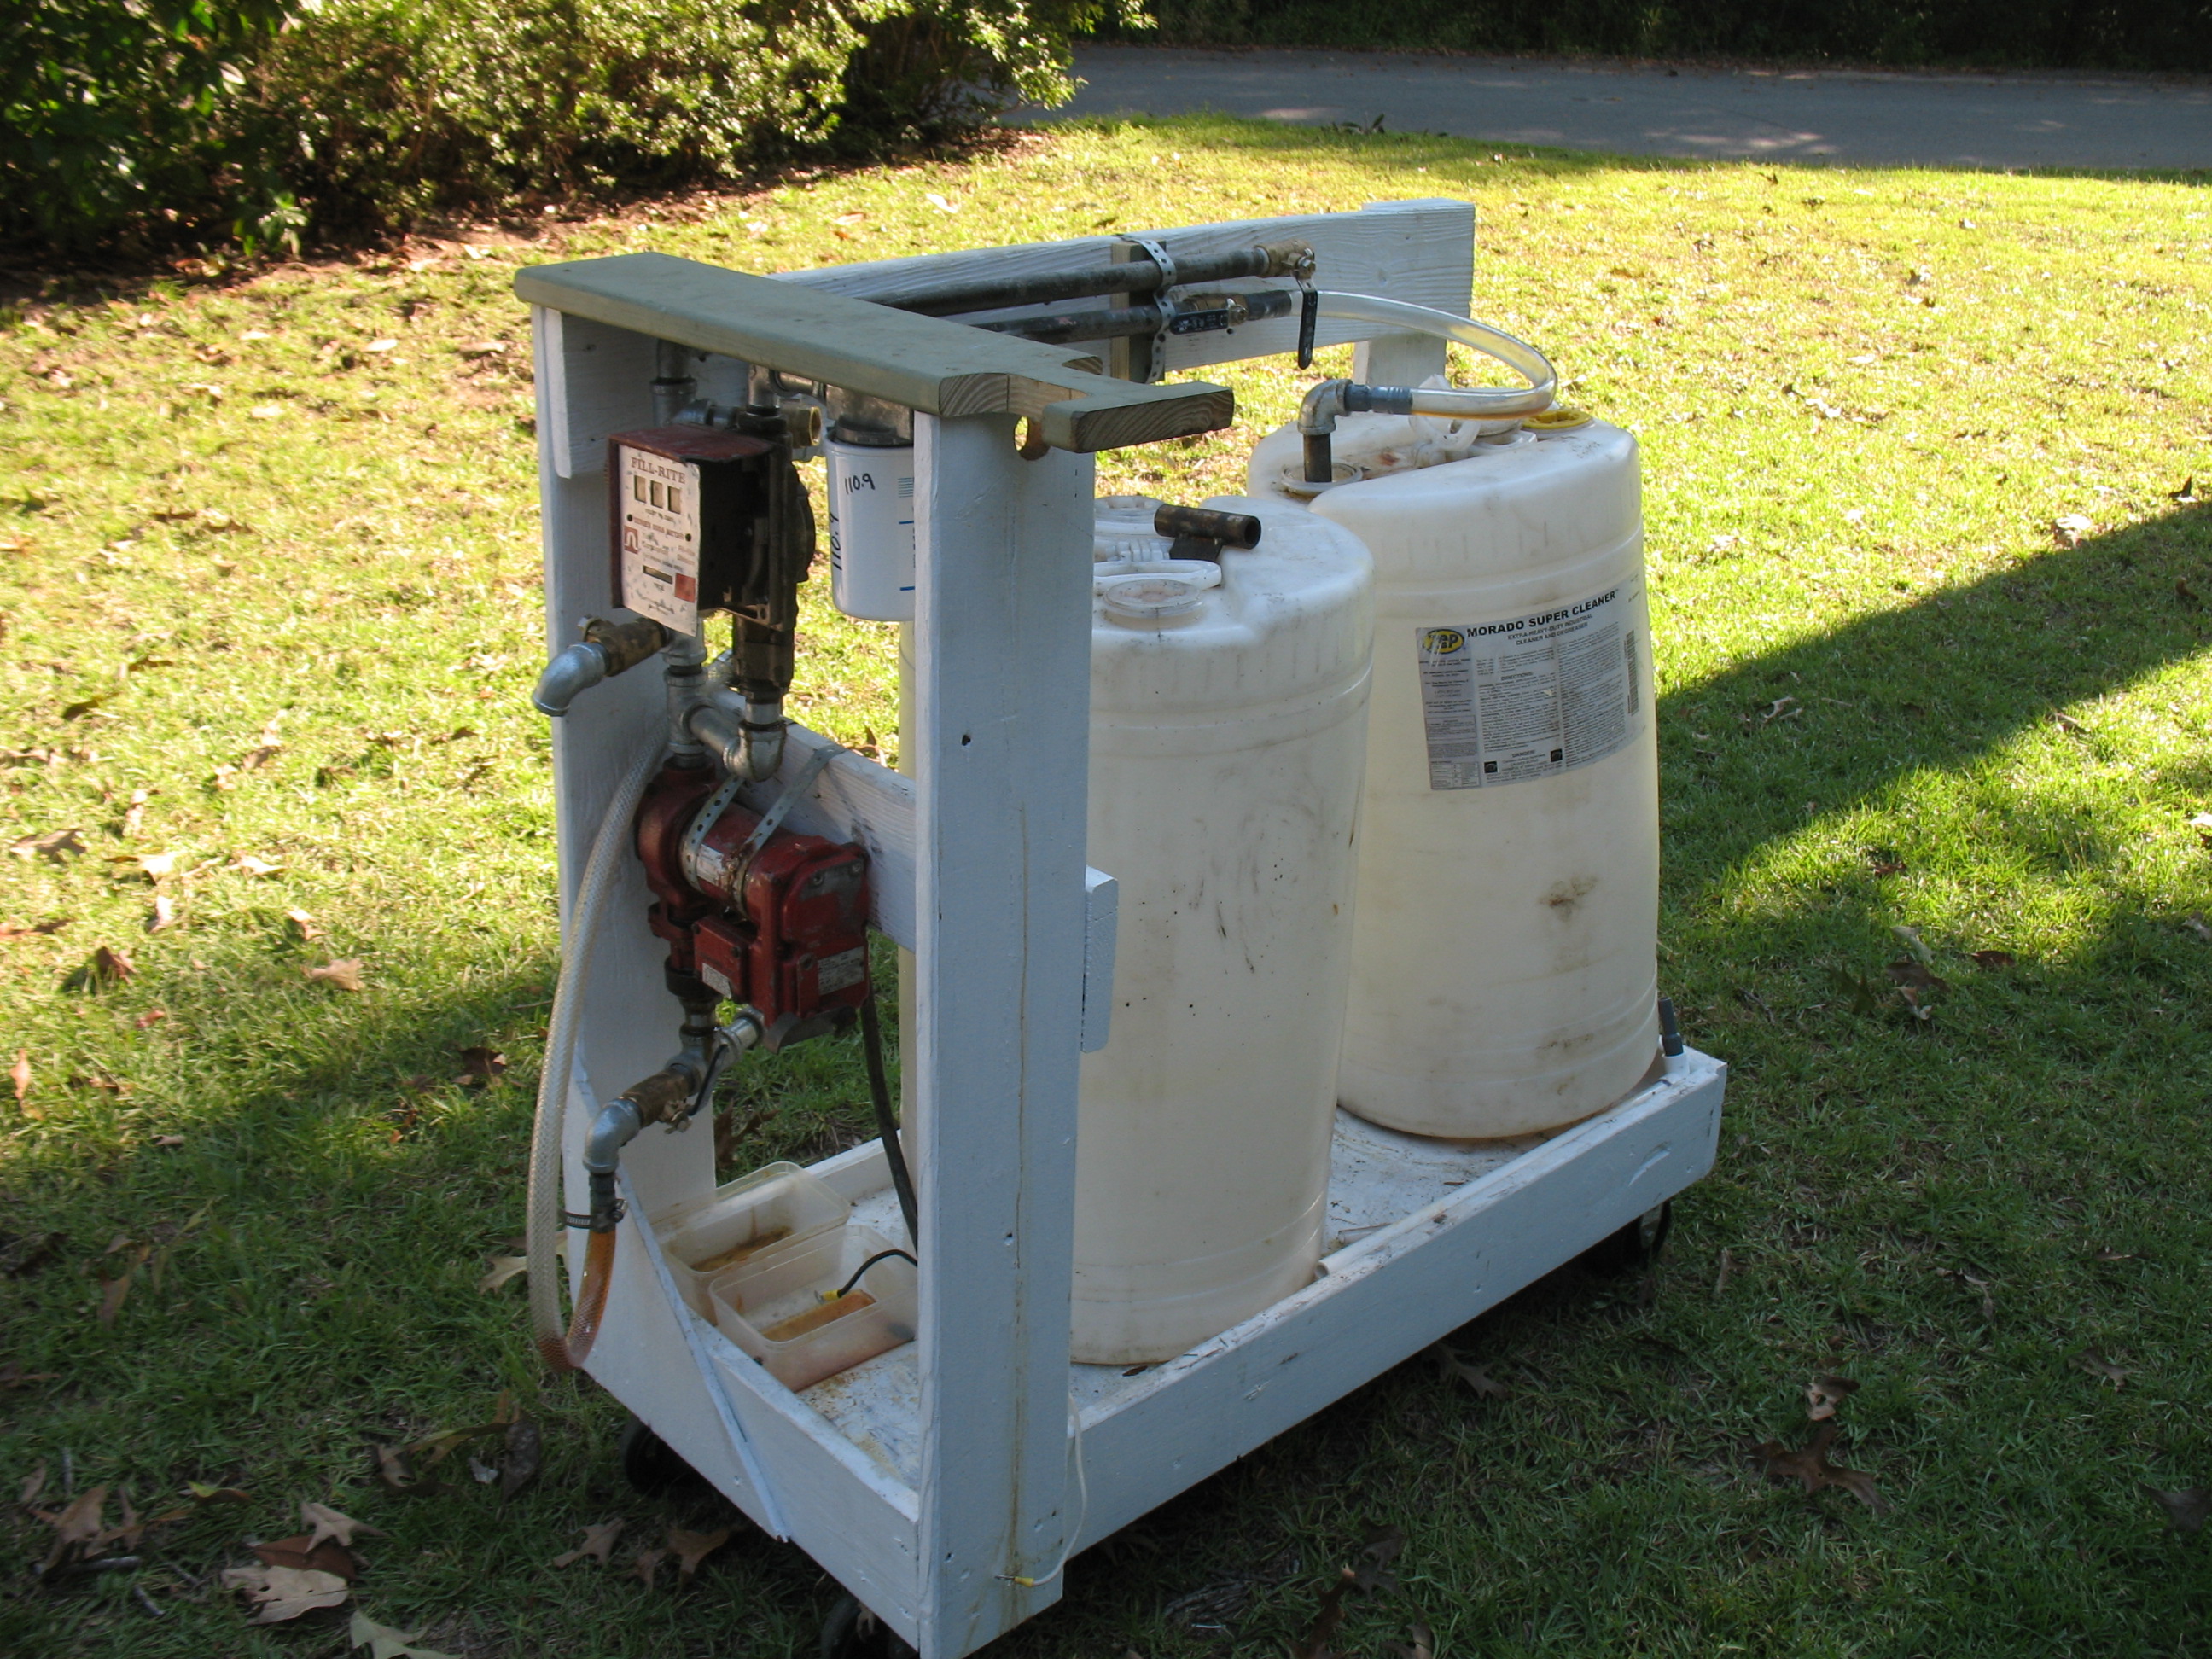
 After installing my WVO fuel tank the next step with the car was fixing a few nagging ventilation issues and designing/installating of my greasecar computer.  

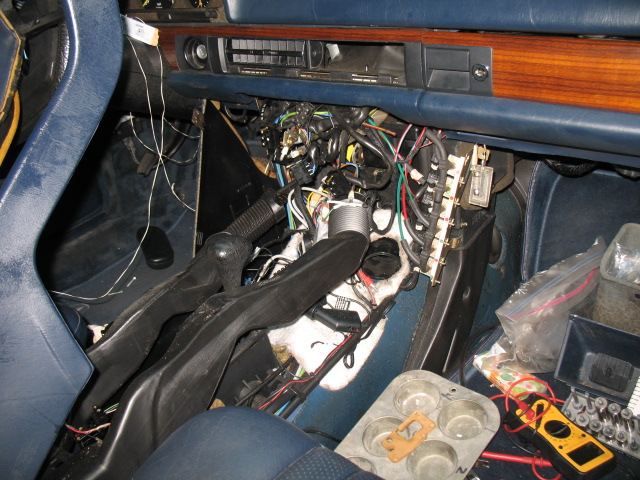
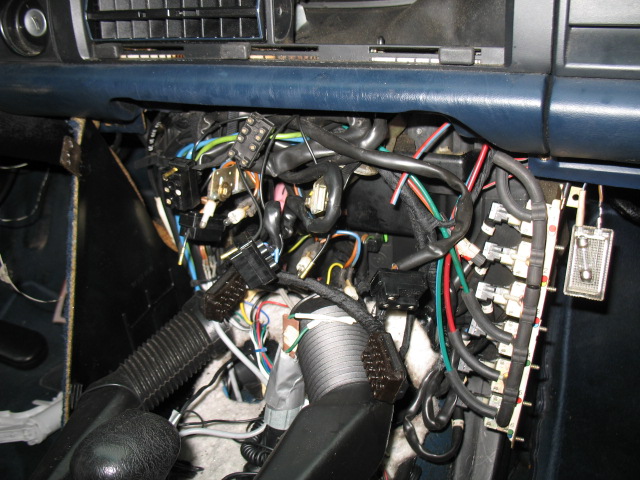
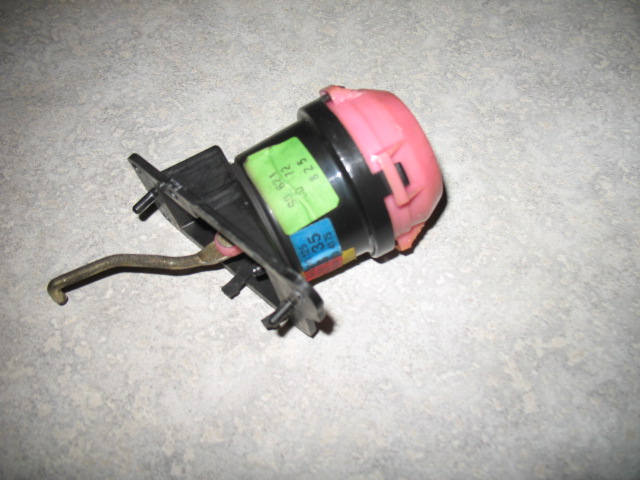
The center vent for some reason stopped working which made cooling the car much more difficult, besides, I love having the wind in my face when I am driving or flying.    After a bit of investigation I found the vacuum diaphragm was ruptured on this vent controller.  Need to get it out and fix the dashpot. 

Such a simple looking thing… 


Yet I had to go to hell and back to get it out…… 


Now I know why they charge so much for Mercedes work.  I had to disassemble half my dash to get to the thing….  Of coarse it is in the worst place imaginable.  I guess that is why it failed…becuase I haven’t been spending much time with Sherman. 

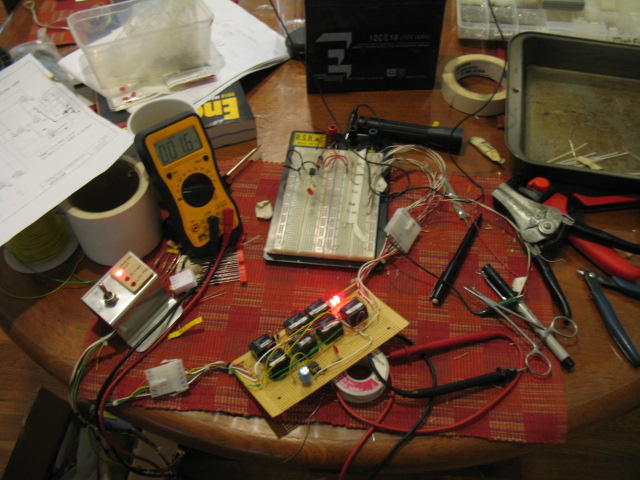
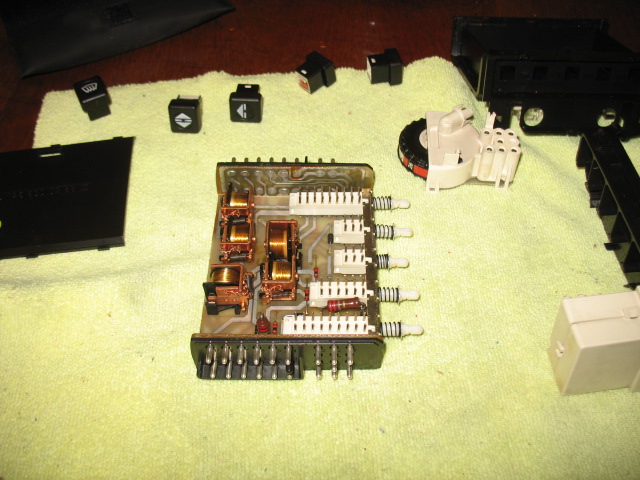
After spending a few hours with my books on the AC system I also tried to reprogram my vent operation controller to do what I WANTED it to do.  


I basically gave up trying to re-educate Sherman.    Sometime there is no changing the way old people (or cars) work or think.  You just have to accept them for the way they are.   He get the AC  job done, in his own stately time in a crazy mix of opening and closing vents which I will never understand.    Fixing the vacuum dashpot seemed help a lot in cooling the car down on a hot summer day, so I am good for now. I also took the opportunity of some free time to wire up the sensors from the engine into the cabin for hook up of my custom designed grease car computer.  

The human brain is a wonderful thing.   What I could do so easily (watch the temp, turn on a switch, shut the system down) is really tough to design into a circuit….I would like to say my design worked like a champ, but I cant.

This is it… 


After frying some diodes and LED, I disabled a some of the features I worked so hard to build, and returned to basically what I originally had.  Shit…..  It should work as I planned it.  Although I spent a lot of time the last few days messing with this stuff, I can say it was a good thing because I’ll have to assemble some boards for the plane.  This project gave me some valuable experience in this direction. 

I plan next to take most of what was built apart, and then just enable small module of the “brain” to see if they work or fail and then trouble shoot the new circuit.   Assembling the whole thing, hoping it would work and then trying to trouble shoot is proved to be too much…..  

Maybe I should just stick to plane building…..

UPDATE: 

I have fixes the wiring (actually it was very simple) and updated the wiring schematic on the computer.  It has been working great for months!!

GreaseCar control system drawing (pdf file)

Enjoy!

Aug 23 2010

Grease car fuel tank

Yesterday started off with a quick 10 minute trip to a “Flyin Breakfast” at Monks Corner.  I helped a little with the food and setup, but mainly I just enjoyed a great early morning flight which was very nice. 

I wanted to show you the progress on the the construction of  Boeing 787 Dreamliner plant.  They are still adding to it.  The size is just immense!  I have to pass it to go to my hanger, so I see the progress on a regular basis.

Only about 40 people showed up at the breakfast.   Not many planes either as I think the weather (low clouds) may have put some attendees off.

I took the opportunity yesterday to finish off the oil tank part for my grease car.  I spent hours welding aluminum and finally thing I am starting to “get it” on welding this metal.  It certainly takes a lot of practice.   At least the welds are not coming like big blobs or melting through.  It takes a huge amount of current (175 A) and the TIG handle would get so hot I would have to let everything cool down ever 15 minutes.   The inside of the tank is built with a baffle and a coil of 5/8″ Al tubing which I can circulate hot water through for additional heating of the cooking oil if I ever decide to use it (cold weather ops).    I always like to plan ahead.

I have been using a 5 gal gas can for the last few months which conveniently fit into a well on the car for the cooking oil.  It held 5 gal of oil and gave me a range of about 110 miles.

The new tank holds 8 gals of oil and it also has a low level alarm which activates at 1 gal.   It looks a lot better than my red tank.

Speaking of red….  I wanted to paint the engine one color since the case was red and the accessory case was gray.  It took a lot of time to paint but the engine is again one color.  Tomorrow I’ll replace all the bolts with new ones .

The new look.   Kind of like it..

Jun 16 2010

Filter test

Most of today was spent researching, planning and ordering materials for the “blended winglet” modification I want to do on the wings.   What is it?    The blended winglet design was first introduced to the canard community by Jack Morrision on his E-Racer about 3 yrs ago.  A beautiful plane which was later destroyed in a fire.    Jack is working on a new plane which looks just as incredible!  His a very innovative guy!

The blended winglet is the latest “craze” in the canard community.  Once you see on on a plane, you’ll know why and will have to have on. 

 The interesting thing I found out from the ordering/research,  is that  if you were building new wings from scratch the blended winglet would only add about $50 or so to the cost of each new wing.    It makes the wings look much sleeker, reduces drag, and provides a real and permanent speed improvement.


In a retrofit situation, the rebuild will cost around $250 or so (less epoxy) per wing.  As I proceed into this phase of the project, I’ll refine the numbers for a more accurate cost of the mod.

I spent some time working on the fire suppression system.  Had to scratch my head a few time on exactly how it was to be done.  As usual, I give myself a seemingly impossible challenges for which in the most part can eventually be worked out.  After an hour or so of fitting, I was able to solve the problems such as routing of the discharge line, activation cable, mounting, having access to the spar wing bolts, viewing the tank level,  etc.  The bottle will limit the storage capacity of the spar area, but if I need more baggage space for a trip,  I can put on some of  beautiful carbon graphite baggage pods P1 Cmposites is now building.


 The cable is routed through a soda straw to allow it to be removed.  I need to go the movies shortly as I find they have the best straws for glass work.  I usually grab 3 or 4 at a time.  The straws are really long and have a large diameter t0 guzzle down those super sized drinks you have to mortgage the house to buy (along with the popcorn).

After the plane work I tested out the next phase of my grease car project.  The filter system I made out of  some bag type filters I purchased at Duda Diesel.  Buying this kind of filter (bag type) is much cheaper than buying cartridge type filters.  For this test I have a 1 micron filter (size of bacteria)  which is smaller than the 10 micron filter in the car.  Worked great!

I am finding I hate the filter and pump stuff in the shop.  The next step is to buy 2 plastic 50 gal drums ($20 ea)  and install a underground pipe line from the front driveway to the back shed (the pipe is free) and move all the filter/storage crap to my shed.   I’ll have to disassemble my cart, but I can reuse all the hardware. 

 Then I’ll just pump the dirty oil from the drum in the truck  (via the pipeline) to the shed , filter it, store it,  then pump the clean oil back to my driveway (via the same pipeline) and into the car.   Clean, neat and out of sight when not needed.  Sweet.