Today was mainly spent ordering electrical supplies. I want to make the instrument panel completely removable with cannon connectors so it can wired and operated on the bench. The connectors are cheap, but the dam pins are very expensive. I think that is how they really make their money…. little machined pins.
I have started to pull wires as I am waiting on the oil pan to be machined flat. I cant put it on the engine just yet because the welding process warped it. It rained all day in Charleston, so I couldn’t paint the engine mount either.
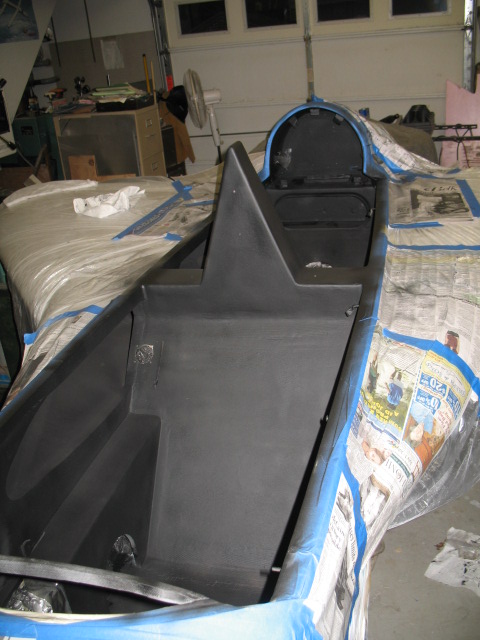
The headrest area behind the passenger is going to be very busy with wiring and instrumentation. It will all be covered by a trim piece and a headrest.
The wiring from the engine monitor has 50 wires connected to it. Each one has to be identified labeled and tested, then the drawings needs to be reviewed and corrected. Tedious, but very necessary for future maintenance. Actually I kind of think it is a bit of fun. Sort of like doing a puzzle, sort of like doing artistry because it also has to look good when you are done too.
I finally received the beautiful oil pan from Calif I designed. When I started to bolt it up to the oil pan I found out the fuel servo was hitting the engine mount??? WTF???? After I checking it out I found out the fabrication company had welded on the mounting flange at 5 deg not 10 deg as I specifically directed in the manufacturing drawing I sent. What to do. I thought about machining the flange to 10 deg, but decided against that coarse of action as it caused other mounting problems with the servo and finally chose to modify the engine mount instead.
Here you see the fuel servo hitting the mount. It still needs to move upward another 1/4″ to bolt on the oil pan…
The engine being removed from the mounts.
I chose to grind out part of the tube. The 4130 tube is .050″ thick and I was surprised to see LOTS of linseed oil in it as is required to prevent internal rust.
I welded on a plate of 4130 steel .063″ to the mount after grinding away the cross tube. It looks like it is ground at an angle but that is becuase the tube is tilted when mounted.
The finished clearance. I LOVE welding 4130 steel. If you want to get good at welding, just weld Aluminum for a while. It makes welding steel or stainless steel seem so easy a cave man can do it. I now have 3/8″ clearence all the way around the fuel servo. More than enough mount clearance.
Re-injecting about 1/4 cut of linseed oil back into the tube prior to sealing. Tomorrow I’ll take the oil pan to the machine shop to have the mounting flange machined flat (should have been done in CA) as it warped during the welding process and repaint the engine mount.
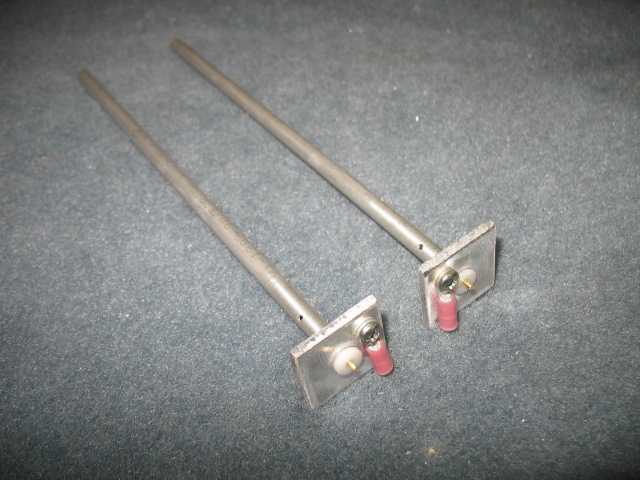
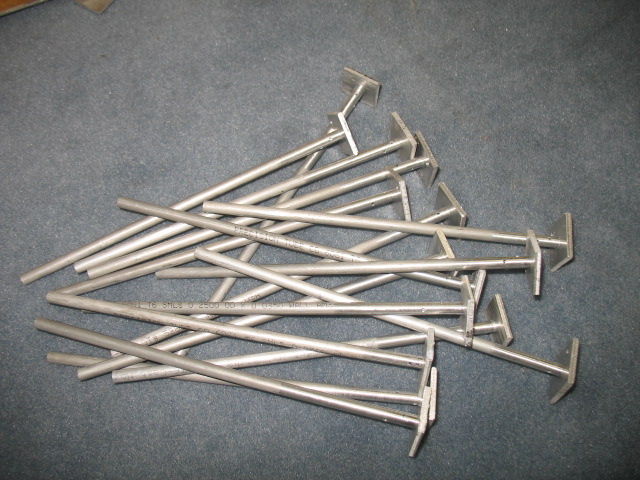
I have been getting more orders for fuel probes almost exclusively through word of mouth. Today I decided to mass produce a bunch of them to have an inventory of parts. I have changed my original design somewhat to account for the spacers I am now getting from Princeton Probes. It is supposed to save me building time. What a fiasco!
I made about 75 bases which took about 3 hrs. They looked great but unfortunately the holes ended up being too big even though I had drilled them severely undersized. Shit….
They are now trash. I even tried welding the tubes into the bases, but was not happy with the results. Welding the tubes to the bases is still a possibility, but I can not use the ones I made.
I did end up making about 14 probe bases (4 of which are sold).
Sum total of 8 hrs of work…. two probes completed.
My next step is to get some very small reamers and try liquid nitrogen to chill the tubes prior to insertion into the hot bases (creates a very tight bond of the two parts). Might also try threading the tubes. I hope that I can eventually come up with a better production methodology or I wont be able to make them at an affordable price. It wont be worth my time….
Today the interior painting was completed. The interior Zolatone color is Lilith Charcoal. I was very apprehensive about this color, but I saw it on David Orr’s Berkut and thought it looked great. The first step is painting on the base coat which was flat black. The dark color had me even more worried!
Next was spraying all the parts with the splatter coat. You MUST use a pressure port to force the thick zolatone into the spray gun. I used a 2.3 mm tip (very big) with about 10 psi at the pot. The pressure pot came from Harbor Freight and only cost $39. I already had the gun and with a few fitting from the hardware store I modified it to accept the pressure pot. Trust me, you have to have one to shoot the thick stuff.
Here is a close up of the interior. When finished I was VERY pleased with the result it does look wonderful. The nice thing is, any color interior trim will good great against this neutral dark color.
I also made a trim spring for the canard. Here is the simple jig I made to lay up the fiberglass.
You can see how the torque tube is split such that when layed up the spring is perpendicular to the center line of the torque tube.
The wood was waxed for the layups.
I would recommend enough layups such that at the torque tube you should have a thickness of about 0.110″ and at the tube end it should taper down to about 0.080″ and the narrow end. Be sure to use mostly UNI but include 2 layers of BID. This will help prevent splitting of the spring (been there). I also added a little flox where the glass first starts wrapping around the tube to ensure there was a nice crisp edge (you can see a little white in the next picture at the base of the spring.
What I really like about this sort of electric trim system is it is very easy to adjust the spring tension by just adding a little more glass or triming the edges of the spring to make it less wide. This way you and easily adjust the trim to your personal preferences.
Today the ADS-B antenna installation was finalized. Installation requires two things…. a ground plane (done) and somehow attaching the antenna to the fuselage. It finally occurred to me, I didnt need to dish out the 1″ thick interior foam to fit the 1/2″ long antenna studs, I just extended the studs with some threaded brass bushing made on the lath. This made installation MUCH easier as I now can easily access the nuts without cutting up the interior.
I talked to the manufacture of the CuPro-CoteTM paint. He said others have used it for ground planes and it works great. If you plan to use it, paint it in THIN layers since excess acrylic binder (if you paint it thick) actually reduced the conductivity.
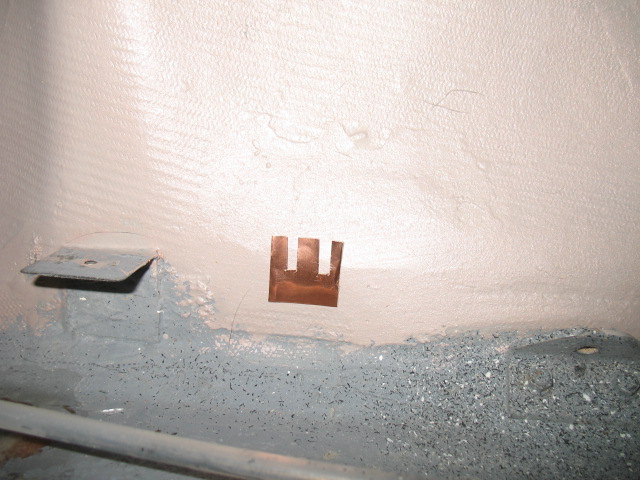
Five patchs of copper tape was cut in a sort of “E” so there would be more edge surface contact area for the paint and attached to the bottom.
Then the entire surface was given a second coat with part of the tap left unpainted so a wire could be soldered to the tab the then covered with a patch of BID for protection. I don’t know if I need the extra wire connecting the sections as the resistance of the surface after a second coat of paint from the hell hole to the nose (about 7 ft”) was only 8 ohms.
Ppod needed some additional “ground planes” which are used for making the antennas work properly. Some antennas need large ground planes to work such as the transponder and ADS-b antennas. Since I am adding new antenna (the ADS-B) and there is not enough much room in the plane for the size recommended. In my plane I had to compromise with smaller ground planes or really odd shaped ones (such as for my lightening detector). A few years ago, I found some electrically conductive paint which was used in my plane for reducing electrical noise (as shielding). Ken Miller apparently used a conductive paint successfully for the transponder antenna he installed and since ATC reported no problems picking up the transponder signal, it was decided to just make the area much bigger.
The entire bottom of the passenger area was painted with this stuff. After drying, I tested the resistance of the paint and found it amazingly conductive. It reads 17 ohms across the fuselage (about 18″). When tested it with a 12v source, it did not loose .01 volts from front to back of the plane! I also plan to attach some small copper tape (about 1/2″ sq) to the one side every 12″ and solder a wire on each tab to ground. It will be interesting to see how this new system works in flight with ATC.
I hope this works well I can use this technique in future planes! **NOTE: I used this technique to “enlarge” the ground plane in my LongEZ. I can now report NO more problems with ATC picking up my transponder. It is working better than ever!
The fire system bottle was installed today. I replaced the 2 ea stock bottle holders (47 g ea) with a riveted hose (6 gm) hose clamp with a finger actuator. You will have to stick your arm way up the spar to tighten the wing bolt and was concerned about interference with the stock clamps. The hose clamp can swivel out of the way, and overall I saved 96g (3 oz) with the mod.
The additional cable installation for the fire system was micro’d so it will be less noticable when finsished out.
Today we had a very strong thunderstorm after I went flying. It was easy to see on the XM weather in the plane and my lightening detector was showed significant activity. This evening, the club manager called and I found out part of the roof of the hanger had blown off. After checking my plane over, all is well. Base maintenance should be fixing in the next few days.
Updated pictures of the Boeing 787 Dreamline plant. They are making amazing progress on it. The contractor has now started on moving a 2 mile road 500 feet to the south to enlarge the manufacturing site.
Most of today was spent researching, planning and ordering materials for the “blended winglet” modification I want to do on the wings. What is it? The blended winglet design was first introduced to the canard community by Jack Morrision on his E-Racer about 3 yrs ago. A beautiful plane which was later destroyed in a fire. Jack is working on a new plane which looks just as incredible! His a very innovative guy!
The blended winglet is the latest “craze” in the canard community. Once you see on on a plane, you’ll know why and will have to have on.
The interesting thing I found out from the ordering/research, is that if you were building new wings from scratch the blended winglet would only add about $50 or so to the cost of each new wing. It makes the wings look much sleeker, reduces drag, and provides a real and permanent speed improvement.
In a retrofit situation, the rebuild will cost around $250 or so (less epoxy) per wing. As I proceed into this phase of the project, I’ll refine the numbers for a more accurate cost of the mod.
I spent some time working on the fire suppression system. Had to scratch my head a few time on exactly how it was to be done. As usual, I give myself a seemingly impossible challenges for which in the most part can eventually be worked out. After an hour or so of fitting, I was able to solve the problems such as routing of the discharge line, activation cable, mounting, having access to the spar wing bolts, viewing the tank level, etc. The bottle will limit the storage capacity of the spar area, but if I need more baggage space for a trip, I can put on some of beautiful carbon graphite baggage pods P1 Cmposites is now building.
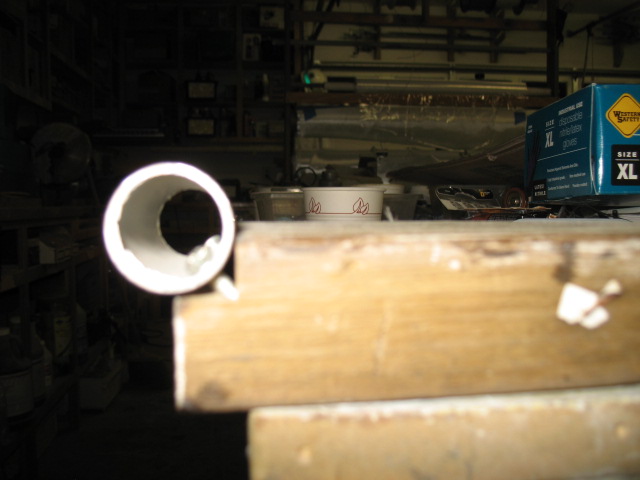
The cable is routed through a soda straw to allow it to be removed. I need to go the movies shortly as I find they have the best straws for glass work. I usually grab 3 or 4 at a time. The straws are really long and have a large diameter t0 guzzle down those super sized drinks you have to mortgage the house to buy (along with the popcorn).
After the plane work I tested out the next phase of my grease car project. The filter system I made out of some bag type filters I purchased at Duda Diesel. Buying this kind of filter (bag type) is much cheaper than buying cartridge type filters. For this test I have a 1 micron filter (size of bacteria) which is smaller than the 10 micron filter in the car. Worked great!
I am finding I hate the filter and pump stuff in the shop. The next step is to buy 2 plastic 50 gal drums ($20 ea) and install a underground pipe line from the front driveway to the back shed (the pipe is free) and move all the filter/storage crap to my shed. I’ll have to disassemble my cart, but I can reuse all the hardware.
Then I’ll just pump the dirty oil from the drum in the truck (via the pipeline) to the shed , filter it, store it, then pump the clean oil back to my driveway (via the same pipeline) and into the car. Clean, neat and out of sight when not needed. Sweet.
This afternoon while emailing DURING A THUNDERSTORM, my computer crashed…. Big time crashed. I know, you have always been told turn off all your electrical stuff during a storm. I THOUGHT I was protected with a UPS and an isolated system, but no, a big crack of lightening, computer crashed and next thing I know there was the “Hard disk not found” during boot up. Yikes!
As recommended I had made a “Recovery Disk” (imagine that) when I installed the operating system and as annoying as the daily backup is (slowing down the computer) for some reason, I had let it run to completion this morning. I booted up on the recovery disk, had to do a complete re-image of the computer “C” hard drive (from this morning’s back up) and wala! the computer is working perfectly again. I keep all my data on the “D” drive (a second drive) so I didnt lose a single file. Windows 7 is terrific in my book! Now I just need to turn off my computer during the next storm.
I had the fuel caps engraved. Actually they look very cool. I’ll paint the lettering a suitable color when the plane is painted the plane in Calif. Polished up and lettered I am sure they will look great!
Disassembly of the plane to prepare it for painting continued today. I have a huge pile of parts now. I want to weigh everything added to the plane (such as the heating system) to see how much my work affected the weight of the plane.
The HID landing light installation gave me a bit of trouble. At first, I didnt think it could be installed. The HID bulb is much taller and a little larger in diameter by 0.015″. Doesn’t seem like much but the bulb would not sit flush to the bracket .
Careful, extensive filing and bending of the aft brace bracket was required to get it installed. The HID light is incredibly bright and requires much less power than the standard 150 watt ligth that was installed.
Installation of the Halon fire suppression system was stared. If a fire is sensed in the engine compartment (there will be an alarm on the EFIS), the pilot can pull a handle on the dash which will flood the engine compartment with halon and quickly put out any potential fire.
I had a little time during the week or so of not working on the plane to work on some fun projects. I finished a roll around fueling station for my waste oil car. It is a complete system for pumping/filtering waste oil for the car. I have already come up with another plan to pump the oil from the drive way to a shed, filter it, and pump it back to the driveway for distribution. This part of the project will have to wait until after the plane is completed.
The canard is painted, balanced and assembled. Ready to install. I am now working on the fuselage removing all interior components to prepare for painting on the exterior and interior of the plane.
I thought you might like to see the work progress on the new Boeing 787 Dreamline plant being built at our airport. You can see two DreamLifters (converted 747’s) parked on the ramp which are used to carry components of the new plane to and from Charleston. Eventually the entire plane will be built here.
HUGE hangers/work areas are being built to assemble the planes. They are even moving the airport perimeter road to accommodate the construction.
At our latest EAA meeting this week, we welcomed a new canard owner to Charleston. There are now 5 builder/fliers in the area. 3 longez’s and 2 cozy’s.
Ed (the pilot in blue) recently flew his plane from Washington state to Charleston. He had lots of problems and adventures on the trip and his presentation was most entertaining. I ended up missing a Spoleto performance which turned to be one of the most talked about show of the season.
Jack Wilhelmson (cozy 3), Me, Ed Hensel (longez), and Glen Phelps (cozy 4), unfortunately Tony Cole (longe ez) was out of town for this picture.
Today was spent mounting more parts for the electrical system. The XM antenna was mounted in the nose area so Pat can easily remove it IF he want to use XM with his portable GPS in another airplane. There will be connection plug near the antenna so the wiring in the plane will not be disturbed.
The three GPS antennas were also mounted in the plane as well as the starting solenoid.
I also fabricated the elevator trim spring. I’ll check out the flexibility of it after curing and if necessary add more glass to stiffen it up.
Next will be finding a place and installing an external ADS-B antenna (the last one!)


