Building Tips: Mounting Radio Cans
The first time I mounted my radio cans resulted in a terrible job. It is hard to hold the cans perfectly aligned (horizontally, vertically and angularly), mark the hole and drill it for screw/nut.
Here you can see how far my first attempt was off. At the end of the can (where the wires attach) it was about 3/4” off. I decided to throw them out and start anew with a little thought as to the best way to do it.
The issue really is you want to mount the cans with a certain amount of exposure so all the cans stick out exactly the same amount and the are perfectly level and straight behind the instrument panel. I dont feel using screws on the cans is the answer. Yes, you can file the holes and make adjustments, but you CAN NOT do that if the radios are really close set. My radios are 3/8” distance apart. I can’t even rivet braces to the front panel and use nut plates and screws.
Here is the method I successfully used.
You’ll need a dial veneer caliper, Gorilla tape (nice and thick at .025”) , Alum angle (from Home depot), screws, nut plates and rivets.
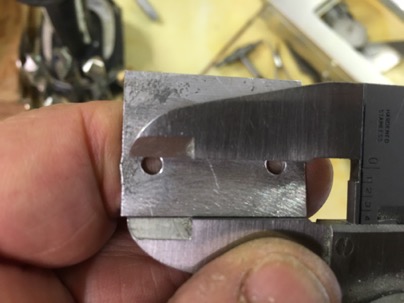
File the top of your can hole and one side straight as reference lines. Using these sides as a references, file as needed the two remaining sides till the opening is about .040” bigger than your radio face plate.
Put strips of the gorilla tape on the edges of the holes. This will not only protect the expensive finish of the radio, but center the radio in the opening. File the hole till the radio fits nice and snug.
Drill holes in the instrument panel where you intend to put the mounting screws. I used a #XX drill for the clecos. I like to drill a minimum of 2 holes per radio or for a stack of radios I drill 3 holes.

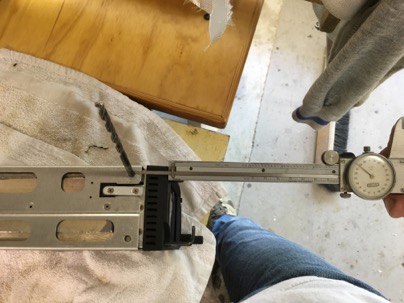
Next stick a drill bit in the hole to measure the diameter of the hole.
Measure the distance from the face to the edge of the drill bit
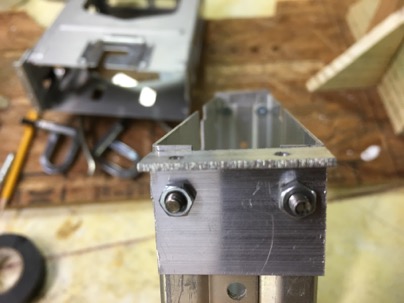
Now decide on the amount of exposure you want on the radio. In my case I wanted .050” because my GRT EFIS has a 1/2” exposure.
Because of my narrow openings I had to stack the support brackets.
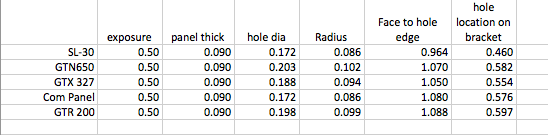
Location to drill the bracket rivet holes = (Exposure desired + panel thickness) – ((Hole dia/2) + distance from face to edge of hole)
For my Garmin GTR200 it is: (1/2” exposure + .090” panel) – ((.198” drill dia/2) + 1.088” from face of radio to edge of hole) = .597” distance from back of panel to center of the mounting hole
A quick spreadsheet and it is easy to determine the exact location of all the bracket mounting holes.
Now it is time to mount the brackets on the cans.