Nov 13 2015

Stripping the Cabin

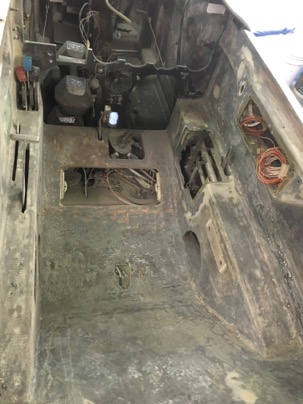
I have spent the last 2 days sanding the interior. What a PITA.

I think another full day and I’ll be able to move on to fun stuff like building panels and glass work.

wpid-IMG_3397-2015-11-13-21-50.jpg

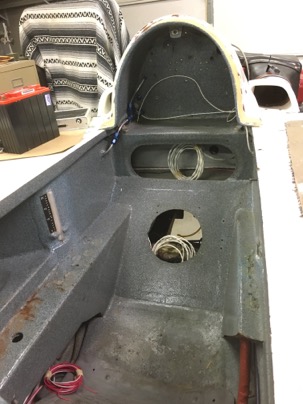
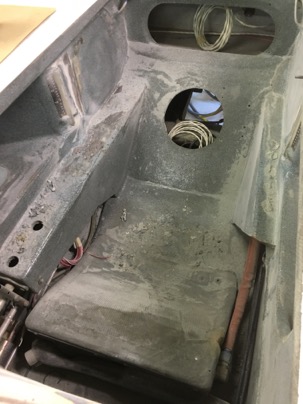
A couple more days of work and I will be done with prep’ing the interior for the beginning of the glass work.
In this area I’ll be installing the ADS-b antenna and replacing the sight glasses.

wpid-IMG_3399-2015-11-13-21-50.jpg

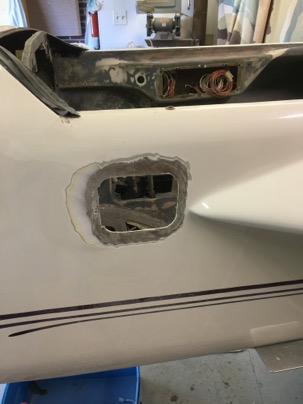
Preparing the door area to be closed off. I will be installing a EZNoselift.com rotary latch to get rid of the door opening.

wpid-IMG_3400-2015-11-13-21-50.jpg

Nov 11 2015

De-wiring done

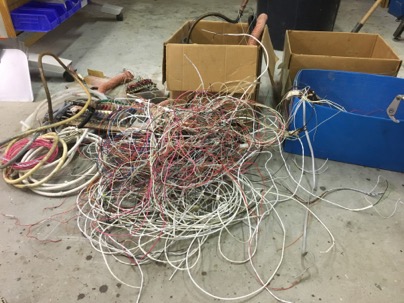
Today I completed the de-wiring. I weighed just the wire alone and it came out to over 30 lbs. This doesn’t include all the instruments I took out which will be replaced by lighter equipment.

wpid-IMG_3384-2015-11-11-18-46.jpg

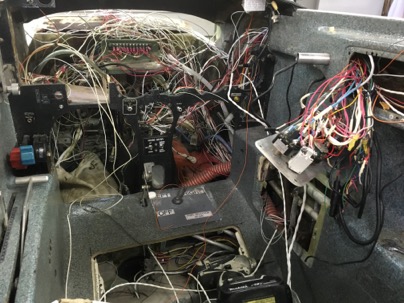
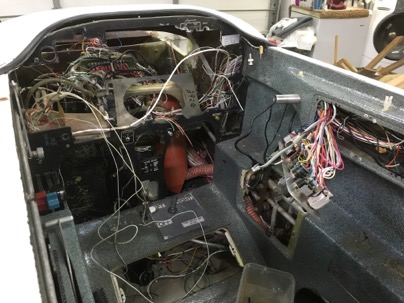
From a wiring nightmare,

wpid-IMG_3380-2015-11-11-18-46.jpg

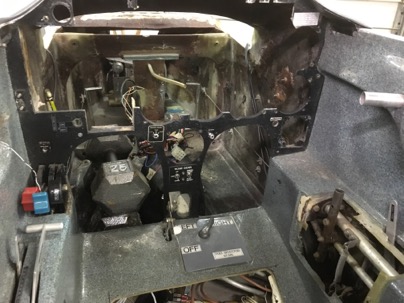
to a clean sheet.

wpid-IMG_3385-2015-11-11-18-46.jpg

Not bad for a days work.

wpid-IMG_3386-2015-11-11-18-46.jpg

Basically, I have a clean plane with an engine now. The next step is to strip the interior of the existing finish, make some new interior panels and replace the sight glasses. Then re-zolatone the interior.

I am not looking forward to the dust and mess of the next step.

Nov 09 2015

De-wiring the plane.

The start of the day was spent just removing panels and misc parts from the plane. I guess I was a bit reluctant to just dive in to de-wiring…

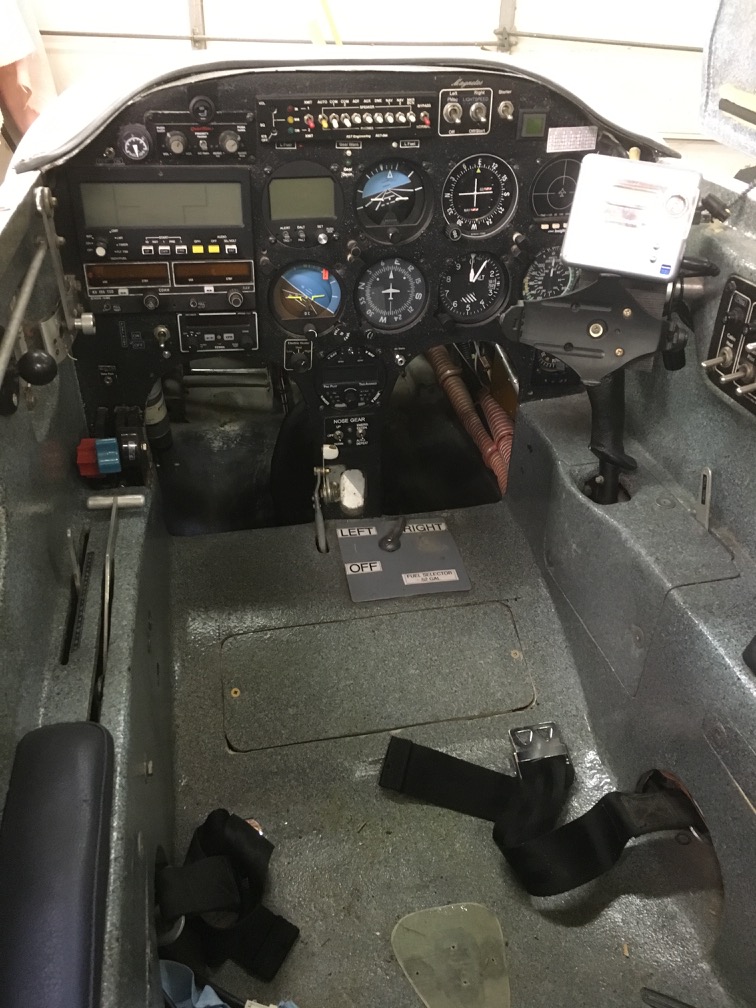
A relatively nice, but dated panel to start with. Everything is working fine.

wpid-IMG_3346-2015-11-9-21-48.jpg

Not to bad an job considering I had no idea of how to wire a plane 17 years ago….

wpid-IMG_3351-2015-11-9-21-48.jpg

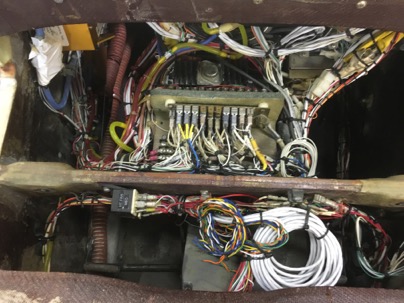
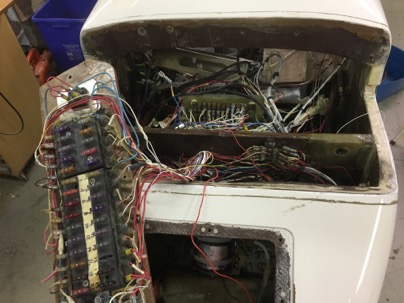
Well…. this is how it looked at the end of the day. What a mess! I am DEFINITELY grounded. now. I cut out a big chunk of the instrument panel to gain easier access to the wiring.

wpid-IMG_3374-2015-11-9-21-484.jpg

It is amazing how much wire I have in the plane. I would have easily finished de-wired it in a few hours if I just cut and hacked it all out, but I need to save some of the circuits as I’ll be using some of them in the future.

wpid-IMG_3376-2015-11-9-21-48.jpg

Tomorrow I’ll have everything removed and start stripping the interior.

Nov 07 2015

Bringing the bird home

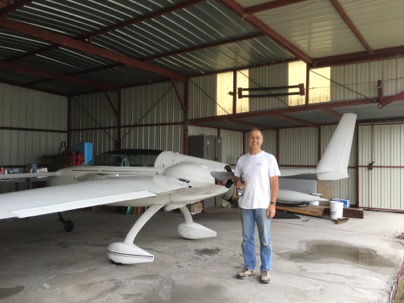
Today is the beginning of a new life for Tweety Bird. She has been away from the home for 17 years with over 2900 hours of time together.

Tweety is moving back in with me for a few months for a major overhaul. When she returns to the hangar it will be like flying a new airplane since she will be radically changed and improved.

The goals of this project is to:

Rewire the plane with new radios and EFIS.
Install ADS-b
Install a WASS GPS system for coupled approaches.
Cut the existing pointy short nose off and add an extended rounded nose.
Repaint the interior.
Touch up various areas of paint the exterior.
Add additional panels and amenities to the interior.

The goal is to have the airplane up and flying for Sun-N-Fun in April which gives me about 4 months to get everything done…

This project is kind of sad and exciting at the same time. Sad, because I am taking a perfectly fine flying airplane with no problems and tearing it apart. I’ll be without a plane for the since I built her. Exciting because I’ll be making major changes and improvements that I have wanted to do for years.

Time to get started!

wpid-IMG_3278-2015-11-7-21-05.jpg

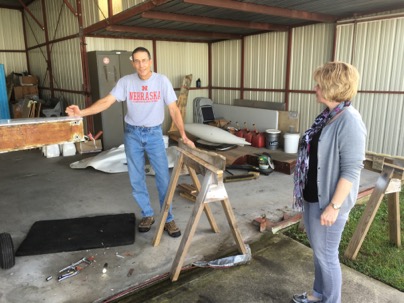
Gary and Robin stopped by to help me disassemble the plane and get her home.

wpid-IMG_3303-2015-11-7-21-05.jpg

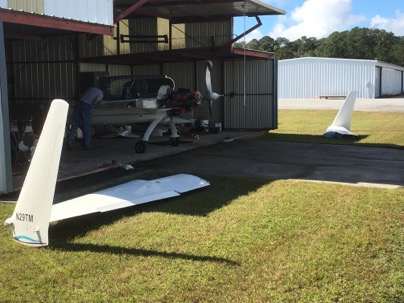
The disassembly process took less than 2 hours.

wpid-IMG_3306-2015-11-7-21-05.jpg

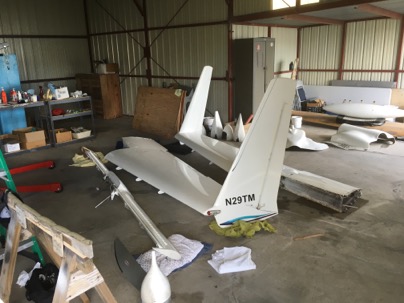
I left the wings, canard, wheel pants at the airports as they are not needed during this phase.

wpid-IMG_3309-2015-11-7-21-05.jpg

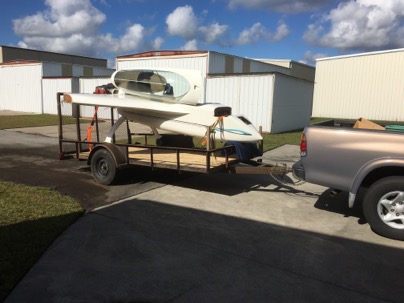
Homeward bound.

wpid-IMG_3308-2015-11-7-21-05.jpg

wpid-IMG_3316-2015-11-7-21-05.jpg

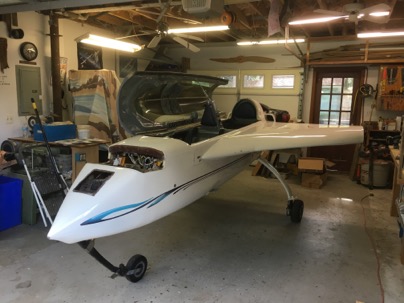
Nicely settled into the shop.

wpid-IMG_3321-2015-11-7-21-05.jpg

We stopped by a seafood restaurant on the river after getting settled for the day. Gary is building a Cozy 3 and I am looking forward to following his progress on the bird. Thanks for your help!!

Apr 23 2015

Tire Valve problem Fixed

Over the years I have had a few flat tires due to the tube splitting or being cut near the filler valve on the inside of the tire. The latest time just occurred is when I flew down to FL on my way to my 2015 Bahamas trip. Fortunately I had a spare tube on board and with the help of Ed, was able to replace it in his hangar.

Additionally, most times when inflated it always seemed like the fill connection was jammed up (rotated) against the side of the rim thus making it difficult to put air into the tire.

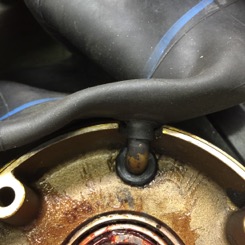
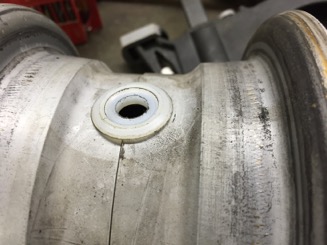
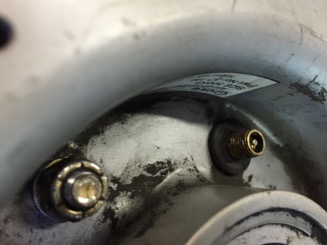
In looking into the problem it is easy to see why it occurs.

wpid-IMG_0662-2015-04-23-16-19.jpg

There is a 5/8” hole in the rim and the rubber on the fill tube is less than 1/2”. This causes stress in on the neck of the filler tube when pressurized since it is trying to push its way out into the larger hole and at times cuts the tubes in this location. The difference in size also pushes on the fill tube into the larger hole causing it to rotate a slight amount toward the rim on the outside making it harder to add air to. The cutting of the tube has happened 3 times over the years and to many others I have talked to.

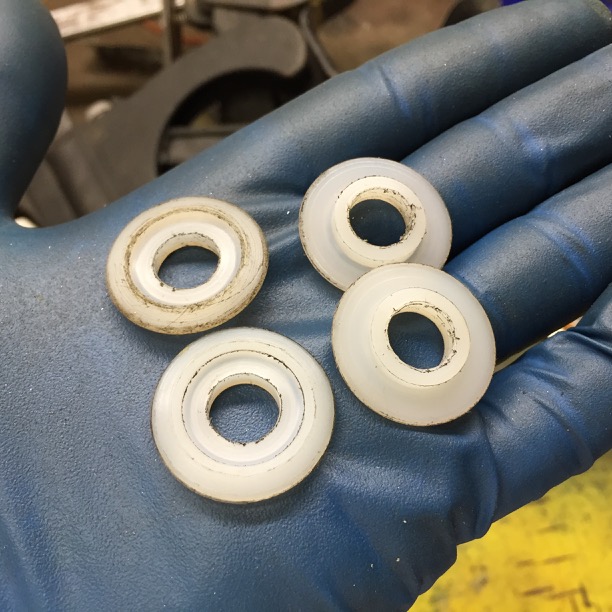
The cure is making a simple small bushing which prevents the tube from being pushed up into the rim and provides additional support to the soft rubber of the tube. You might just be able to use a large diameter washer to support the tube and keep it from pushing in to the larger hole.

Here is what they look like.

wpid-IMG_0659-2015-04-23-16-19.jpg

How the insert looks on the rim. I am sure with air pressure it presses itself flat to the contour radius of the rim.

wpid-IMG_0675-2015-04-23-16-19.jpg

For assembly, I first push the bushing the tube prior to inserting the tub into the tire.

wpid-IMG_0672-2015-04-23-16-19.jpg

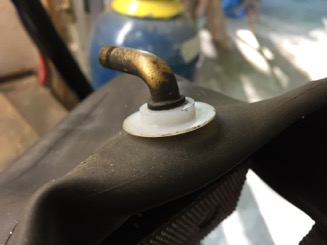
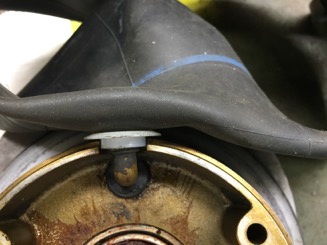
With the bushing on the tube, it prevents the tube from being pushed down into the hole on the rim

wpid-IMG_0673-2015-04-23-16-19.jpg

This supports the filler tube, and keeps it from rotating keeping it straight thus making it MUCH easier for adding air.

wpid-IMG_0676-2015-04-23-16-19.jpg

No more cut tubes, easier filling. A simple fix.

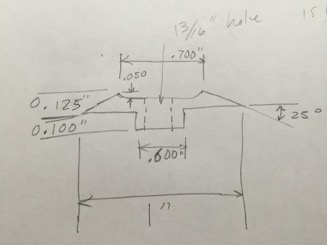
This is the general drawing I used for making the nylon bushing. It is the only 1” material I had, although if the pressure distorts the bushing, I’ll make the next set of of some scrap Al I have.
The numbers are approximates so feel free to play.

wpid-IMG_0680-2015-04-23-16-19.jpg

Feb 25 2015

Pool Heater Replacement

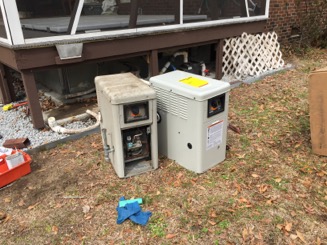
Today I installed the pool heater I purchased from Amazon. The original heater only lasted 12 years (WTF??). Actually, I was quite pleased to keep it alive for so long but it has been giving me problems for the last few years.

Time for an upgrade!!

wpid-IMG_0151-2015-02-25-20-46.jpg

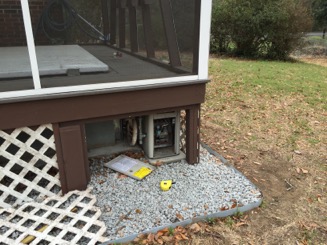
My biggest concern was getting it out from under the deck. I thought I would have to removed the concrete base it was sitting on to get it out. I guess that is part of the reason I havent replaced it sooner.

wpid-IMG_0153-2015-02-25-20-46.jpg

Actually I was luck and it came out easily (after cutting all the tubing).

wpid-IMG_0156-2015-02-25-20-46.jpg

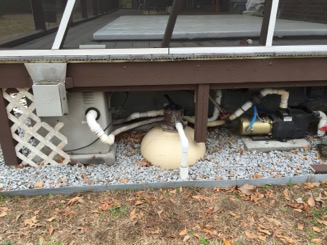
After installing quick disconnects on all the lines for easy future servicing, the new heater was installed in about 3 hours. The old heater is going into storage for spare parts if needed.

After firing up the heater my pool temperature increased at a steady 4 deg per hour from 64f to 90f.

I love being up to my neck in hot water…

Feb 19 2015

Ice Art

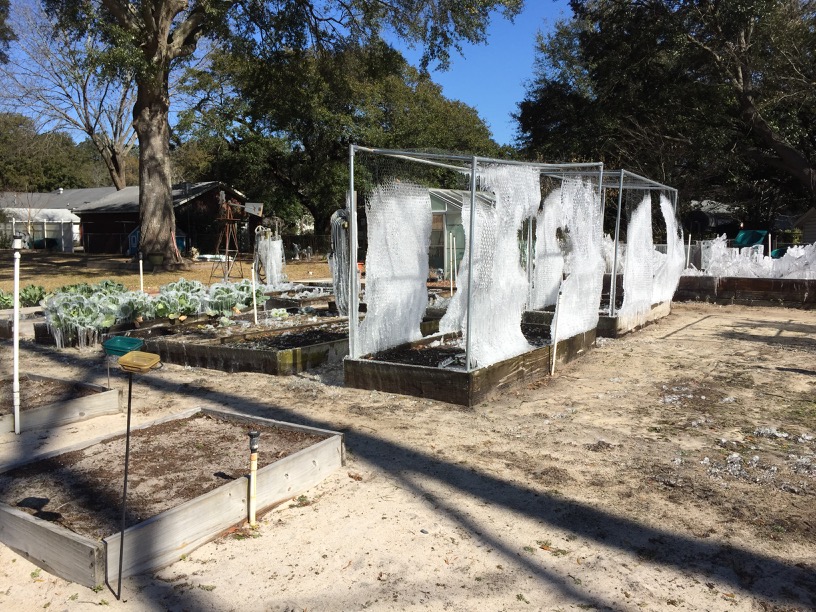
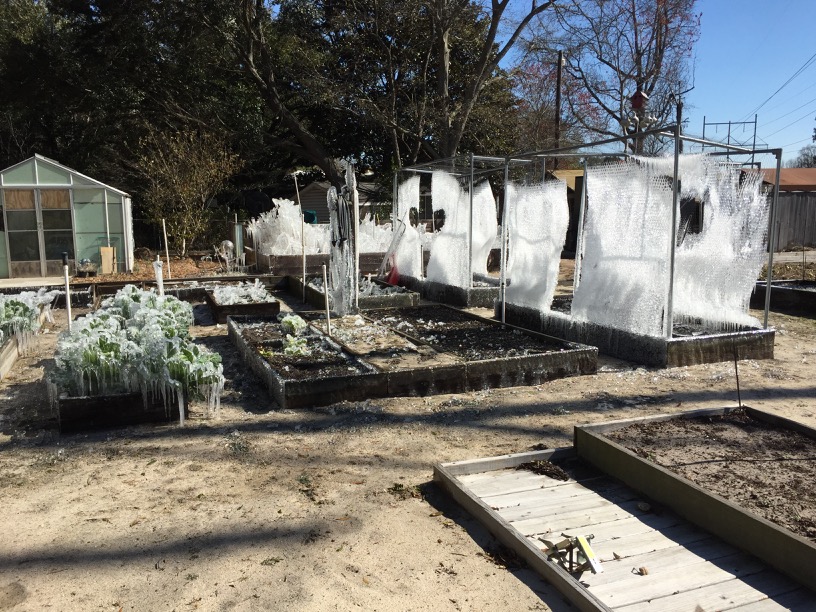
We had a very cold night last night and apparently my neighbor had run his sprinkler in his garden for some perfectly logical but mystifying reason. It made for some interesting ice pictures.

wpid-IMG_0105-2015-02-19-21-01.jpg

wpid-IMG_0108-2015-02-19-21-01.jpg

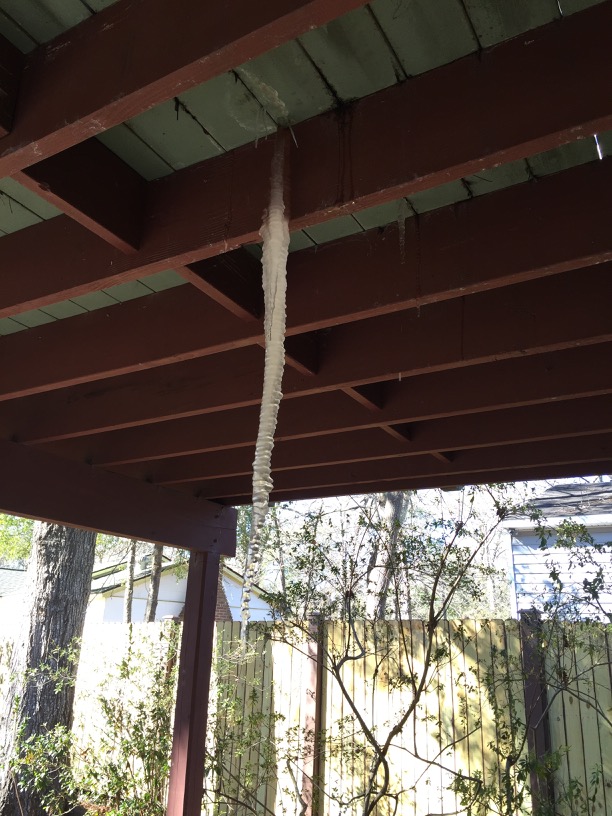
I even had one hanging off my deck. So Cool!!

wpid-IMG_9905-2015-02-19-21-01.jpg

Jun 26 2014

Another AirFlow Performance Fuel Injecton emergency

Well, today I experienced my 3 inflight emergency in the last ONE year due to the same issue, a clogged AirFlow Performance finger filter (located on the fuel servo inlet).  The strange thing is I flew for thousands of hours with no fuel problems at all and now with in the last year I have had 3 fuel related emergencies.   In all cases, immediately after taking off the engine would not develop full power.  The engine started to backfire and sputter which necessitated an emergency go-around and landing.  The second time it happened, the tower had to divert an airliner which  resulted in a lengthy conversation with an FAA investigator.  (see http://nickugolini.com/blog/?s=airflow)

Fortunately I had only flown from my airport (JZI) to Mt Pleasant Airport (LRO) which was just a short 10 minute flight. The plane flew fine on the way over and developed the problem with no warning at all. Luckily, one of the flight instructors flew me back to my airport to get my tools and a spare finger filter to fix the the bird and after a short 30 min installation life is good again.

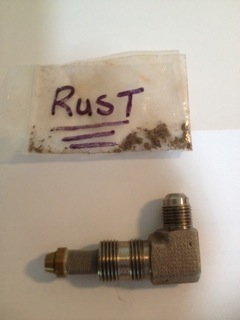
Once again as before, I had a problem with this FINGER FILTER. which is a major single point of failure on most canard AFP installations.
 wpid-IMG_4773-2014-06-26-16-49.jpeg

Basically, AFP/bendix has 3 filters inline to protect itself.   The filter supplied with their fuel pump is 125 micron (protects the pump).  The fuel servo finger filter is 75 micron has  about ONE square inch of filter area.  This is pathetic.  There is a third one in the spider which again is 75 microns with about 3/4″ sq inch of filter area.

IF you get a load of crap in your fuel (for me….    ?? the first time, rust the second time, now fine dust) your plane goes down.      All the fine stuff just flows through your fuel pump filter (125 micron) and accumulates in the finger filter 75 micron) or possibly in the spider filter until they totally clog up.  Honestly, It takes next to nothing to clog these tiny filters.

After talking to Kevin at  AFP (and Klaus) about the issue I found out there is an alternate way of plumbing the fuel system which will eliminate this single point of failure.  Just install a finer micron filter PRIOR to the finger filter on each tank outlet so it clogs first to protect the finger filter, duh…   This is NOT how we plumb our planes, nor is it discussed in the AFP manual.  Kevin told me this alternate fuel filter installation is very routine for RV airplanes and makes sense for ours too.   AFP even sells their fuel pump system without the 125 micron filter on it for the RV group.

Summit Racing sells a 63 microns filter with AN fittings with a HUGE amount of filter area (the filter is 12″ long).  Allstar Performance filter #40218, $61.    The reason for such a massive filter area is that being installed on the suction side of the fuel pump you want a large surface area so you do not reduce suction pressure to ensure the fuel doesn’t vaporized prior to the pump. There is no way this large filter (approx 20 sq inches of filter area) could restrict inlet pressure unless it was massively plugged.  If one does plug one up due to crap, (instantly recognizable due to low fuel flow) you switch tanks and use the other filter.   You protect the finger filter, the engine produces power, you keep flying, the FAA is happy.

Here is a couple key point if your building, planning, or flying a AFP or Bendex system.  

1. Consider the problems of this single point fuel failure and what can be done to prevent them or eliminate them.  Happened to me 3 times in a year, it could happen to you too.

2.  When taking off, be sure to include fuel flow in your scan.   The fuel pressure will be normal, but the fuel flow will decrease from about 12 gph on take off to 6-7 gph at full power setting.  If a fuel flow reduction occurs, retard the throttle which reduces air into the engine and about 2000 rpm the air/fuel mixture will be correct, and engine will smooth out and you can safely make it home.  Dont panic.

3.  I plan to carry my spare AFP finger filter with me in the plane at all times in case I get another load of crap in the fuel.  The finger filter is $75.  Cheap insurance.   If this happened on my recent 2800 mile trip to Burralls flyin, there would have been a much different outcome.

4.  Every annual, I’ll remove the finger filter and have it professionally cleaned.  BTW, you can buy a ultrasonic cleaner at Harbor Crap…use soap and water and blow it out.

For the cozy 3 I am building as well as another builder know (cozy 4) we are plumbing both fuel systems with 2 inline 63 micron filters immediately after the fuel tank outlets.

Fuel tank–>stop valve –>63 micron filter–>|selector valve –>electric fuel pump–>mechanical fuel pump–>75 micron finger filter–>fuel servo
Fuel tank–>stop valve –>63 micron filter–>|

The stop valves allow you to secure the fuel from each tank for servicing the filters.  Klaus recommends just fly them until the point one side plugs up and only then, remove and clean the filter.  

One would think having fuel injection solves all your problems…. no carburetor icing, great mixture control, the best fuel system you can put on your bird.  Life is great.    The one big issues is a fuel injection is very unforgiving about is dirty fuel which has lesser affect on a carburetor.   Hopefully, this post will make you think about your installation and possible issues of the plans type fuel system installation.
May 06 2014

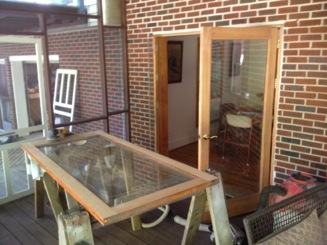
Back door refinishing

Todays project was to sand and refinish the back doors. They had been in installed for 12 years and had taken a beating from the weather when I didnt have the back porch covered.
wpid-IMG_7069-2014-05-6-19-19.jpg

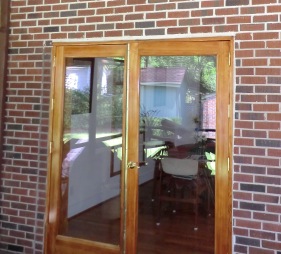
I replaced some of the hardware and they now look great!

wpid-CIMG3102-2014-05-6-19-19.jpg

Apr 19 2014

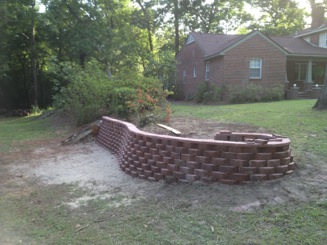
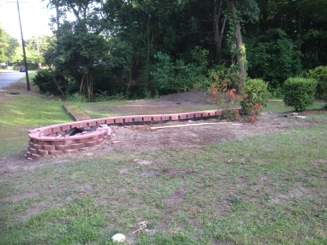
Block retaining wall continued

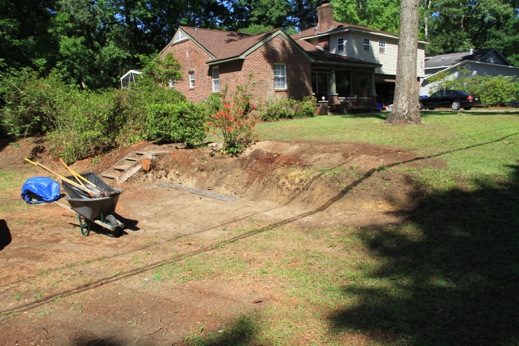
The wall is taking shape nicely, but I am still not sure how I am going to finalize the end. I guess I’ll work that out when I get there..

wpid-IMG_0972-2014-04-19-19-01.jpg

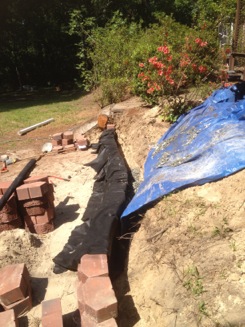
Foundation is started. A gravel drain on the backside was installed on the back side to to prevent excess water pressure from casing wall collapse.

.wpid-IMG_7143-2014-04-19-19-01.jpg

I custom cut the top and glued the cap pieces around the curve and decided to put an loop at the end for flowers.

wpid-IMG_7147-2014-04-19-19-01.jpg

wpid-IMG_7149-2014-04-19-19-01.jpg

Back fill the low area with top soil and plant some grass.

wpid-IMG_7158-2014-04-19-19-01.jpg

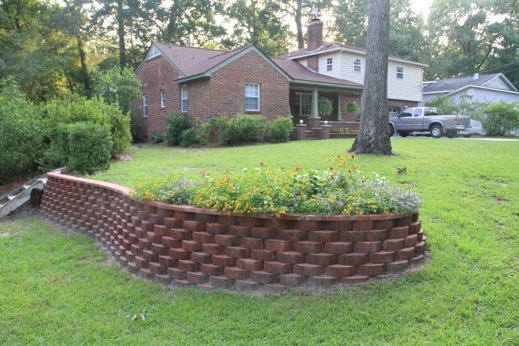
The final result. I like it….

wpid-IMG_2203-2014-04-19-19-01.jpg