Grease Car …part 1
I started on a project I wanted to do for 2 years. Converting my car to run on used cooling oil (a grease car). I have a friend who can give me all the waste vegetable oil (WVO) I want. I had the equipment and supplies for almost 2 years, designed a dedicated electronic control system, but for some reason I never got started. I guess Pats plane threw off my time line… Building a veggie car is the only reason I bought the diesel Mercedes (Sherman the German).
The conversion plan will happen in stages.
1. Get the basic system operational for testing. No electronics (a simple switch system), no automation, use the 8 gal tank for WVO, the main 20 gal tank will remain diesel.
2. If everything works well, and I have have a steady supply of WVO, I’ll build the electronics for system automation.
3. Switch the tanks so the main car tank is used for cooking oil and the smaller 8 gal tank is used for diesel.
4. Improve the filtration system of WVO, and set up a dedicated area for processing it. I want to build a centrifuge to get it as particle free as possible before putting it into the car
5. Improve cold weather operation of the system by adding pre-heaters in the fuel tank, insulating fuel lines, etc.
My main focus is just getting it going for testing. Most of the stages will have to wait until after I get the plane done.
I am using a fairly simple system. It takes WVO, heats, filters it, then using electric solenoid valves turns switch from diesel fuel to WVO. You must get the WVO up to at least 150 deg F so it flows easily for filtering and burning. The trick with this system is to start and shut down the engine with pure diesel fuel (to clean the injectors and pump) and have a way to switch over to WVO after the system heats up, hence the solenoid valves.
I am using a diagram I found on the web and some of my own ideas from my research.
..Click on the diagram to view..

This is the space I have to work with.

The aluminum fuel tubing (I used 3/8″), heater core, filter and valves.

Installing the fuel lines was the worst part of the project and the dirtiest.

I was just filthy after this part of the project.

The liquid to liquid heater core is installed. It takes hot water from the coolant system which flows through a 15 plate core which heats up the WVO.

I machined my own oil filter housing. I didnt like the off the shelf type.

The system as installed. My first focus is getting the car running again. The diesel fuel/coolant system are operational again, but I wont be able to start using WVO until I build the fuel tank.

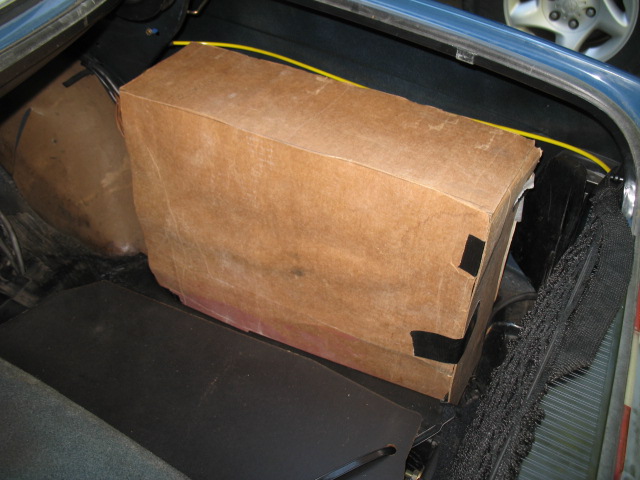
Here it is… my cardboard fuel tank. I figure it will hold about 8 gal of WVO which well be good for about 160 miles. This weekend, I’ll start on the fabrication of a real tank.

I need to get back to work on Pat’s plane….


