Nov 19 2015

First glassing

Today I did my first glassing in a long time. It was actually quite satisfying.

This a a jig I made to curve a piece of 3/8” foam for a foot rest/storage area for the back seat passenger.

wpid-IMG_3418-2015-11-19-20-17.jpg

Under the wood is 3 layers of BID which has a 3/4” joggle in it so I can make a panel for the back seat electronics. You’ll see it later when I installed it behind the passengers headrest. I am moving the battery from the front to the back of the plane to save the weight (9 lbs) of battery cable. The tools normal stored in the headrest will be moved to the front of the plane.

wpid-IMG_3419-2015-11-19-20-17.jpg

Nov 17 2015

Prepping the cabin for glassing

After removing my pressurized oil heat system, I decided I NEED to do some glass work. I am tired of stripping and sanding and taking the plane further and further down the path of disassembly. I need some creative time with the bird..

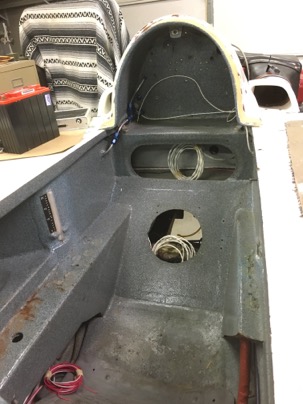
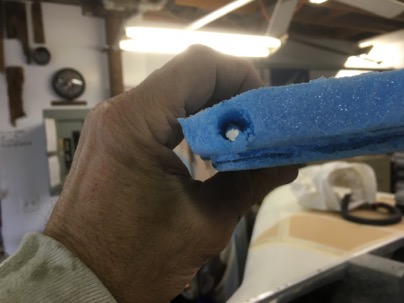
This is the normal canopy hatch door that I am closing off. See the red lines. It is a wire chase I am installing for an accessory mount for my iPod at the left end. I will wire power and a stereo input thought the case. I hate to see wires and this is an easy install.

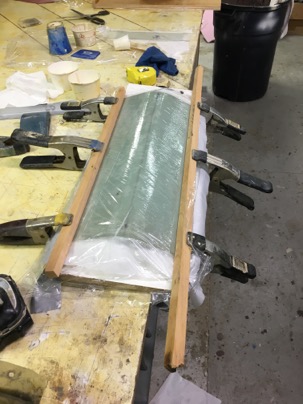
Draw a slight line, drill a hole at each end, drill a hole in the door flange and auger out the foam in between.

wpid-IMG_3406-2015-11-17-18-04.jpg

After fitting a piece of foam to close the door, drill a hole though it along the level line, Split the foam along the drill hole, stick at soda straw as a conduit, micro in the bottom and top pieces of foam and glass the door. Took all of 10 minuets to prepare

wpid-IMG_3405-2015-11-17-18-04.jpg

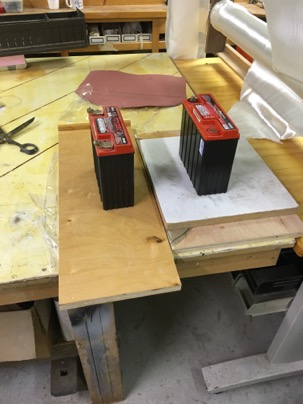
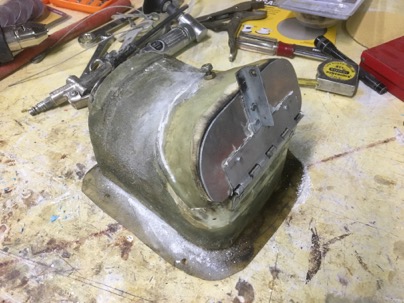
This is the airbag for the engine (holds the air filter).

The Door on the box was a later addition which I used to increase the cabin pressure when flying though rain.

Opening the door would to raise my normal low -50 mph cabin pressures to +5 mph cabin pressure. All the water stopped entering the cabin. I could actually feel the vents in the plane reverse direction. It is low cabin pressure which sucks ion the rain and cold. Adding more seals is just trying to fix the symptoms of the problem, without addressing the root cause.

The only drawback to my original test design was it made the cabin incredibly loud due to power pulses from the induction system having a clear path into the cabin.

wpid-IMG_3409-2015-11-17-18-04.jpg

I have a new type cabin pressurization system I have designed will address two things. Pressurization of the cabin, and improving the climate control if the cabin. If this system is successful I will duplicate it in the cozy. I learned what I needed from this successful experiment so time to be removed.

wpid-IMG_3410-2015-11-17-18-04.jpg

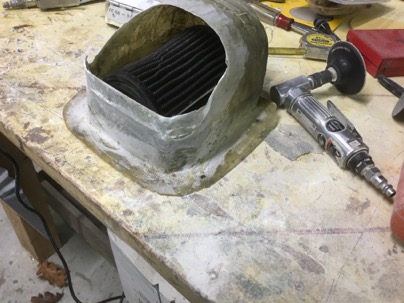
The door addition was cut off and box will be returned to it’s original design. Weight removed. 8 oz.

wpid-IMG_3416-2015-11-17-18-04.jpg

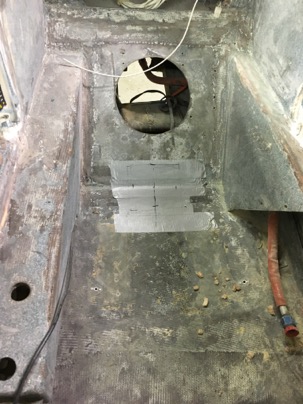
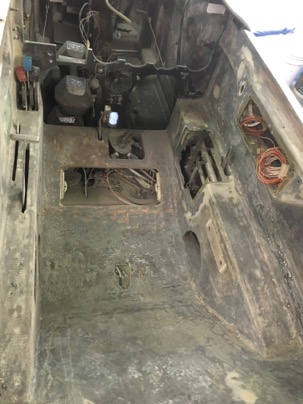
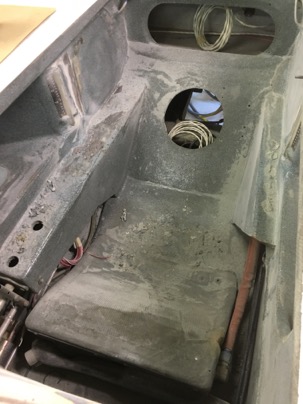
An area was prepared for glassing. I will be the cover for where the floor where the of the ADS-b antenna and ground plane will be installed.

Nov 15 2015

Week 1 report

Hrs: 34.
Total: 34.5

Nov 13 2015

Stripping the Cabin

I have spent the last 2 days sanding the interior. What a PITA.

I think another full day and I’ll be able to move on to fun stuff like building panels and glass work.

wpid-IMG_3397-2015-11-13-21-50.jpg

A couple more days of work and I will be done with prep’ing the interior for the beginning of the glass work.
In this area I’ll be installing the ADS-b antenna and replacing the sight glasses.

wpid-IMG_3399-2015-11-13-21-50.jpg

Preparing the door area to be closed off. I will be installing a EZNoselift.com rotary latch to get rid of the door opening.

wpid-IMG_3400-2015-11-13-21-50.jpg

Nov 11 2015

De-wiring done

Today I completed the de-wiring. I weighed just the wire alone and it came out to over 30 lbs. This doesn’t include all the instruments I took out which will be replaced by lighter equipment.

wpid-IMG_3384-2015-11-11-18-46.jpg

From a wiring nightmare,

wpid-IMG_3380-2015-11-11-18-46.jpg

to a clean sheet.

wpid-IMG_3385-2015-11-11-18-46.jpg

Not bad for a days work.

wpid-IMG_3386-2015-11-11-18-46.jpg

Basically, I have a clean plane with an engine now. The next step is to strip the interior of the existing finish, make some new interior panels and replace the sight glasses. Then re-zolatone the interior.

I am not looking forward to the dust and mess of the next step.

Nov 09 2015

De-wiring the plane.

The start of the day was spent just removing panels and misc parts from the plane. I guess I was a bit reluctant to just dive in to de-wiring…

A relatively nice, but dated panel to start with. Everything is working fine.

wpid-IMG_3346-2015-11-9-21-48.jpg

Not to bad an job considering I had no idea of how to wire a plane 17 years ago….

wpid-IMG_3351-2015-11-9-21-48.jpg

Well…. this is how it looked at the end of the day. What a mess! I am DEFINITELY grounded. now. I cut out a big chunk of the instrument panel to gain easier access to the wiring.

wpid-IMG_3374-2015-11-9-21-484.jpg

It is amazing how much wire I have in the plane. I would have easily finished de-wired it in a few hours if I just cut and hacked it all out, but I need to save some of the circuits as I’ll be using some of them in the future.

wpid-IMG_3376-2015-11-9-21-48.jpg

Tomorrow I’ll have everything removed and start stripping the interior.

Nov 07 2015

Bringing the bird home

Today is the beginning of a new life for Tweety Bird. She has been away from the home for 17 years with over 2900 hours of time together.

Tweety is moving back in with me for a few months for a major overhaul. When she returns to the hangar it will be like flying a new airplane since she will be radically changed and improved.

The goals of this project is to:

Rewire the plane with new radios and EFIS.
Install ADS-b
Install a WASS GPS system for coupled approaches.
Cut the existing pointy short nose off and add an extended rounded nose.
Repaint the interior.
Touch up various areas of paint the exterior.
Add additional panels and amenities to the interior.

The goal is to have the airplane up and flying for Sun-N-Fun in April which gives me about 4 months to get everything done…

This project is kind of sad and exciting at the same time. Sad, because I am taking a perfectly fine flying airplane with no problems and tearing it apart. I’ll be without a plane for the since I built her. Exciting because I’ll be making major changes and improvements that I have wanted to do for years.

Time to get started!

wpid-IMG_3278-2015-11-7-21-05.jpg

Gary and Robin stopped by to help me disassemble the plane and get her home.

wpid-IMG_3303-2015-11-7-21-05.jpg

The disassembly process took less than 2 hours.

wpid-IMG_3306-2015-11-7-21-05.jpg

I left the wings, canard, wheel pants at the airports as they are not needed during this phase.

wpid-IMG_3309-2015-11-7-21-05.jpg

Homeward bound.

wpid-IMG_3308-2015-11-7-21-05.jpg

wpid-IMG_3316-2015-11-7-21-05.jpg

Nicely settled into the shop.

wpid-IMG_3321-2015-11-7-21-05.jpg

We stopped by a seafood restaurant on the river after getting settled for the day. Gary is building a Cozy 3 and I am looking forward to following his progress on the bird. Thanks for your help!!