Category: House

Nov 05 2012

Amazon is AMAZING

Lately, I’ve been doing a lot of Shopping with Amazon. I am beginning to find that Amazon has almost everything that I need to order. From computer stuff, kitchen equipment, personal hygiene, automotive parts, just about anything imaginable!

Many times, the prices are as good as EBay, or anywhere else on the web, I get 2 day shipping AND returns are a snap. In some cases, you might a dollar or two buying somewhere else, but the convenience of ordering on line is worth it. Besides, they really take care of the customers. I pre-ordered a Blue Ray DVD and after was shipped Best Buy was selling it for $4 less. Crap, it would cost me more to send it back so just decided to not bother. The next day to my surprise and pleasure Amazon automatically refunded me $4 because they found a lower price and price matched it. As a PRIME member, I automatically get two-day shipping which is well worth the extra $79/year and you also get to stream movies and TV shows.

On Monday morning, while taking about 300 book to Goodwill, I broke the tail gate handle on the truck. Crap plastic cheap ass stuff. Hell, the dam thing only lasted through 13 years of abuse! I thought about welding one up and make my own, but in a moment of sanity, I decided to check on line before I got out the cutting tools and drill bits.

wpid-CIMG1625-2012-11-6-18-37.jpg

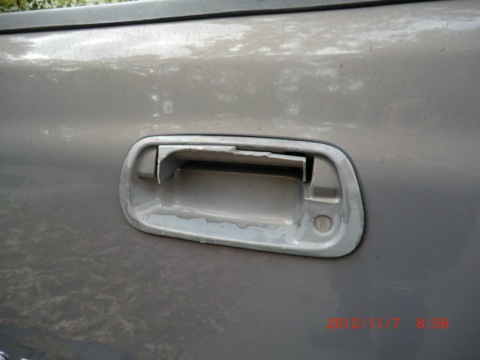
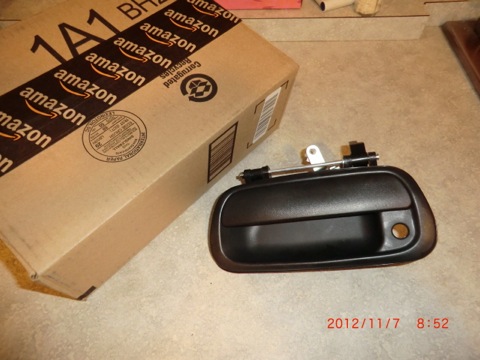
I went on EBay to order on, had actually clicked to buy one and decided to check Amazon before paying. Dam if they didn’t have it for the same low $21 price as Ebay. I can order it and it will arrive in two days ((Prime). I didn’t even want to drive to the Toyota dealer to check their price. Not worth the time or gas.

I was surprised when the next afternoon the replacement handle arrived!!

wpid-CIMG1623-2012-11-6-18-37.jpg

I remember reading some articles about Amazon. They are working toward having next day deliver on more items and Amazon and Walmart are investigating the possibility of same day delivery. Order by 10 am, get delivered in the afternoon ($10 extra charge). Talk about the ultimate convince. I wonder if I can do all my grocery shopping with them. Now THAT would be worth $10 to me.

The local “Newsless Courier” had an article a few months back that Amazon was able to get a special tax break from the state of SC to build wear-house/distribution center in the state. After some tense on/off moments when I thought Amazon might back out (state was giving them the run around), they finally negotiated a sweet deal for locating in SC and hiring workers. No taxes for 5 years. There are now two wear houses located in Spartanburg (3 hrs away, where Airflow is located) and in W. Columbia SC (about 2 hrs away).

I now I get everything in 2 days max, and more orders are starting to show up the next day if you order early in the morning. Yah!

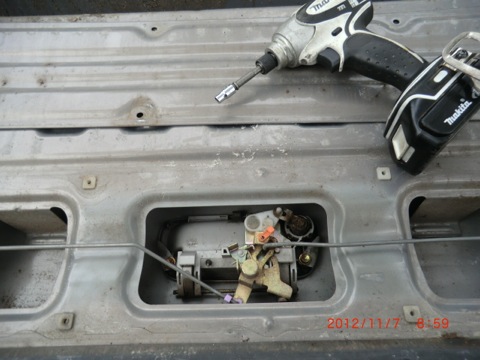
The handle fit just like the original, and easily installed in the tail gate.

wpid-CIMG1627-2012-11-6-18-37.jpg

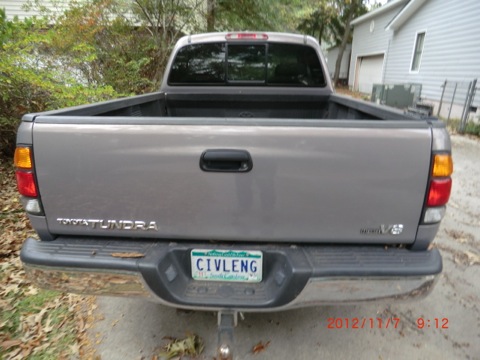
Now repaired and back in business!

wpid-CIMG1628-2012-11-6-18-37.jpg

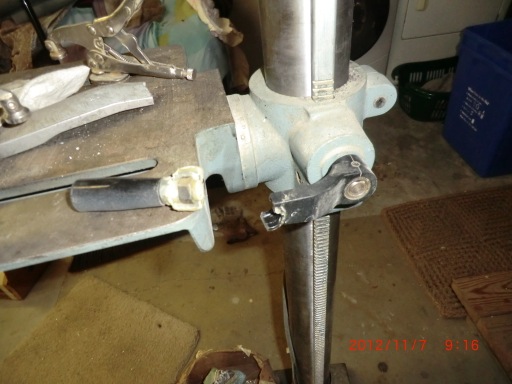
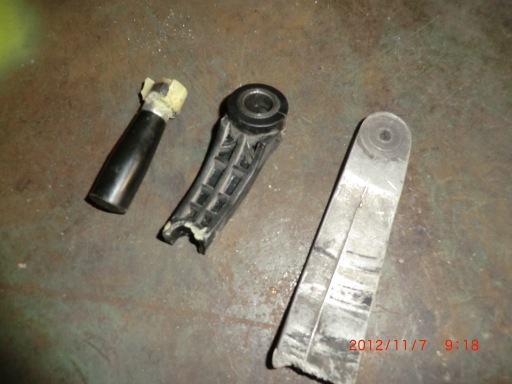
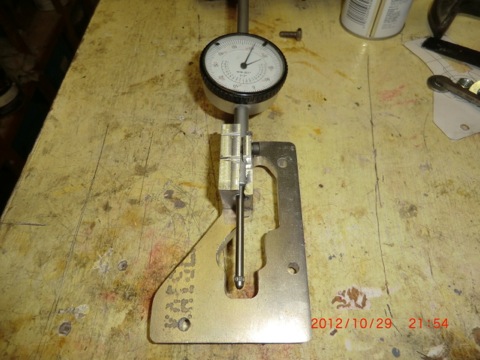
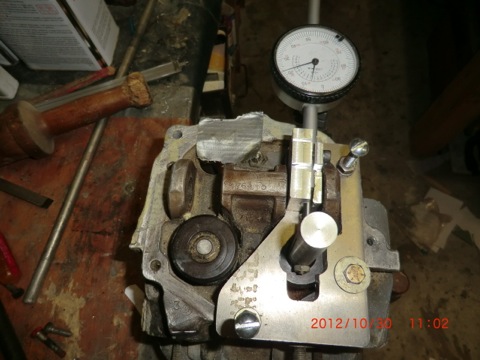
I also fixed the handle on my drill press. I tried to repair and flox it in place once before, but did a crappy job of gluing it and it broke again.

wpid-CIMG1630-2012-11-6-18-37.jpg

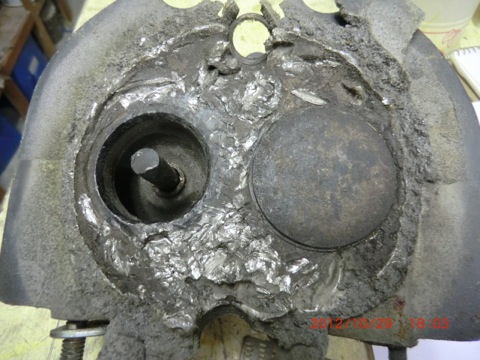
I was fix’n to throw out some AL when I ran across the metal on the right. It is what was left of the nose fork on my plane that I was just about to recycle. I thought, why not save it and have a memento.

wpid-CIMG1631-2012-11-6-18-37.jpg

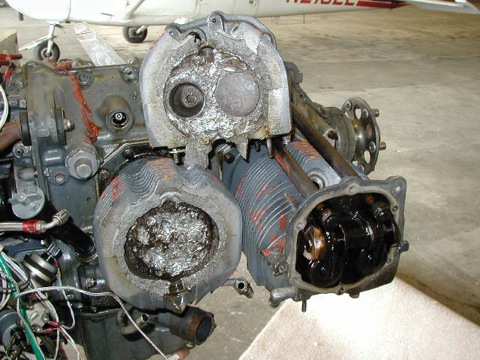
This is the remains of the nose fork which broke off when I was landing at Greenville Downtown airport on 26 March 2001.
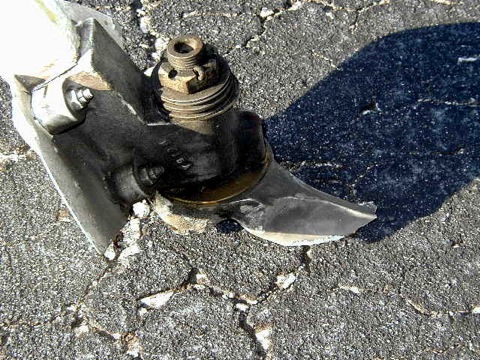
wpid-P3260063-2012-11-6-18-37.jpg

No wheel, no go!

wpid-P3260066-2012-11-6-18-37.jpg

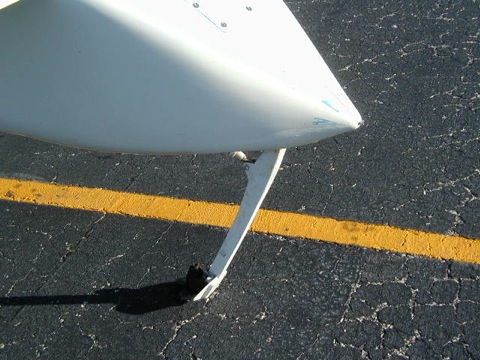
I clearly remember the event (how could one ever forget). I was just touching down heard a pop, and saw something from the corner of my eye fly by the starboard wing and though, “SHIT, was that my wheel?” I looked through the little view window for checking gear position, and saw the front wheel was gone. I informed the the tower and gently touched the nose down.

The grinding sound was really loud and I sure I stopped in a hurry. Dam! I picked up the nose and walked the plane over to the parking area. After the everything settled down, we look all over the runway and grass area for my front wheel, but never could find it. The really sucky part of all this was I had to rent a car to drive up to Norfolk VA for a navy ball that I was attending. The plane was left at the parking area until I could get a replacement fork.

When I returned a few weeks later to repair the bird, the FAA had also stopped by as they are required to do after every accident, and there was a big yellow tag on the prop indicating it was cracked and I needed to contact the manufacture get it rectified before I could fly again!! I laughed a bit, called them up, told them I made the prop and it was fit to fly. The FAA… don’t like them all that much.

About 6 months later I landed at Greenville on other trip, and the desk handed me what was left of my tire. Apparently it had bounced a long way from the runway and the grass mower had chopped it up a bit.

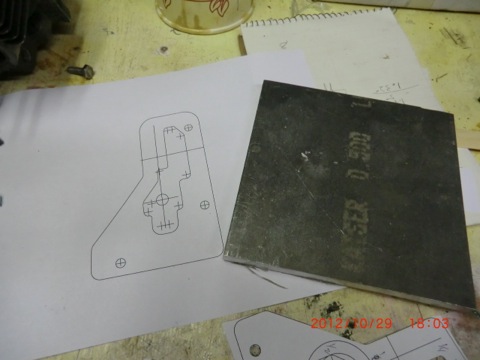
Back to the drill press repair. Some cutting, drilling and grinding……

wpid-CIMG1633-2012-11-6-18-37.jpg

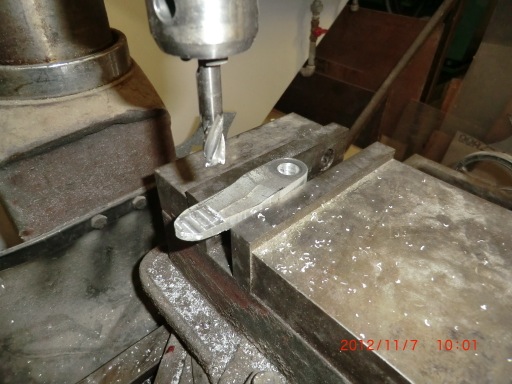
And now I have a new handle for the drill press an another story to tell.

wpid-CIMG1634-2012-11-6-18-37.jpg

Oct 29 2012

Makeing a Wobble Tester

This is a potential damage which could occur if you lose an exhaust valve. This is what is left of the head which was on my plane which caused me to do an emergency landing at Summerville Airport. I ended up with a cracked crank and had to do a complete engine overhaul.

wpid-P5090108-2012-10-29-16-181.jpg

The valve head broke off due to excessive clearance of the valve guide to the valve stem.

wpid-CIMG1577-2012-10-29-16-18.jpg

I decided to build the wobble tester, and check my valve clearances before I put the overhauled hydraulic lifters in. It took me a few hours I get a design I was happy with in AutoCAD. Actually making the tester only took me about two hours to build. The design is a bit different than the factory model as I mounted the dial indicator from the top down, between the rocker rod support columns (on the top part) which is opposite to the normal mounting (from the bottom up) which would require me to take off the exhaust system to test the wobble.

It allows me complete the test and not removed the exhaust system to do the testing.

wpid-CIMG1579-2012-10-29-16-18.jpg

The final result is made out of 1/2” aluminum plate.

wpid-CIMG1581-2012-10-29-16-18.jpg

Here it is being used on an old cylinder I had in the shop. Yah! I’ll be able to test the cylinders every year now to see how quickly the exhaust guides wear.

wpid-CIMG1584-2012-10-29-16-18.jpg

Oct 27 2012

Making a perfect bread machine loaf

Every saturday, I have a tradition of making fresh bread and have been doing so for at least 15 or 20 years. I just love waking up to the smell of fresh baked bread on Saturday mornings. I haven’t bought sliced bread at the store in YEARS. It is crazy to think that I purchase this bread maker prior to getting out of the navy in 1977 when I was enlisted. The machine is still working!

Each loaf now comes out PERFECT each and every time.

wpid-IMG_3678-2012-10-27-21-482.jpg

For years I tinkered with hundreds of recipes and combinations of ingredients, , trying everything I could find in the kitchen to experiment with. Garlic bread with oregano, banana bread, soy flour, vegetables, nut bread, seeds, yogurt, sour cream, raisin brand, oat meal, you name it and I have tired it.

I finally figure out what it takes to make a terrific loaf of bread. It is part regular flour and whole wheat flour, has a nice firm texture and is constant dense firmness top to bottom.

wpid-IMG_3679-2012-10-27-21-48.jpg

The Perfect Bread Recipe

You need to layer the ingredients so if you use a timer the yeast does not activate. Put the ingredients in the pan in this order.

1/2 tsp salt
1 TBS sugar
1 tsp bread yeast
2 TBS instant cream of wheat
1 level cut of wheat flour
2 level cups of bread flour
Vegetable Oil (approx 1-2 table spoons)
1 1/8 C of water (Exactly)

Set the timer and your are done.

NOTES:

You must BE EXACT on your measurement. This is very important. Bread making is chemistry and your are only making one loaf so if you are off a bit with the ingredients the loaf will not come out perfect.

Here are two critical discoveries I found which impact the loaf quality.

  1. Cream of wheat for some reason helps improve the texture and density. It has made a world of difference in my results and works much better than gluten additives.
  2. The amount of water added is crucial successful results. Add one cup and the loaf will be dense and 2” shorter. Add 1 1/4 cut and it will be soft and smash itself against the glass top. WATER is how you control the size and density of the loaf.
  3. Don’t wash the bread pan. Just wipe it out and reuse. It keeps the non-stick surface working as it should.

Now that your perfect loft is made, eat the delicious first pieces with butter and coffee and store the remainder in a plastic store bag (like a grocery store bag). It is just right for keeping it fresh. The loaf will only keep on the shelf until 3-4 days and then it will need to be refrigerated. If I make my loaf on Saturday, by Wednesday, I’ll have to put it in the frig or it will develop mold.

You might also try the Land Of Lakes Lite Butter with canola oil. It spreads easily right from the frig, and was rated the best butter substitute by Consumer Reports and has a terrific taste.

Hint: Fresh bread is great for sandwiches, refrigerated bread is great for toast.

Jul 04 2012

Happy 4th

Today is the 4th of July. I celebrated by quitting work a bit early after completing the purlins. I am still pushing myself to get the roof up before we have a major rain event. We have a 60% chance of rain on saturday. I hope to have the plastic roofing up Friday afternoon which will cover most of the structure. I still have to frame in the end which is a lot more complex. I”ll get the major area done first then worry about it later.

Tomorrow I am flying down to KCOI (Merritt Island, FL) with Alex to inspect a plane he might build. When I get back on Friday, I’ll get some more wood and then I’ll be able to start roofing! Cant wait.

wpid-CIMG1345-2012-07-4-20-35.jpg

Jul 03 2012

Purlins are almost done

The installation of the purlins is taking much longer than I had hoped… I thought I would get a good picture of me before the day started. I will be drenched from the heat in a few hours.

wpid-CIMG1339-2012-07-3-20-30.jpg

I managed to get 4 rows done before the day was out.

wpid-CIMG1342-2012-07-3-20-30.jpg

Jul 02 2012

The walls are going up!

I decided to direct all my time to getting a roof over the work area for a couple of reasons. One is for shade, but the most important reason is to protect the job site from rain. I am worried if we have a significant rain, the water from the roof will cave in the side of the pool since the pool is drained. Once the worksite is covered, then I’ll concentrate on the pool area and decking.

Over the weekend I painted all the roof rafters and left areas so the perlings could be glued/screwed in place

wpid-CIMG1324-2012-07-2-20-21.jpg

This is the header beam for the roof
wpid-CIMG1325-2012-07-2-20-21.jpg

It is starting to look like a structure now.

wpid-CIMG1329-2012-07-2-20-21.jpg

Jun 30 2012

Work continues

Todays work consisted of removing all the old exterior support wood

wpid-CIMG1320-2012-06-30-20-18.jpg

and replacing it.

wpid-CIMG1322-2012-06-30-20-18.jpg

The heat index today went all the way up to 113f. It was really hot out there!

Jun 28 2012

Pool damage is assessed…a plan is formed

Today was spent removing the decking, chopping it up to put in my fireplace wood pile and assessing the damage.

After the decking was removed completely, I found a lot of rot, warped boards and bent metal. The pool originally built between Jun 10 to Aug 2002. I worked on it after I came home from my job each evening. Shit it had to be hot then? Working in July/Aug?

wpid-P6220022-2012-06-28-17-51.jpg

At the time, I even had to relocate he sewer line from the kitchen.

wpid-P8060064-2012-06-28-17-51.jpg 
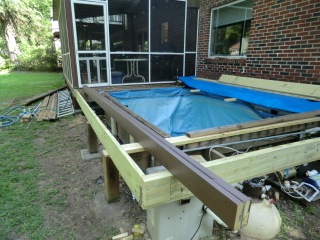
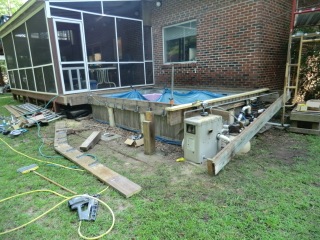
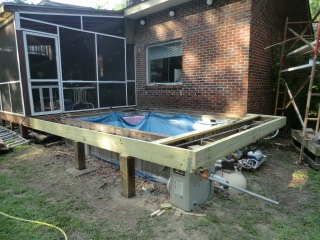
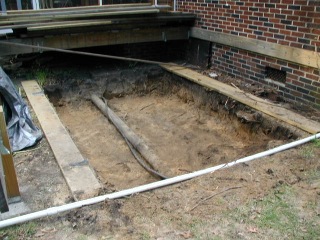
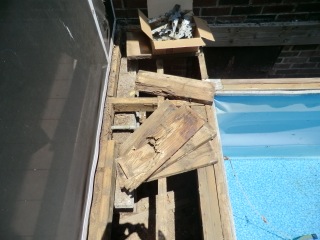
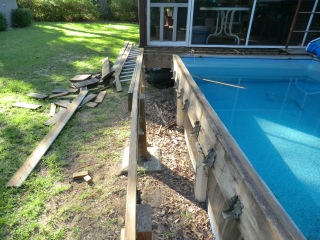
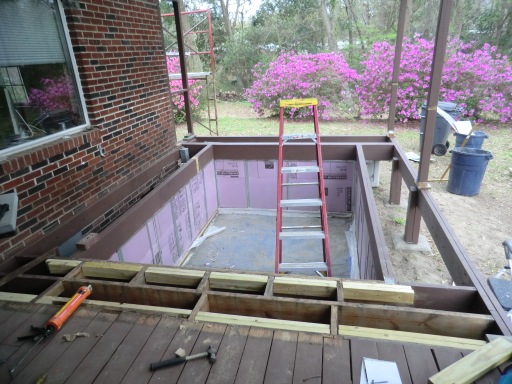
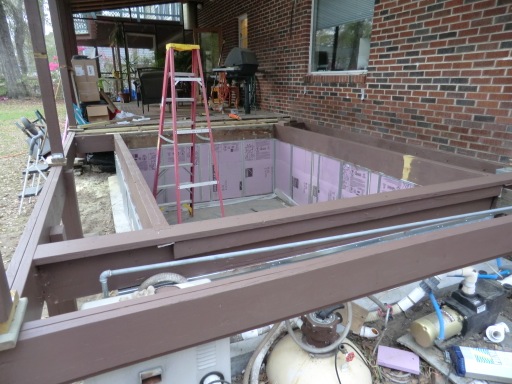
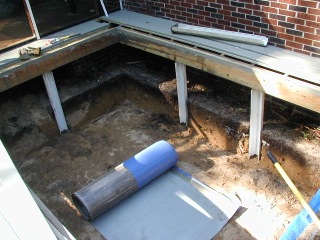
This is how it was in the beginning as I was rolling in the steel sides. I a bunch of parts from old 30 foot round above ground pool someone gave me and recycled it into my pool.

The pool has served me well for 10 years, but the environment as really taken the toll on the “system” . I want to correct some of the design flaws, rebuild it totally such that I should never have a structural problem for the rest of my life…

If I had to do it all over again, it would have been built entirely of poured concrete. I love working with concrete. It is like fiberglassing, but for the house. Once you do it, you are done for just about ever. But, in this case I’ll rebuild it with mainly wood, with some concrete help.

wpid-CIMG1315-2012-06-28-17-51.jpg
You can see the rotten wood here.

After the deck was removed I used a piece of wing foam, floating on the water to establish a “water level” line around the perimeter of the pool to establish the drop or sinkage. I found the low side was 1 1/2 inches below the highest point … problems. Next I found the wood along the pool was was twisted and bowed out from the pressure …. more problems.

wpid-CIMG1302-2012-06-28-17-51.jpg

The pool was drained and surprising, the walls bowed back into straight line. It is at this time that I figured out what the problem was, and how to fix it.

wpid-CIMG1316-2012-06-28-17-51.jpg

The pressure of the pool water is bowing the wood out because of some steel supports which are just mushing into the dirt. AaaHaaa! That is the key issue and now I know how to fix it.

Originally, I thought I would have to build trusses for the deck, but instead, I am going to concrete around the middle of the pool. Essentially creating a concrete ring (girdle) to take the pressure of the water instead of the dirt. Plus, I found I had enough of the original steel sheeting to put a second sidewall in, so instead of one outer steel skin, I’ll have two. This will make me feel more comfortable as I have worried about the original steel sides rusting out.

Now I have a plan. I knew the structual support system would be the most difficult part of this renovation, and if I just wanted to deck over the pool and have a large outside deck, it would have been an easy upgrade. But, I love to exercise in the pool so the effort is worth it. This will be the last upgrade I do to the pool….gotta make it right.

Jun 27 2012

Start of Lower Deck

Today I started the work on the lower deck. I plan to rebuild the deck structure, put new plastic deck boards down (with SS screws) and lastly to build a screened in enclosure over the deck/exercise pool. It will have a Poly Carbonate roof over it. Finally I can protect the house from rain and keep the pool free of leaves and twigs.

wpid-CIMG1268-2012-06-27-18-29.jpg
I stared by building a header beam. In order to do so glued an nailed a two 2×6’s together. Then I used the aluminum walkboard as a leveling surface to build the trusses. The header allowed me to set up a jig such that each truss has a 1/2” crown in the center. The “T” beam trusses are 2×4 with a 2×4 nailed and glued together. It is incredibly strong.

wpid-CIMG1270-2012-06-27-18-29.jpg wpid-CIMG1291-2012-06-27-18-29.jpg

I had to use the 2×4 because I had to have a drop in height between the existing 2×6 roof and my new roof. Before the assembly starts on the deck outside, I’ll paint them in the shop and build most of the pieces inside where I can been in the air conditioning.

There is a lot of rotten wood around the deck which will need to be replaced and the pool opening must be totally flat (on a level plane) so the pool cover will fit snugly. I have an interesting way to do this will will be shown later.

Now comes the fun part, all the existing decking must be removed under which I found a number of rotten boards and warped wood. Yuck. I’ll need to some reinforcement and strengthening of the structure before I can start on putting down the deck. Just replacing the boards would have been easy. I just need to figure out how to deal with the side pressures of the pool wall which has pushed it out 1.5” in the center. I am thinking about building a horizontal truss to try and reduce the outward pressure of the pool…..

wpid-CIMG1299-2012-06-27-18-29.jpg

Jun 20 2012

Pool: Painting

Since water is so damaging to wood (over the long term) and I am a freak would preventing water damage, I felt it was important to do everything I could to protect the wood. I learned a lot from the last time I built the pool.

I am painting everything support to seal the wood prior to final assembly. After that I’ll add flashing to everything.

This will probably add many years of life to the support structure as I will NEVER re-do this pool area again. I’ll sell the house first!

wpid-CIMG2263-2012-06-20-22-01.jpg

wpid-CIMG2265-2012-06-20-22-01.jpg