Jun
30
2012
Work continues
Todays work consisted of removing all the old exterior support wood
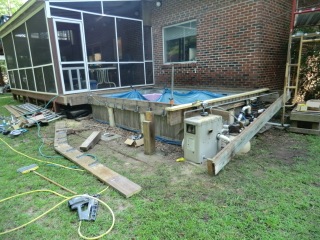
and replacing it.
The heat index today went all the way up to 113f. It was really hot out there!
![]() House | Nick |
House | Nick | ![]() Comments (0)
Comments (0)
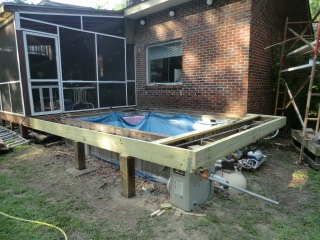
Todays work consisted of removing all the old exterior support wood
and replacing it.
The heat index today went all the way up to 113f. It was really hot out there!
![]() House | Nick |
House | Nick | ![]() Comments (0)
Comments (0)
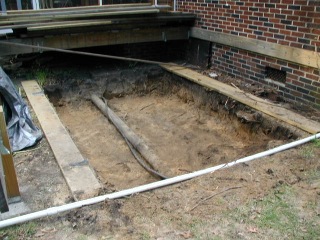
Today was spent removing the decking, chopping it up to put in my fireplace wood pile and assessing the damage.
After the decking was removed completely, I found a lot of rot, warped boards and bent metal. The pool originally built between Jun 10 to Aug 2002. I worked on it after I came home from my job each evening. Shit it had to be hot then? Working in July/Aug?
At the time, I even had to relocate he sewer line from the kitchen.
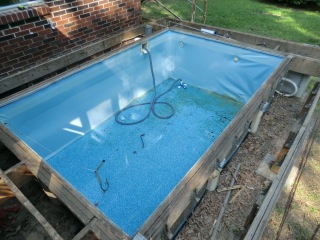
 This is how it was in the beginning as I was rolling in the steel sides. I a bunch of parts from old 30 foot round above ground pool someone gave me and recycled it into my pool.
The pool has served me well for 10 years, but the environment as really taken the toll on the “system” . I want to correct some of the design flaws, rebuild it totally such that I should never have a structural problem for the rest of my life…
If I had to do it all over again, it would have been built entirely of poured concrete. I love working with concrete. It is like fiberglassing, but for the house. Once you do it, you are done for just about ever. But, in this case I’ll rebuild it with mainly wood, with some concrete help.
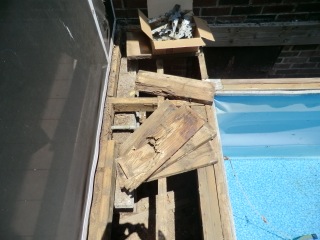
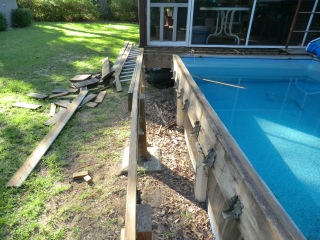
You can see the rotten wood here.
After the deck was removed I used a piece of wing foam, floating on the water to establish a “water level” line around the perimeter of the pool to establish the drop or sinkage. I found the low side was 1 1/2 inches below the highest point … problems. Next I found the wood along the pool was was twisted and bowed out from the pressure …. more problems.
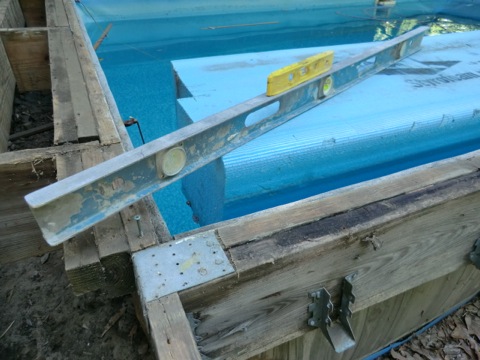
The pool was drained and surprising, the walls bowed back into straight line. It is at this time that I figured out what the problem was, and how to fix it.
The pressure of the pool water is bowing the wood out because of some steel supports which are just mushing into the dirt. AaaHaaa! That is the key issue and now I know how to fix it.
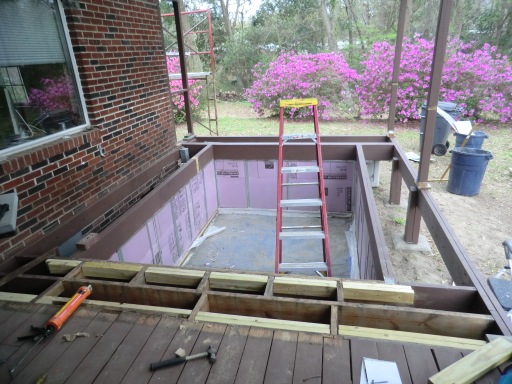
Originally, I thought I would have to build trusses for the deck, but instead, I am going to concrete around the middle of the pool. Essentially creating a concrete ring (girdle) to take the pressure of the water instead of the dirt. Plus, I found I had enough of the original steel sheeting to put a second sidewall in, so instead of one outer steel skin, I’ll have two. This will make me feel more comfortable as I have worried about the original steel sides rusting out.
Now I have a plan. I knew the structual support system would be the most difficult part of this renovation, and if I just wanted to deck over the pool and have a large outside deck, it would have been an easy upgrade. But, I love to exercise in the pool so the effort is worth it. This will be the last upgrade I do to the pool….gotta make it right.
![]() House | Nick |
House | Nick | ![]() Comments (0)
Comments (0)
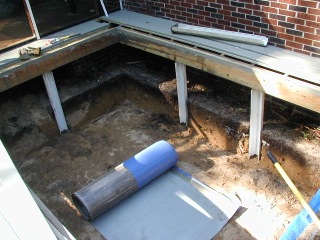
Today I started the work on the lower deck. I plan to rebuild the deck structure, put new plastic deck boards down (with SS screws) and lastly to build a screened in enclosure over the deck/exercise pool. It will have a Poly Carbonate roof over it. Finally I can protect the house from rain and keep the pool free of leaves and twigs.
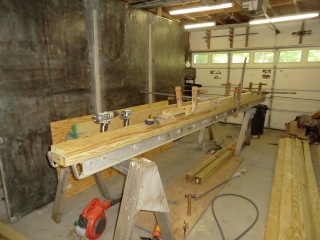
I stared by building a header beam. In order to do so glued an nailed a two 2×6’s together. Then I used the aluminum walkboard as a leveling surface to build the trusses. The header allowed me to set up a jig such that each truss has a 1/2” crown in the center. The “T” beam trusses are 2×4 with a 2×4 nailed and glued together. It is incredibly strong.

I had to use the 2×4 because I had to have a drop in height between the existing 2×6 roof and my new roof. Before the assembly starts on the deck outside, I’ll paint them in the shop and build most of the pieces inside where I can been in the air conditioning.
There is a lot of rotten wood around the deck which will need to be replaced and the pool opening must be totally flat (on a level plane) so the pool cover will fit snugly. I have an interesting way to do this will will be shown later.
Now comes the fun part, all the existing decking must be removed under which I found a number of rotten boards and warped wood. Yuck. I’ll need to some reinforcement and strengthening of the structure before I can start on putting down the deck. Just replacing the boards would have been easy. I just need to figure out how to deal with the side pressures of the pool wall which has pushed it out 1.5” in the center. I am thinking about building a horizontal truss to try and reduce the outward pressure of the pool…..
![]() House | Nick |
House | Nick | ![]() Comments (0)
Comments (0)
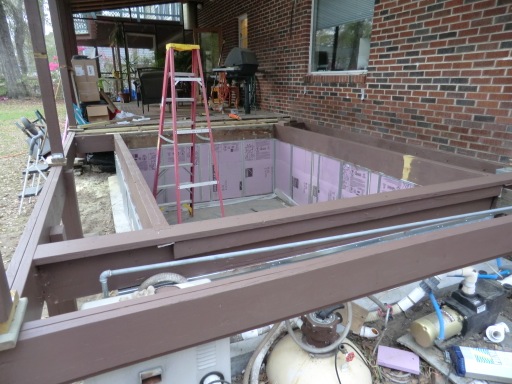
Since water is so damaging to wood (over the long term) and I am a freak would preventing water damage, I felt it was important to do everything I could to protect the wood. I learned a lot from the last time I built the pool.
I am painting everything support to seal the wood prior to final assembly. After that I’ll add flashing to everything.
This will probably add many years of life to the support structure as I will NEVER re-do this pool area again. I’ll sell the house first!
![]() House | Nick |
House | Nick | ![]() Comments (0)
Comments (0)
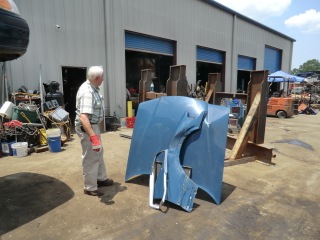
Today was spent mostly helping Gerhart out with his car. I had to haul it with my truck to the shop to be fixed.
While on the way we took the hood and fender from Sherman to the scrap metal yard.
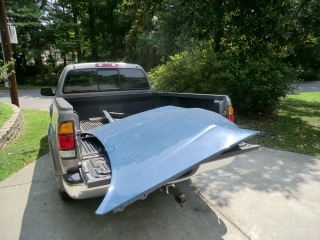
The hood is made of pure Aluminum and a new replacement hood would have been $1800. I loved the hood. It would get dings in it and NEVER rust. Very light weight too. I had to replace mine with a steel hood as the junk yard Al ones are hard to find. Woo hoo…. I got all of $17 for it
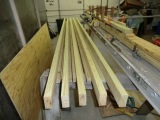
I also started building parts for the pool enclosure. I needed to make a 16.5 foot header beam for for the rafters, but also needed it as a work surface to build the roof joists. The easiest way I found of making a PERFECTLY straight beam is to put it on the walk board, put a level string on it, and using wood stir stick, I could then shim it up for a nice straight beam (+/- 1/16”).
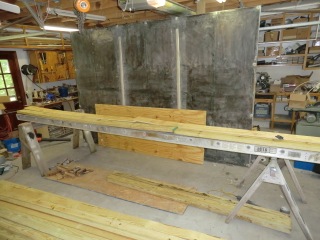
Sometimes I think a am a bit too anal (engineering wise).
![]() House | Nick |
House | Nick | ![]() Comments (0)
Comments (0)
Today was spent mainly painting the upper deck on the house
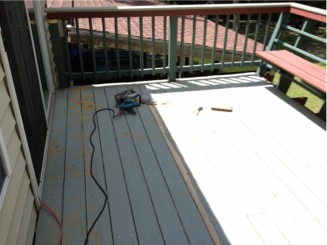
I decided to cut the openings between the deck boards since they had warped and swelled over time. Now they have a consistent look and the gaps will let more dirt and water through them.
I also had to move the hot tube to paint below it. I used the old trick of lifting the tub up, and putting pipe below it to roll it on some wood rails.

I have already painted everything except for the deck. Tomorrow I’ll start the screened enclosure around the exercise pool.
![]() House | Nick |
House | Nick | ![]() Comments (0)
Comments (0)