Jan 22 2011

Aluminum

I just returned from the 2 pm show of  Aluminum at the Performing Arts Center.

A while back, I saw an advertisement for Aluminum inthe papers and have a secret  love for the metal.  I enjoy it as much as using fiberglass.    I like aluminum because it shiny, easy bend, holds it shape, inflexible and unforgiving nature and the creative easy to work, forgiving, complex to work with, high tech BUT difficult to fabricate nature of fiberglass.    I would love to build an RV aircraft someday.

The news paper add showed a shinny round tube of Aluminum with two legs sticking out (M? or F?)    Quite a visual image!   …. heck, why not go I thought.

aluminum.jpg

I had no idea what I was getting into when I purchased the ticket.   This week a short  article about the show appeared the Post and Courier.   I quickly scanned the article and in one sentence the story could be summed up as: 

A BIG tube of aluminum drier hose which gives birth to a tiny baby drier hose THEN the parents and baby tube get separated THEN begins the quest of reuniting the baby (which has many interesting adventures with new friends) WITH the sad, lonely, distraut parents aluminum tubes who are desperately searching everywhere for their missing young one. 

After reading the article,  I scratched my head and I thought “WOW, how lame is THAT?”     I can watch the CBS nightly news and see the same story line.  Heck wasn’t it this week a woman who was living in New York and stolen at birth was reunited with her biological parents in Alabama or am I just imagining it?  It was a big deal on TV (I think?)     

Now I am going to see a bunch of aluminum tubes with the same heart breaking problem.  Got the ticket…got to go.

While I was walking up to the PAC with ticket in hand I happened to notice TONS of kid.   Kids everywhere.   Chatting with to a couple of parent I found they too had no idea of what the show was about.  The  kids were bringing them in tow.    Hum, I guess I am not alone in blissful ignorance.    Surprise me Aluminum I thought. 

And surprised me it did. The creative use of small and large aluminum tubes made of mylar was just amazing.   The blend of “human” and “human hybrid tubes” and “mechanical puppetry” was incredible.  This show just works. 

It is a HIGH energy, energetic music  show with great performers and creative use of props.  Visually stunning Aluminum is simply an over the top production.  A fantastic unusual show which will delight you.    Easily, this is one of the best shows I have EVER seen at the Performing Arts Center.

I was drawn into the story, was dazzled by the imagery and thoroughly enjoyed the non stop action and surprises.   Aluminum is definitely a stage show which should be featured at the 2011 Charleston Spoleto Festival.   It would be the must see, most talked about, killer show of the year.    

Here is a Youtube link for the Aluminum show

If you EVER get a chance to see this production GO.   Definitely, GO!   Get a seat dead center about ten rows from the front.  You WANT to be right up front so you can get involved in the audiance interaction, the characters and props.  You’ll have a blast! 

Take the kids (5 yrs old on) and your parents if they have even a minimal abount of motor and cognative skills (basicly they are still breathing).   Both young and old will have a fantastic sensory experience none of you will never forget.

Copyright 2011
Nick Ugolini
Jan 22 2011

Wire Lacing

I think the epitomeof a good wiring job is how the wires are bundled together.  When ever I look at someones wiring, I look at how the wires are grouped together, are they in nice straight lines, do the corners have radius’s, etc.  Good wiring is an art as well as science.

The most important aspect of wiring is how the wires are grouped or bundled.  Lets say you have a 100 wires, it is not a good idea to bundle them all together.   The problem is that when trouble shooting you can’t determine which wires goes to which plug or if you need to test a wire or spice into one, which one is it?  If you have 30 white wires in a big bundle you’re got a problem. 

In production shops identification information is actually printed on each wire.  I dont have the luxury of having a dedicated piece of equipment to do this.

A better way is to bundle wires is to separate them into smaller groups for a dedicated purpose.  An autopilot bundle, a trim controller bundle, etc.  This way if there 8 wires in the bundle, you can figure out the purpose of the bundle is and therefore what each wire represents.

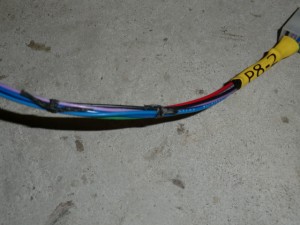
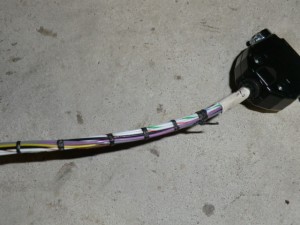
There are a number of ways to fasten the wire bundle together.   The easiest and quickest way is to use zip ties.  I dont like them but they have their place.   They are heavy and the little cut ends (if you are not careful to trim the properly) will slice your hands when reaching around them.   Boeing decided to stop using them in the 747’s which saved them over 400 lbs per plane.    Granted, I am not using tens of thousands of them in this plane but you get the point.  Besides I think they look unprofessional, they can squeeze the wire to tightly, or not tightly enough. 

The “old fashioned” and I think the best way of  bundling wires is using lacing cord.  It is bee’s wax coated polyester cord and is the standard for the aerospace industry.   I think it looks great, is very light weight and wont cut you.    The only issue with lacing cord is that it is a bit time consuming to use (although I am getting faster with practice).   When done properly it is very artistic.   

When I went to the National Air and Space museum in Washington DC, I marveled at the wiring on the old NASA space craft.  All the wire bundles were beautifully stitched together.  Nice even knots and they used techniques I couldn’t even find on the web.   Wire lacing is truly an art if done correctly.

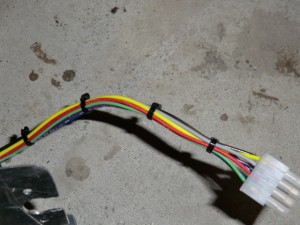
Here is a picture a wire bundle using individual knots. 

Fairly easy to do, but as I was sitting (butt getting sorer by the moment) I remember seeing on the web techniques for “continues” lacing, so I did a little more research and printed out some instruction sheets.  Continuous lacing uses a starter and end knots and a repeating lace stitch between them as you just move down the wire bundle.  I think it looks fantastic and is much quicker than individuals knots.  Not as nice as NASA, but I am getting better and faster.

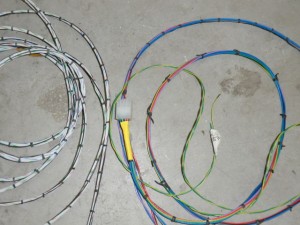
Here you can see the left bundle with a continuous lace stitch and the right bundle with individual knots.    The continuous  lacing looks much better for sure…

I plan to lace as many bundles of  wires I can.   Sure makes for a good looking an professional job!

Jan 20 2011

Passenger Panel done

Today was a somewhat short but productive for me.  I just had constant interruptions in the morning and didnt even get to work until 12:45. 

I finished of the Pilot entertainment system input.  I wanted to add a input jack to the port side ball mount to add a second stereo input for the pilot.  This will allow the pilot to mainly use the stbd side input for the Garmin hand held GPS or by plugging into the port side jack switch the entertainment system input to the other side of the plane for such things as watching a move, or listening to an ipod.

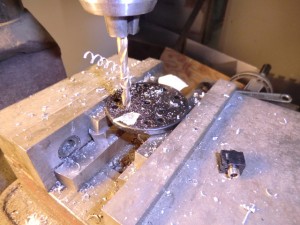
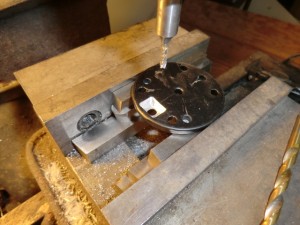
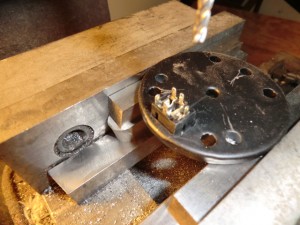
In order to keep it clean, I had to mill out the back side of the ball mount for the stereo input jack.

Here is the recess for the input jack.

The jack is now sitting into the little pocket.

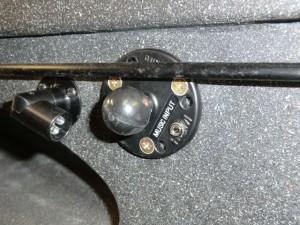
Finally, installed in the plane with all the wires hidden in the foam.   Before painting the plane, I had installed a ring of aluminum with nutplates for the screws and covered everything with 3 layers of glass.  The ball mount will be able to support anything you put on it (iPad, iTouch, GPS, 19″ tv, you name it).  

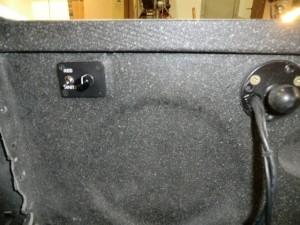
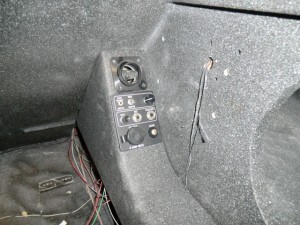
You can also see the LED map light (it has both red and white lights in it)

The map light is controlled from a small panel on the stbd side.   I chose to have the light on the left (you usually have your maps and knee board on your left leg),  but positioned the control on the right side since you are flying with your right hand.    This way you can use the left hand to control the brightness.  When designing the plane, I wanted all controls to be manipulated by the left hand since you dont want to move your hand off the the joy stick.

The passenger entertainment system panel is done.  It is actually a fairly complex panel to wire.   It is removable with one plug in case you need to do maintenance in this area..

As will be installed in the plane.  It looks great!

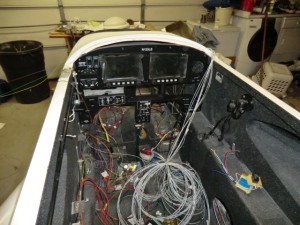
The wiring is starting to come together as more and more wires are installed.  It’s fun and frustrating at the same time.   Cant wait until tomorrow to get back to it.

Jan 19 2011

Building Tips: Zip Tie Loops

I wanted to show you the greatest thing for wiring a composite plane I have ever come up with.

The big problem with wiring one of our birds is how do you secure the wires to the structure.  You cant just put screws in the side of the plane.  Securing wires is a big issue…

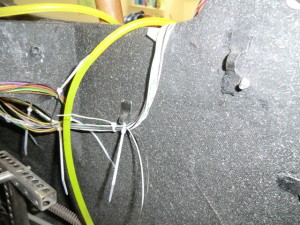
I came up with a great way to do this which weighs almost nothing.  I call them zip tie loops (ZTL)s.  After you fabricate them (which takes very little time) you can secure them anywhere on your structure by just gluing them in place with a little bit of flox.  They are so light you dont even need to secure them or hold them in place while the floxis curing.  Just wet the back side and postion.   Once cured, they will self destruct before they will come loose.

Just stick them where ever you need to secure a wire bundle.  I must have 30 or 40 of them in the plane now.

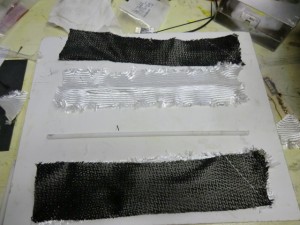
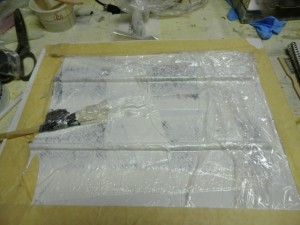
ZTL’s are made by taking 3 layers of wetted glass and laying them over a rod or some square material (1/4″ x 1/4″  I would recommend at least 1/4″ high.  In this picture I just used some scrap 1/4″ delron rod I had handy.  In this case I tired  two different tests.   Case one, 1 bid, 1 carbon BID (fair) and case 2, 2 BID and 1 carbon (better).  I dont think the carbon helped much so I would just recommend 3 or 4 layers of BID.

I like to use the LoVac method to make sure there is a nice tight loop in the strip.

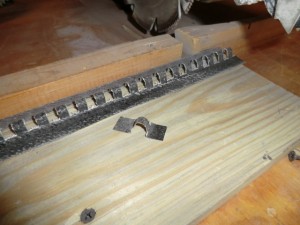
After curing I used my radial arm saw to cut the slots in the long strip and a pair of scissors to separate the loops.   A little paint and they are ready to install in the plane.

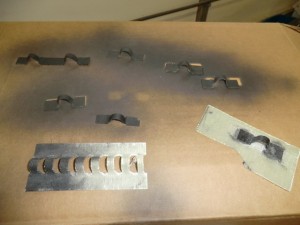
Here is some ZTL’s that I am spraying black to match the interior of the plane.

Quick and EZ.

Jan 17 2011

All Electronic Modules are installed!

I have decided the hardest part of wiring is not hooking up wire but finding a home for all the components needed to operate the plane.   All the receivers, antennas, control modules, switches, grounds, etc.   This issue is even more difficult to do in a highly complex and space limited plane like a Longez.

I must have installed and removed the front panel 30 times already.  I wanted to make sure all electronics were easy to get to, removable with minimal hassle with the caveat that the final product should not look busy or complex.  This is not trivial.  I hate having to take a bunch of stuff out of my plane to get to a component to work on.

Also, I did not want to see a complex of wire everywhere.  Basically when I get done, there will be very little wire visible.  The worse you’d have to do is remove the canard (about 10 min) to get to anything in the plane.

I have installed cannon plugs on the dash to make it removable.  It wont be easy and very rare operation, but it is a requirement of mine.

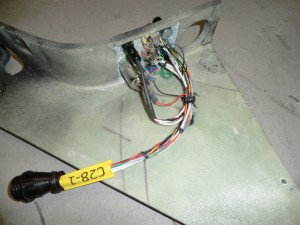
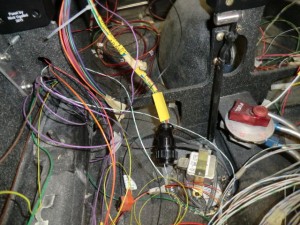
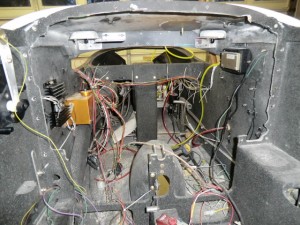
The mount area of the EFIS GPS receiver.

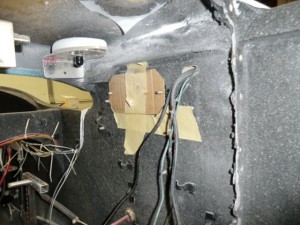
Mount area for the heat sink of the diode isolators.

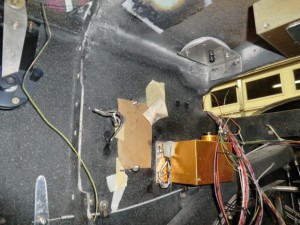
Mount are of the ADS-B receiver,  ADS-B GPS antenna and Garmin GPS Antenna.

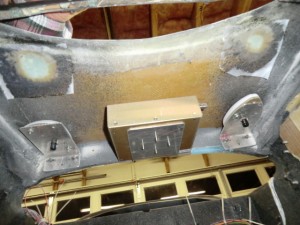
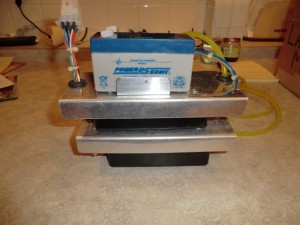
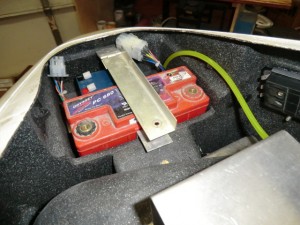
Orginally, the plane had two batteries in the front.  I moved one of them to the back seat area which gave me a little free space (where the battery used to be) to work with.  I decided to use it for the electric trim controller, emergency extension battery and emergency gear down module.    By stacking them they are about the same size as the former battery.  I could have used a bunch of foam in the area to hold them in place but decided to use alum separators to stack the components and to keep the battery from moving.


Finally, all the modules are mounted.

 The last part of the puzzle to mount is the joy stick.  There is a LOT of wiring in the joy stick to work with.  After it is wired and mounted, I’ll really be able to start to wire point to point and hook everything up.   It wont take too long at that point until I can start powering systems up.

Jan 16 2011

WVO panel install

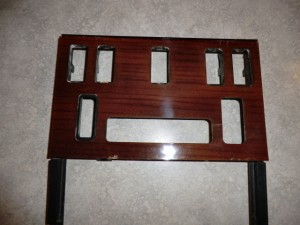
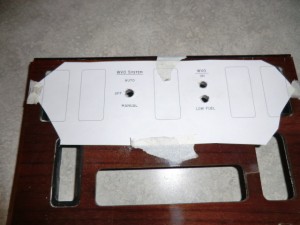
The car’s conversion to cooking oil is almost done.  This weekend, I found a reasonably good dash panel at the junk yard to modify.  I didnt want to mess up the good one in the car.  This way when I sell the car I can put the unmodified one back in, remove the WVO system and the car is stock again.

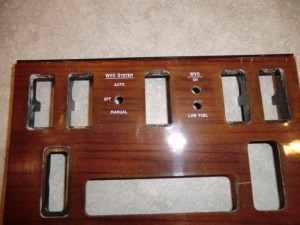
After designing the panel in Acad, I printed out the template and drilled the holes in the panel.

Next it is lettering the panel.

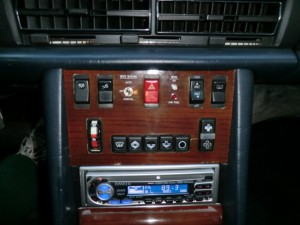
Finally it is installed in the car’s dash.  I really like the look.  Simple and unobtrusive.  It works great in all modes. 

The last and final step in the car mod (not really necessary but nice to have) would be installing water heated fuel lines and hooking up the tank heater to the car’s coolant system.  No hurry.  I’ll do it by next winter if I dont have a another car by then.  I am actively looking on Craigs list for a newer diesel.

Jan 14 2011

Dusting at Sunset

I would NEVER recommend dusting at sunset.   The effect of the sunset seems to amplify and highlight dust, hair, crumbs almost anything close to the surface.

When finishing a plane, I always shine light parallel to the surface to highlight imperfection in my finish work, and just noticed at sunset the angle of the sun has the same effect.   If you ever want to find a nut, washer or an earring just shine a flashlight parellel to the floor and you’ll instantly spot the item.

As I was cleaning tonight with the sun setting, I found those prolific dust bunnies have been breeding everywhere!   Where do these dam dust bunnies come from?

Sadly, my dust bonny killer was Rosie (the Rooba iRobot ) died on me.  She did a fabulous job sweeping under everythings whacking those bunnies into submission.  Her ticker finally (battery) gave out.

The good news is I found a replacement robotic floor vac which is supposed to be even better than the Rosie!    NEW Technology too!   This one uses lasers to map a room out and then cleans in straight line grid pattern.   VERY efficient and fast.   It even remembers rooms layouts too!     Rosie would just randomly run around bumping into everything with no plan like some women do.   This new vac is definitely a mans, man vac.

Better get back to rooting out those bunnies.  They are mating as I write and the sound is deafening.