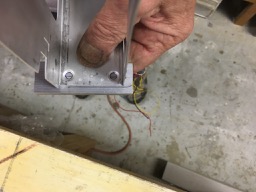
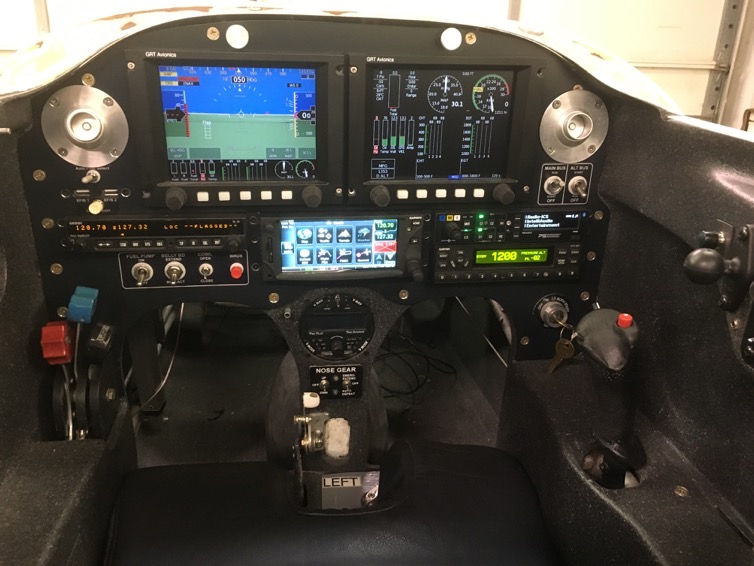
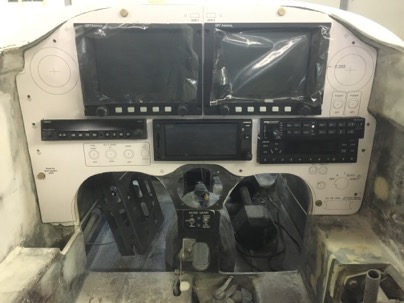
I have built a couple of instrument for canard aircraft and it is always a challenge. Especially for a LongEZ since panel space is a premium and the spacing between the radios.. Here are a few tips to help you with the process.
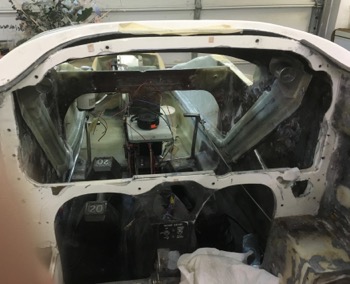
Here you can see where I created a space for the new instrument panel I had to plug a few instrument areas and mounted nut plates on the backside of the perimeter of the old panel. These nut plate will help you index the new panel templates.
I like using .090” 67061-T6 aluminum. It is easy to machine, stiff enough for the purpose and most importantly, most set backs (exposure ring) of the instruments is designed for a panel of this thickness. You’ll also need a basic computer drafting program (I use Auto-cad) which helps with the design of the panel and some basic hand tools such as a jig saw, drill, rotary grinder and band saw. That it!
Initially I start with a rough measurement of the panel space to layout out the design of the panel. Don’t worry about the perimeter edges of the panel. That will be done later.
With your basic instrument panel layout on the computer done, get a 4×8 sheet of 1/4” luan ply wood. Cut and trim it to fit in the panel space of your plane. It is much easy to shape, sand and grind to fit perfectly the the AL is. Trying to model the permitter of the panel on the computer is very difficult because our planes are all custom built and a waste of time.
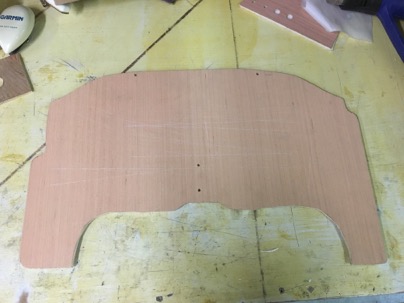
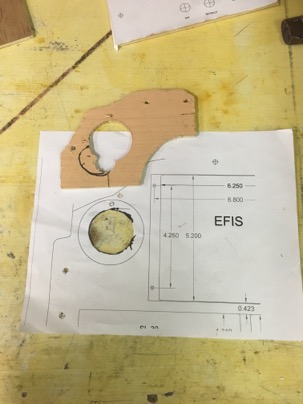
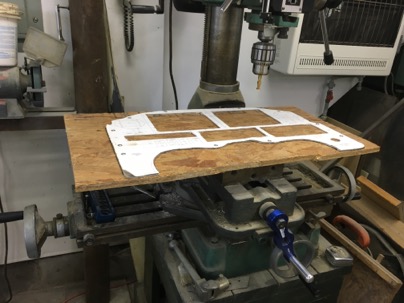
Next step is now that you have the basic panel made, you need to index it to the plane. On this picture you can see two holes at the top and middle of the panel. This panel becomes your your “Master Template”. Transfer drill the alignment holes to the mounting flange. DO not drill permitter mounting holes at this time.
The master template allows you to easily make more copies as needed and it will always fit. The index holes allows you to always place the panel in the same location. It was fairly mark the holes on auto cad, then print 8×11 sheets of paper and glue it to the panel and drill the holes. You never change these hole locations as you modify your drawings or make new panels.
Next. Trace your new panel onto another sheet of luan, cut it out and drill it for your first working copy.
Now you finalize your instrument locations and test design. You can print out individual sheets of paper and glue and tape them to the panel or if you have a wide printer you can make one LARGE printout and glue it to the working copy. I did it both ways and they are equally accurate. Here is the printout glued to the wood for a first look at the layout.
Hum, will the cans fit and was sort to problems to I have going on behind the panel? Yep, I had a number of unseen issues. With a bandsaw you can easily cut the working panel out in a minute or two since you aren’t worried about destroying your ‘working’ panel.
Here you can see I am not even worrying about the perimeter or strength. Just plunge cutting with the band saw to open the holes up. You end up with a panel that has no real structural strength, but will allow you check the fit and feel with the cans lightly placed. LOTS of issues with my first draft.

This is the panel pasted together with individual pieces of paper. No strength, just hacked and cobbled together.
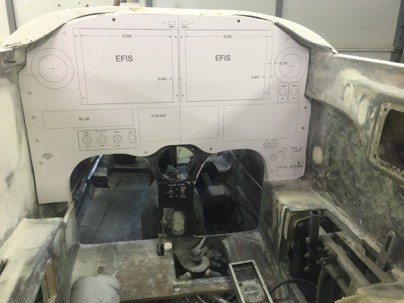
Mount the panel and test fit your instruments.
Now you have a good idea of interferences and problem areas. I needed to make all sorts of adjustments… such as switch location and vent locations (too high)…first iteration done. Back to the computer for to modify the drawing.
Throw this copy of the panel away, use your ‘master’ and make another copy of the panel as it only takes a couple of minutes to cut it out on the band saw.
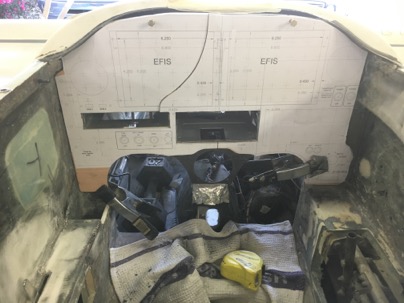
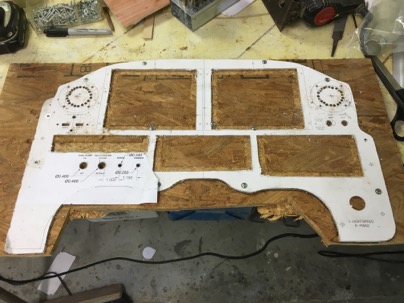
Glue your updated paper templates to the new working panel, cut it out …this time I used a jig saw for a nicer panel to see if the radios were a better fit after being moved and they were. Now that I am reasonably happy with the layout, I used this wood copy to drill the perimeter mounting holes in the working copy and transferred them back to the master copy. Use the master copy to NOW drill the permitter holes.
Taking your ‘master panel’, you can trace it onto the aluminum panel and cut out. Transfer drill you holes into the AL. Now place the AL panel in the plane and using the holes as guides, drill all the holes around the perimeter of the panel into the mounting flange. Make your nut planes and flox them on to your mounting flange with screw through the panel. You now have your master panel cut in AL. Now you want to check your switch locations and any other problem areas before cutting up your nice Al work.
NOTE: What is cool about making your panel this way is you can quickly fine tune small sections of the panel. I was a bit unsure of exact locations of the vents opening (due to backside mountings nut plates and switch locations. You can quickly make test panels to how it works for you.
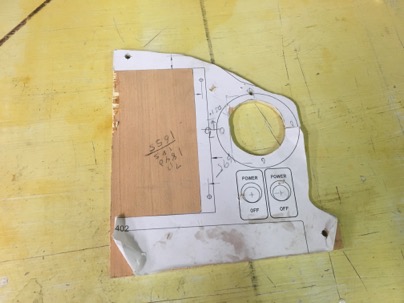
To check your locations, print out that section of the panel on a piece of paper, glue it to a scrap piece of wood, trim it if necessary, and transfer the mounting holes from the master panel to your working panel then test it.
Had to move the vent holes slight down.
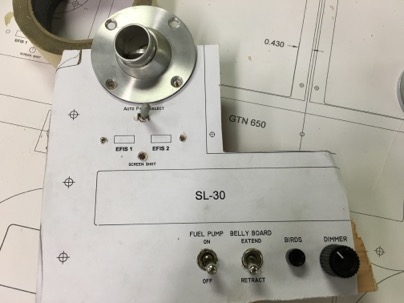
Testing the switch distances and heights. Again, more adjustments….
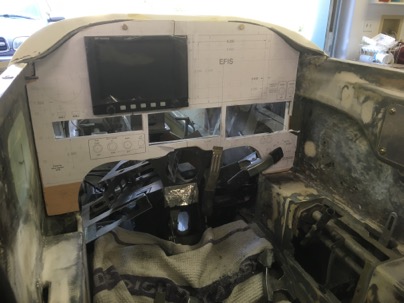
You get the idea, I must have made half a dozen small test panels moving the instruments/switches,/holes slightly up, over, and apart, testing and looking and then correcting the locations on the computer. It is a terrific way of making sure the work you invest making your panel will work fit and be right the first time. Once and done.
This sounds like a bit of effort, but trust me, you dont want to make a mistake on a CNC cut panel because your switches are too close together, or you have some other crazy interference problem. It was very quick to to make the small test sections and test them.
Now you have a final design on the computer but there is just one more step needed prior to cutting it out.
When you mount the blank AL panel and check it with a straight edge, you will find it will probably be twisted slight but it definitely won’t be straight and flat due to the way the flange was installed. You will need to ‘bed’ the panel to make sure it stay straight when all the holes are cut out.
Wax the back of the aluminum, take some WET micro, put a small amount around the permitter and mounting holes, remount the panel and lightly fighting the screws to pull the panel down. Use a straight edge to make sure you pull it flat and straight squishing out the micro and let it cure. In some areas I had to use pieces of wood stir sticks to act as shims until the micro cured. The panel is now bedded and completely flat when the mounting screws are tightened. Yah!!
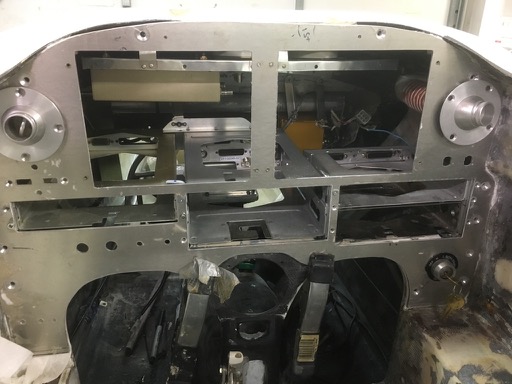
NOW you are now ready to cut the panel out. I think you can do it a number of ways. CNC, using a mill, or a jig saw (my choice). For this panel I used the jig saw first, then cleaned up the lines with a mill. Mostly the mill work was a waste of time.
The paper template protects the AL, and using a jig saw with a light touch will result in amazing straight lines. Center punch the holes for the switches and use a rotary grinder to open up the circles.
I ended up doing a lot of filing on openings anyway after I milled it to size them for the instruments (since each is slightly different), so milling the panel really wasn’t needed.
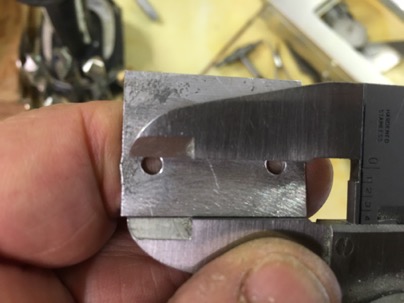
here you can see where I drilled the round holes with a lot of small holes to allow me to use the jig saw to open the circle up. Then using a air grinder with a rotary bit allowed for a reasonable accurate circle, then a 1/2 round final was used. A perfect hole for sure and overall, it took very little time to do. A sharp file cuts this grade of aluminum very quickly.
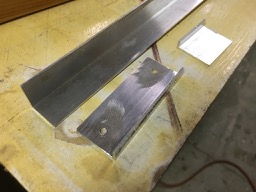
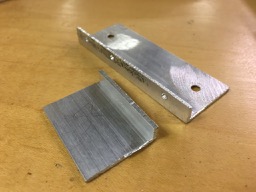
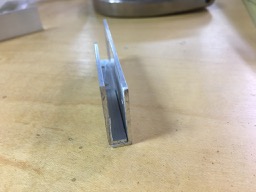
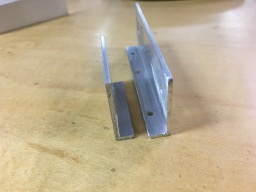
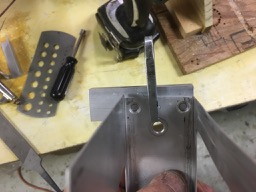
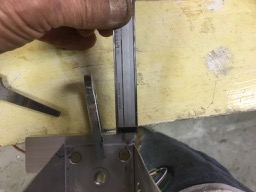
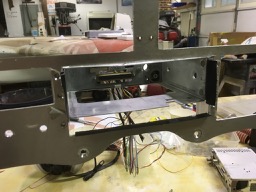
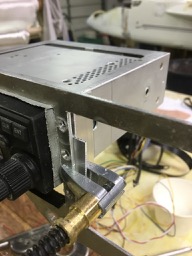
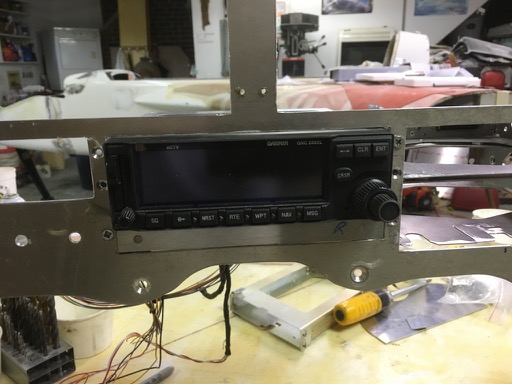
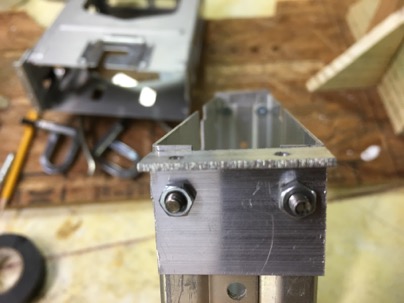
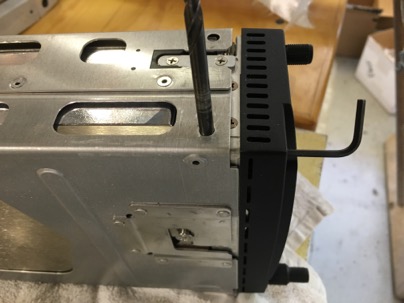
The panel is cut and ready to mount the radio cans. The cans presented a special problem due to the narrowness of the opening between the radios (3/8”). My first attempt to mount the cans turned out to be total crap as all the cans were not level nor straight and wiggled around a bit.
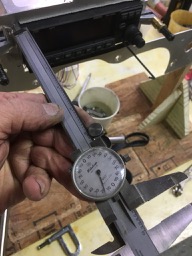
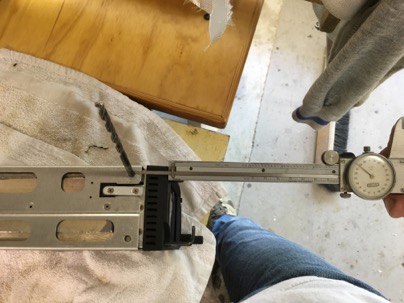
I threw the mounts out, spent some time thinking through the problems and came up with a much better mounting solution which resulted in the vertical alignment at the far end of the cans within 1/16” and the exact desired setback of all the radios to within .500” (+/- .25”) to match my GTR EFIS face place. Straight and level. All the guess work was eliminated and now they are firmly mounted with no movement. Nice.
My next post will detail this technique.