Jun
26
2009
Today’s efforts were totally concentrated on finishing the install of the hardware for the fuel injection system so I can send the fuel servo back to Air Flow on Monday with the order for tubing.
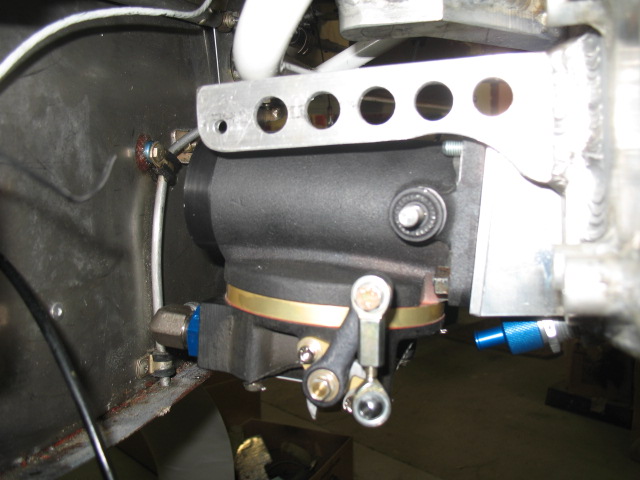
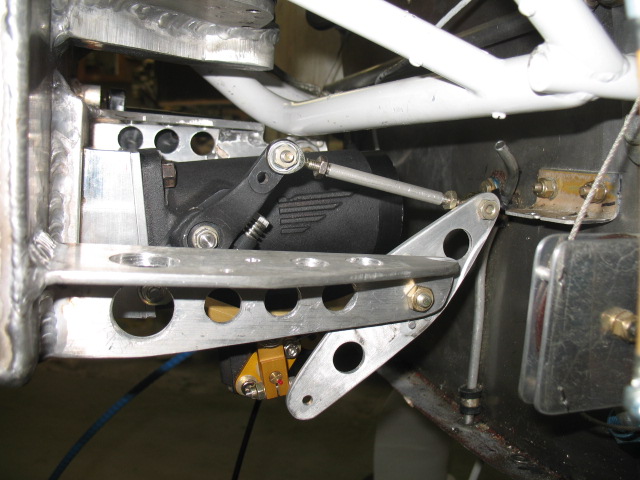
I needed to mount the purge valve, the fuel totalizer (Flow Scan) and the distribution spider. Getting the push pull cable for the purge valve was a challenge because I had to go through 3 iterations of the mounting bracket to clear everything. I also had to weld on a support for the fuel spider on the cowl. I am getting better at Al welding, and now I wish I had modified the cowl myself . A lot of money was spent at the machine shop and I have the feeling they might have overcharged me. I feel bad about it now…. bummer.
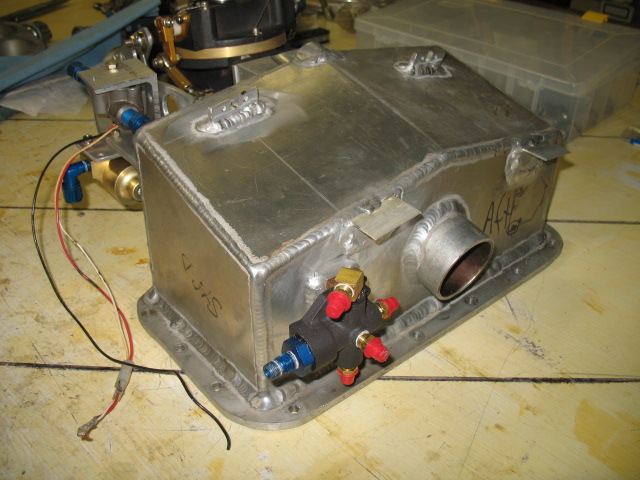
The fuel distribution block support was welded on the back of the sump and is insulated with a phenloic separator.
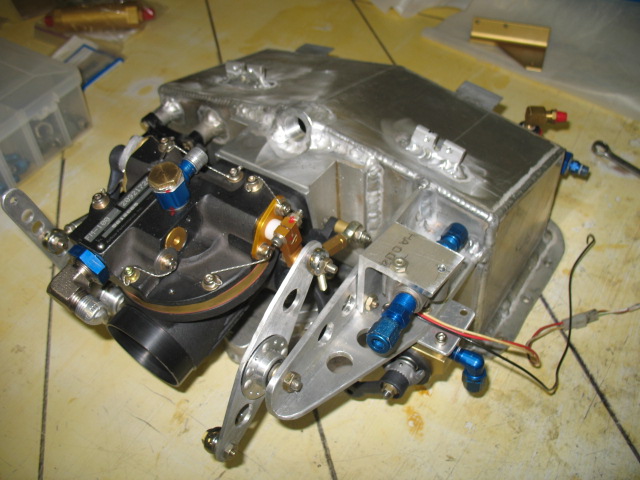
Here some views of the sump. I found out I can use 1/4″ SS fuel lines between the components since they are all fixed to the same mount. It make for a nice clean install.
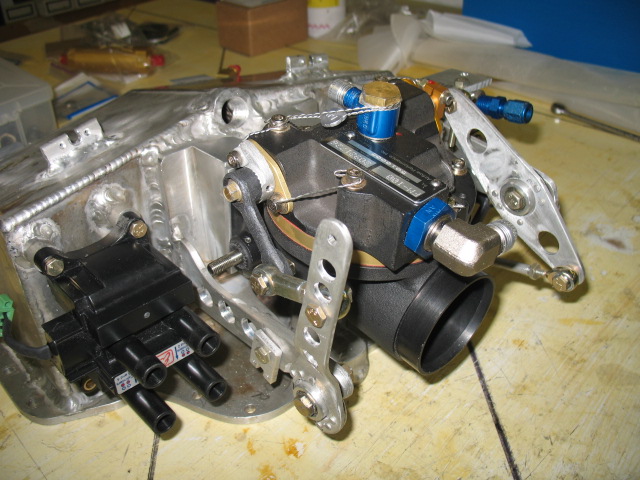
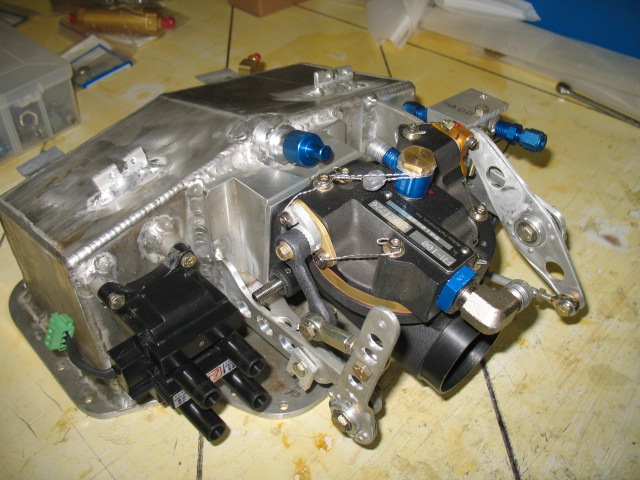
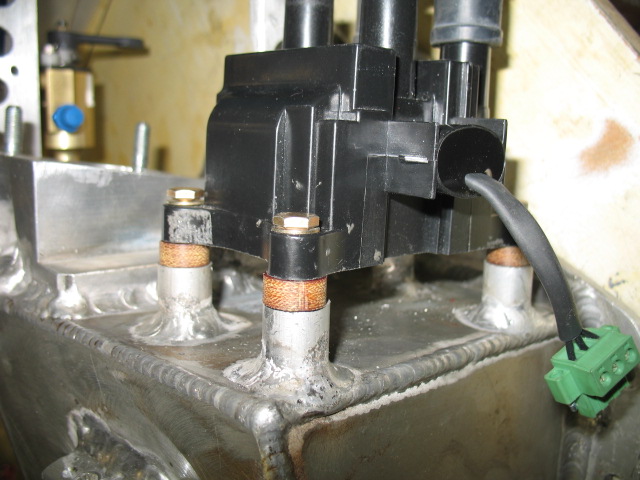
I was concerned about the hot sump affecting the Pmag coil which is mounted on it. So I took some scrap phenolic material and manufactured some washers for extra insulation.
Pmag mounted on the sump. I am beat…done for the day!
Jun
25
2009
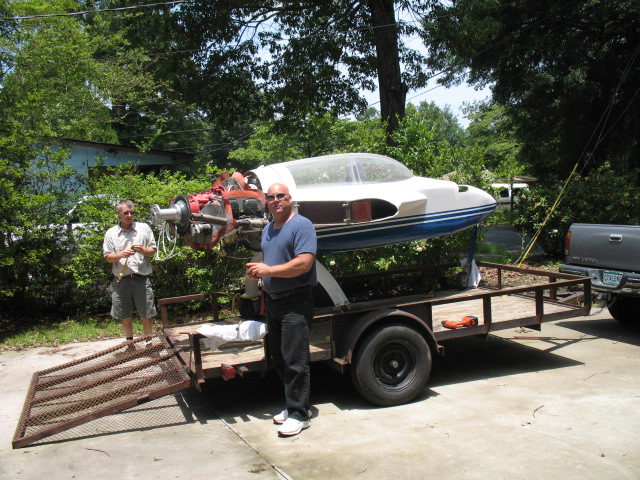
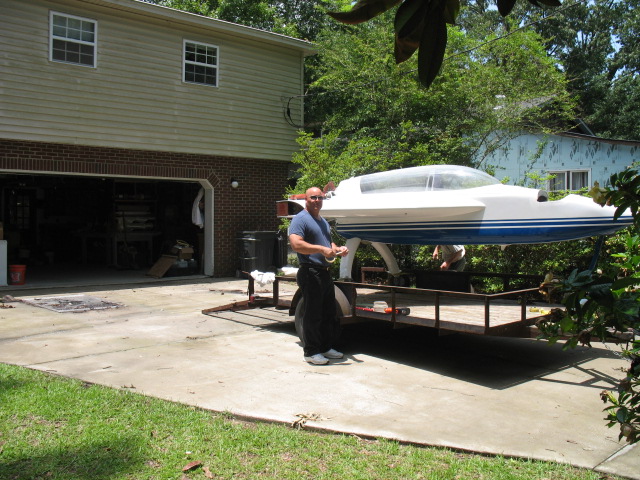
Today’s work was high lighted by a visit from Jack and the pickup of the oil sump. I ended up not putting much time in the plane because of the visit with Jack and us picking up the sump and having lunch. Still, it was a good day.
Jack is working on a new rotary lock for the canopy. It is very nice and is going to be very easy to install and adjust (in the X and Y directions). We have been talking a lot about the product working out the bugs. Jack has made a number of different design trying to work out the bugs and improving the installation methodology.
A closer look at the product. Pat’s plane will be the first installation in an EZ.
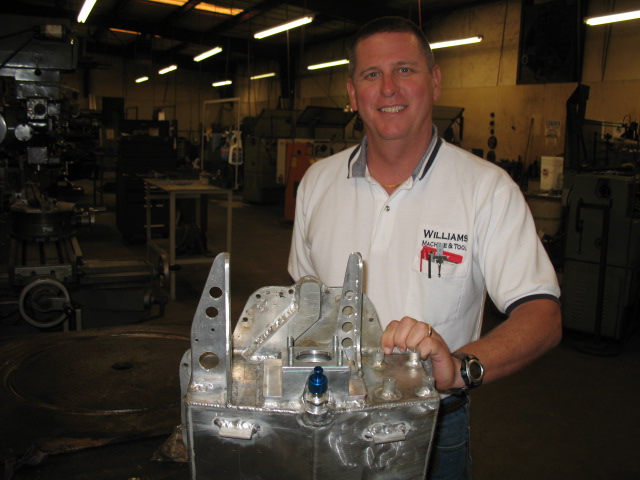
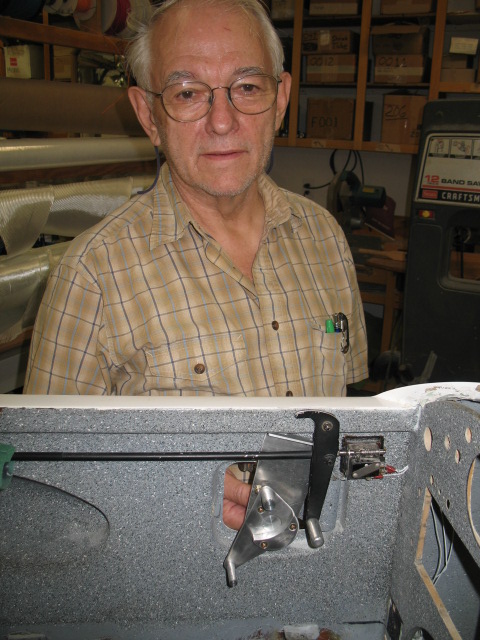
This is Jimmy Williams who owns the machine shop. He did the welding and fabrication of some of the parts on the sump. Don’t ask what it cost…. I need a new profession at a machine shop. I would make more money.
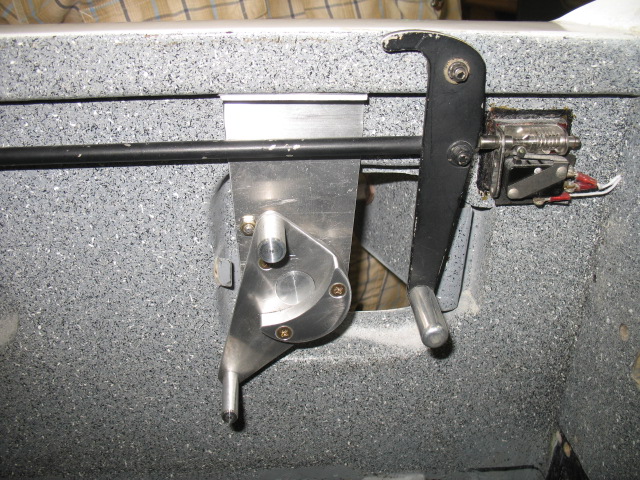
I took the pan home and F**K the lever arm for the mixture hits the engine mount. I was afraid of that!
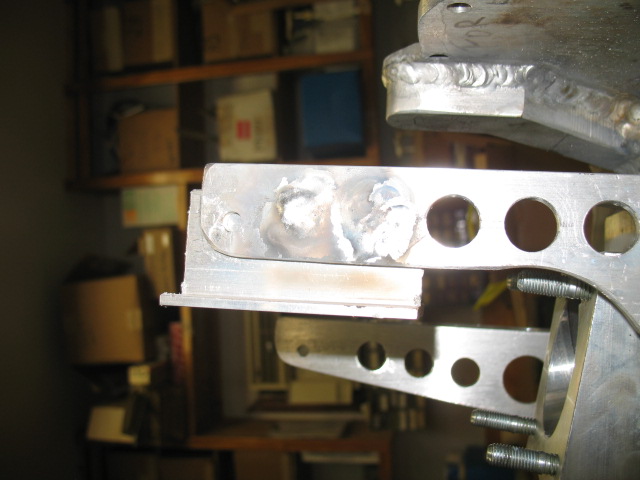
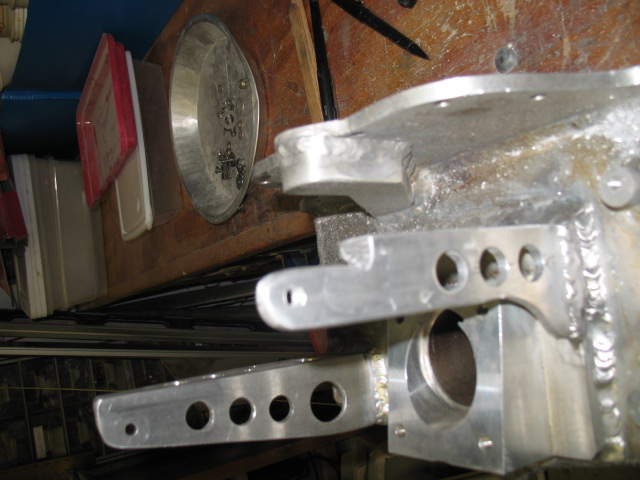
If I hadn’t drilled the holes in to lighten the mount, I would have been good. I ended up welding a plate to the mount to strengthen it before cutting it out to clear the mount. .
A little more trimming and Walla it fits and is very strong. I then installed the pan to check on lever arm movement.
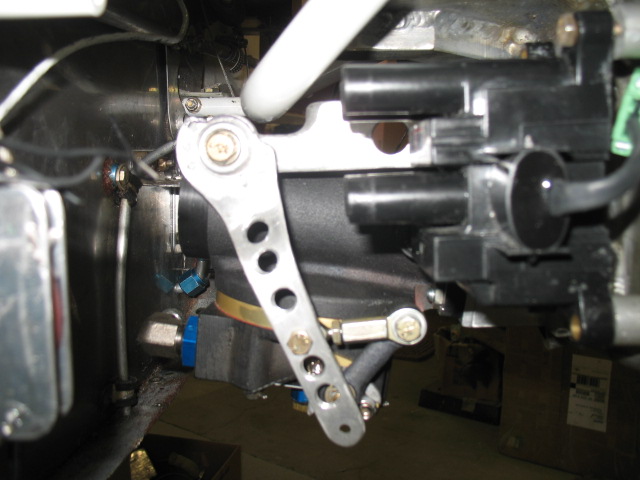
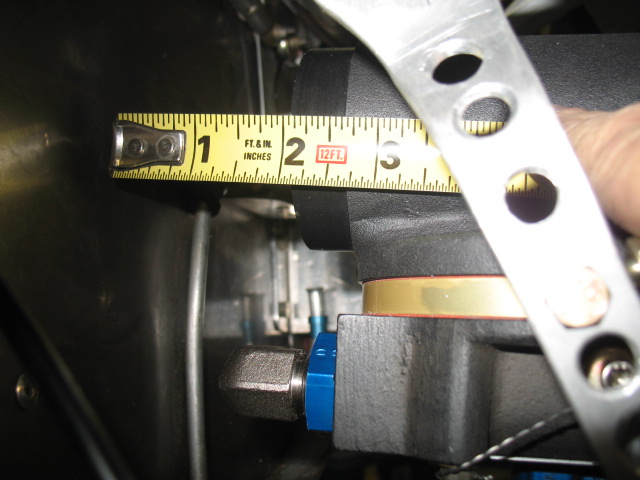
Everything worked out as planed. The push/pull cable move slightly less than 3 3/8″ to archive full movement of the throttle arms. PERFECT! I put the cowls on and the cable will clear the cowl bottom. The fuel regulator clears the cowl by 1/4″.
Now I have to solve the problem of where to put the purge valve and distribution spider. By next week I should be able to send everything back to Air Flow Performance for mods and then do a final install of the fuel injection system. The fuel injection system is DEFINITELY the most challenging part of this project.
The firewall is close… I can use a 6″ dia by 2 in filter on the unit. I will then be 1/2 in from the firewall.
Jun
19
2009
Today was a fun day. I changed the EGT probes from the original Grand Rapids supplied ones to a weld on boss type. I HATE hose clamps. Would you buy a Lexus if it had stuff hanging all over the place hose clamps…. Yuck! Had to go.
The Hewitt Industries type is made of Monel instead of some other material (inconel and SS). They are guaranteed for life and the Monel WILL NOT deteriorate over time ( and I run mogas whenever I can). Good stuff. Beside did I say they didn’t have hose clamps?
This is how it looked when I started…

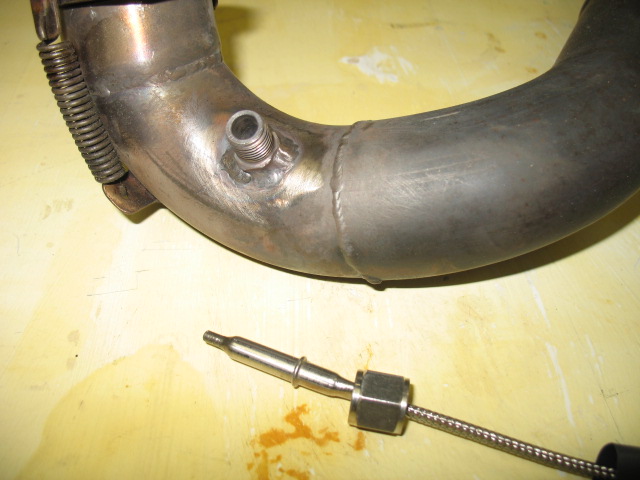
After removing the camps the area needed to be buffed up prior to welding.
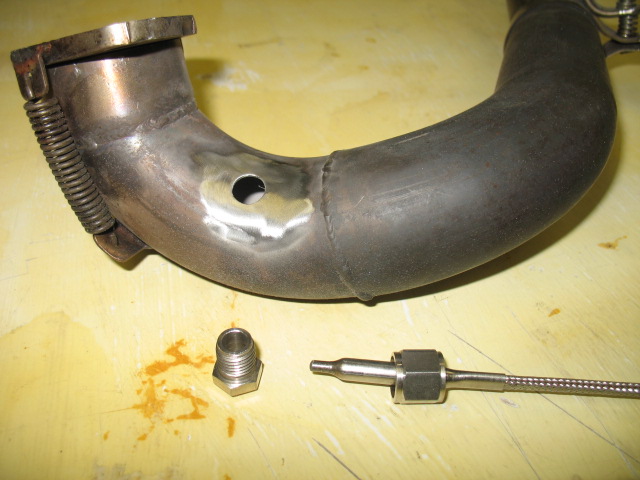
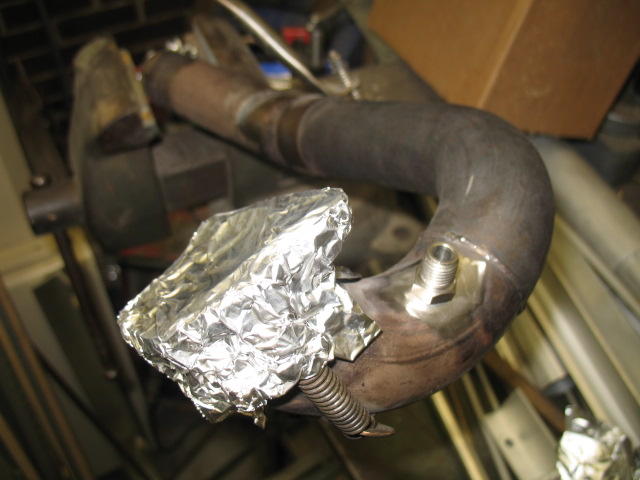
Whenever you weld SS, you should back purge the pipe so the inert Argon gas is on both sides of the welded area (since it has a big hole). Not doing so causes a oxygen rich weld on the other side and weakens the bond. Covering the ends of the pipe with tin foil is a good trick to pug it up. Insert the purge tube in the other end and its good to go.
Welded… not bad for an armature.
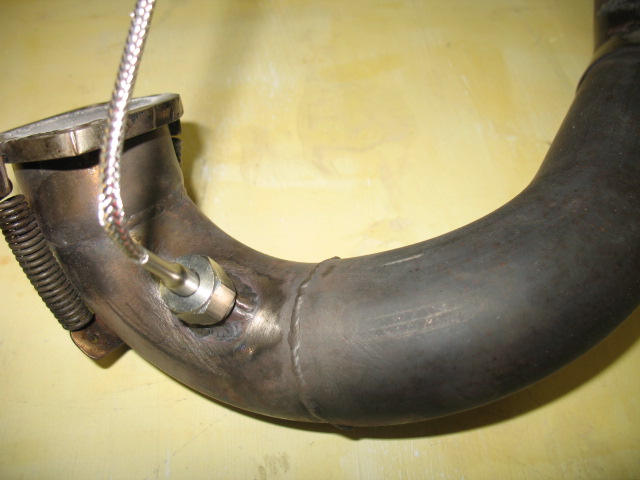
Looks beautiful with out a hose clamp…. The Lexus look.
Jun
18
2009
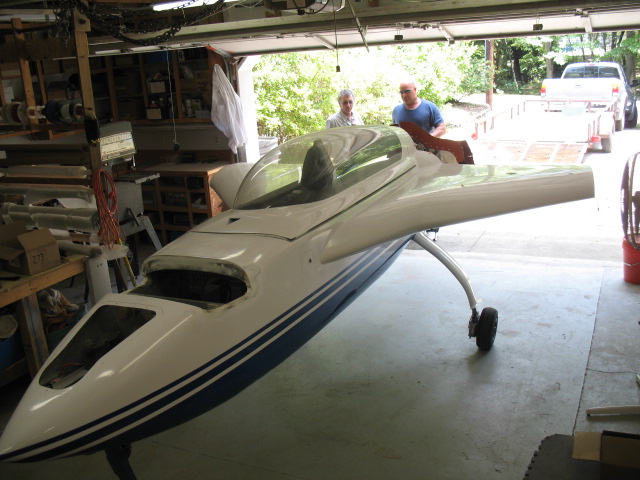
Well the plane is moving again! This time to my most excellent workshop (actually it is my garage). When I built this part of the house I fully anticipated building/working on a planes so I made the shop extra large 30×30 ft. At one time I had two canards in (a Varieze and a LongEZ fuselage). It has a 11 ft ceiling and is free span (I used a big I-beam for the center support). Most importantly for the summer in the south is that it has a super big ass air conditioner, TV, Stereo and a frig. What a great place to go to work.
These are two buddies. Tony Cole (left) Nick Annon (the big bruiser) . I like Tony because we get along famously, laugh a lot and he is from the British mother land (funny being he is now living in a former colonies and enjoying it). He is building a LongEZ and I just love his English accent. Tony left for a few weeks right after the move to work on his house back in England. He goes back once a year, so you know where my first trip abroad is going to be.
Nick is fun. Kind of hard not to love a big, puppy dog…. Nick and Nick. Brains and brawn.
Looks sleek in the shop!
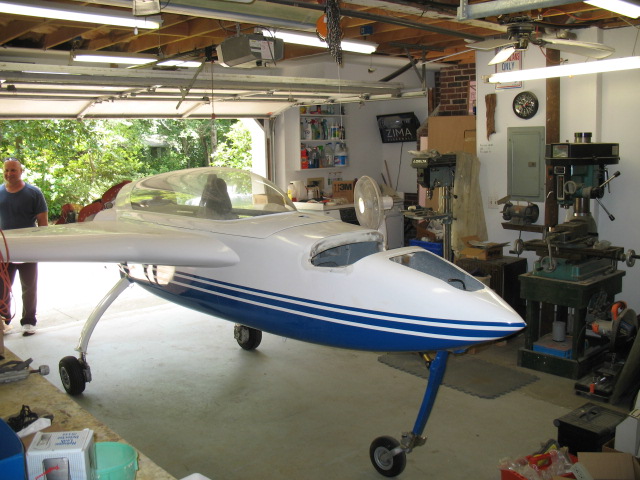
Anyone for a Zima?
Jun
12
2009
Today was spend on designing the instrument panel. Talk about stuffing 5 gallons of sh*t in a 1 gallon bucket! If you just look at the indiviual components, it looks absoultely impossible to fit everything into the space I have to work with. There is something to be said about computer modeling!
Fortunately the GRT has inputs for alarms hich will eliminate all warning lights on the dash.
I cant wait to start cutting out the panel…

Jun
09
2009
Summary of the next few days of work. Boring stuff, researching parts and looking through catalogs.
-
Ordered a bunch of electric parts and the RAM mounts.
-
Went to the machine shop to check on the sump…. not done. Not even started. I threatened to take to another shop and the owner promised to get started on it immediately.
-
Got the paint on the plane coded so I could get it mixed. The gray is matched exactly to the gray interior vinyl and will be used on the instrument panel. Blue and white match the exiting colors.
-
Worked on ACAD panel design.
-
Worked on the electrical system. Some of the parts I wanted to use would not fit in the panel. So I had to search again for smaller switches.