NACA Duct Install
Today I boxed up the fuel servo and sent it off to Airflow Performance for modification. Basically, they are undoing what was done the first time I sent it to them. This is because of the new sump design and changes in bell crank configurations. I hope they aren’t too pissed at me… probably think I am a bit crazy but paying the bill will make them happy.
Work was started on installing a NACA air duct for cabin ventilation. Pat wants a LOT of air in the back seat. Pat flew in the back of another LongEZ and thought it was hot in the back seat. I thought a two inch NACA would be sufficient, he wants a three inch NACA.
After thinking about it, I now feel the larger size is a good idea because installing such a large air source goes along with my ideas on cabin pressurization which is: Keeping a high cabin pressure keep air leaks and water out. I know simple but true. At our last EAA meeting, I gave a presentation on air leaks and was going to give the same presentation at Rough River, but the weather keep me home. Sometime I’ll blog my philosophy for cabin climate optimization which is a somewhat radical view for our planes. In a very simple way it explains why we have air leaks and how to solve the problem. I use it on my LongEZ with complete success.
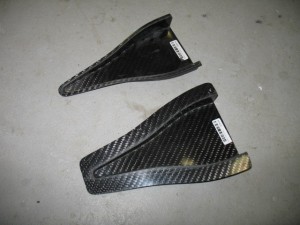
Here is the NACA. I trimmed the edge of the top one (the one I am using) to a constant width of .0180″ to remove most of the flange.

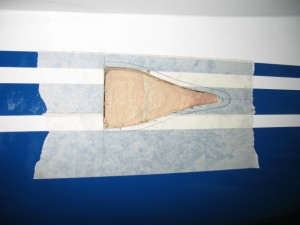
After tracing the NACA on to the side of the plane the skin was removed.

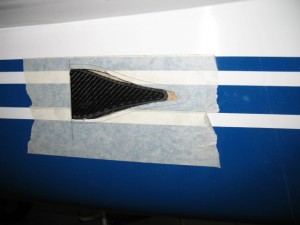
The NACA inserted from the inside of the cabin. I want to try and preserve the paint and striping such that I wont have to repaint the area. A little more foam removal and I should be able to slide it further forward and flox it into place tomorrow.

4.3 hrs worked…